
Discounts & Referrals
Set up discount codes and the referral program: enable codes, allow stacking, set commission, lifetime and prefix, and create or edit individual codes.
What this page does
The Discounts & Referrals page is your promotions hub. From one screen you control whether discount codes can be redeemed at checkout, how the referral programme rewards customers who bring in new business, and the full list of individual codes. It combines platform-wide promotion rules with a searchable code manager and a code editor.
How to reach it
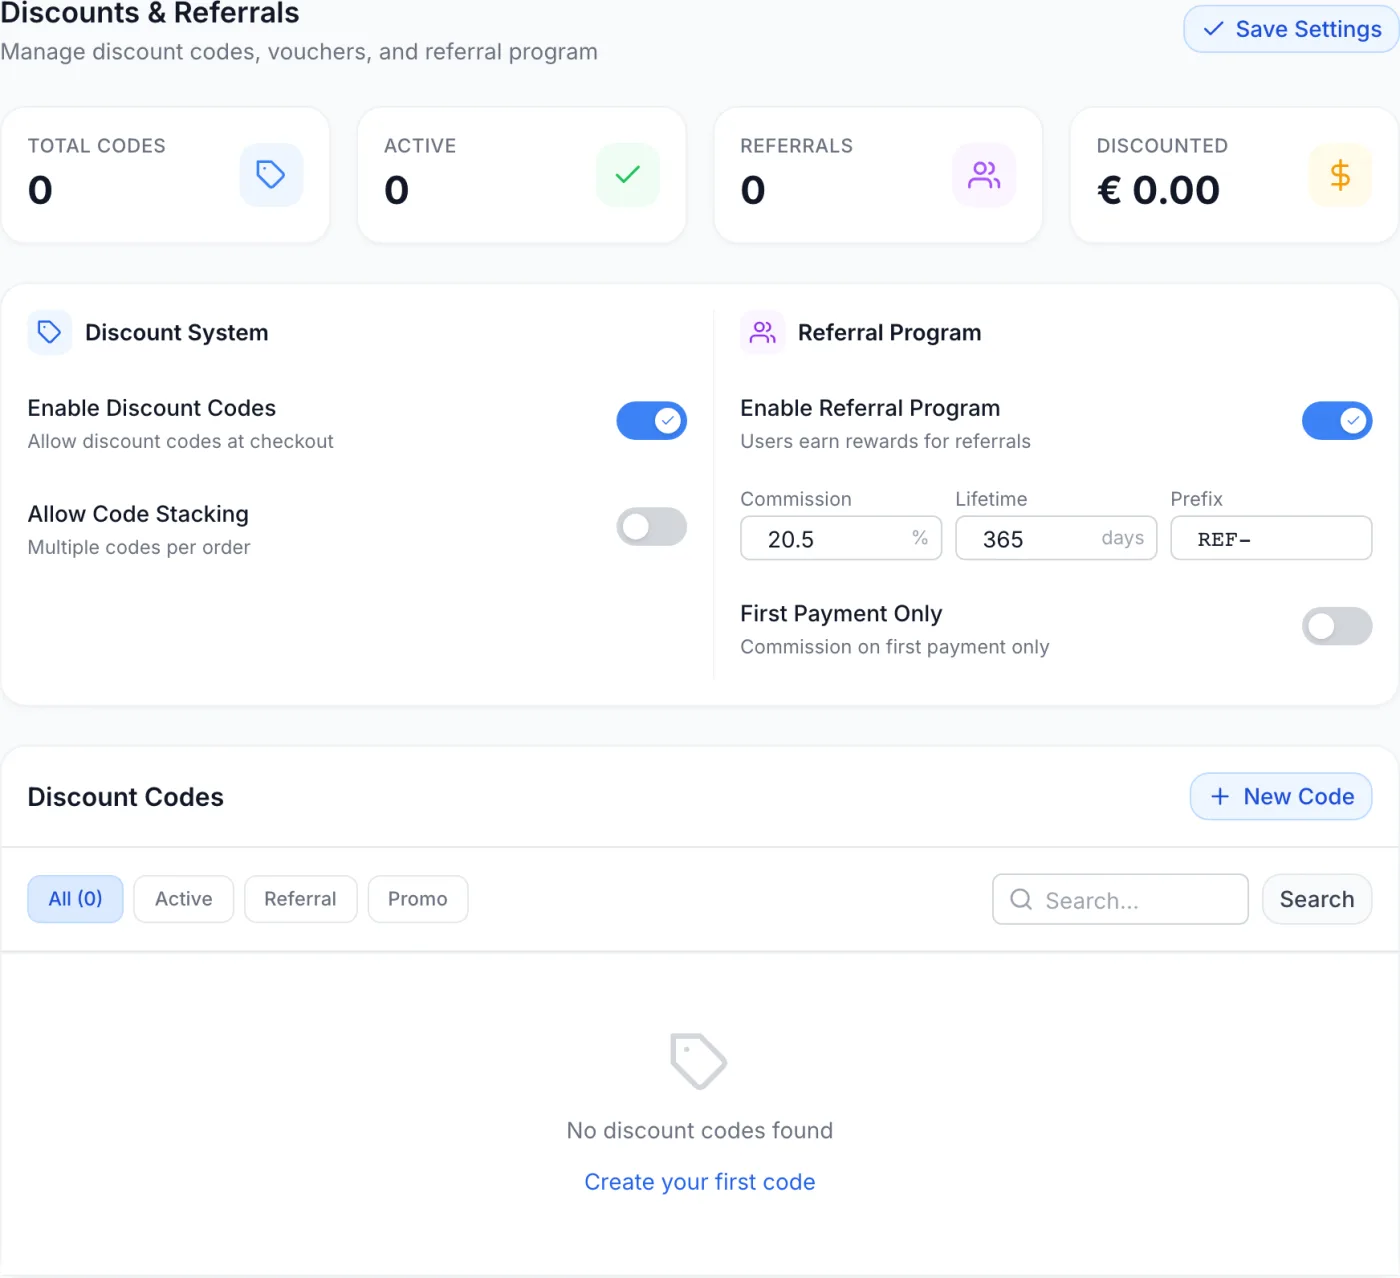
Open Settings from the admin panel, then in the settings menu choose the Promotions group and click Discounts & Referrals. The page loads with a heading and a Save Settings button at the top right, a statistics strip below it, the system settings card in the middle, and the discount codes table at the bottom.
The statistics strip
Four cards summarise your promotions at a glance:
- Total Codes — every discount code that exists, active or not.
- Active — how many of those codes are currently switched on.
- Referrals — the total number of referrals recorded by the programme.
- Discounted — the cumulative value of discounts handed out, in your base currency.
Configuring the discount and referral systems
The settings card is split into two halves: Discount System on the left and Referral Program on the right. After changing anything here you must click Save Settings at the top right — nothing is committed until you save.
Discount System
This half holds a single control: Enable Discount Codes, which allows (or blocks) discount codes at checkout. One code applies per order.
Referral Program
- Switch on Enable Referral Program. Until it is on, the three fields and the First Payment Only toggle below stay dimmed and cannot be edited.
- Set the Commission percentage the referrer earns — 0 to 100, in steps of 0.1.
- Set the Lifetime in days: the attribution window during which the referred customer's payments still credit the referrer. Minimum 1 day.
- Set the Prefix placed in front of auto-generated referral codes (for example
REF-). - Optionally turn on First Payment Only to limit commission to the referred customer's first payment instead of every payment within the lifetime window.
- Click Save Settings.
| Field | What it does |
|---|---|
| Enable Referral Program | Main switch. When off, the fields below are disabled. |
| Commission (%) | The share of a qualifying payment paid to the referrer. 0–100, decimals allowed. |
| Lifetime (days) | How long after sign-up the referred customer's payments keep crediting the referrer. Minimum 1 day. |
| Prefix | Text placed in front of auto-generated referral codes. |
| First Payment Only | Caps commission to the referred customer's first payment rather than all payments in the lifetime window. |
Tip: the lifetime is measured in days, independent of any billing cycle. A 30-day window usually catches a first monthly renewal but typically misses an annual one. Use First Payment Only when you want a predictable, one-time reward rather than an open-ended commission liability.
The discount codes table
Below the settings card, the Discount Codes section lists every code. Narrow the list with the filter chips — All (which carries the total count), Active, Referral and Promo — and with the search box: type a term and click Search.
| Column | Meaning |
|---|---|
| Code | The redeemable code with a copy button beside it, and its name underneath. Referral codes carry a small people icon. |
| Discount | The value — a percentage, or a fixed amount in the code's currency. |
| Usage | Times redeemed, shown as current uses and, when a total limit is set, the maximum. |
| Status | Active, Inactive, Expired or Upcoming, worked out from the on/off state and the validity dates. |
| Validity | Permanent for codes with no expiry, otherwise the From and Until dates. |
| Actions | A button to activate or deactivate the code, and a delete button (which asks you to confirm). |
Click anywhere on a row to open it for editing. When there is more than one page of codes, Previous and Next buttons appear at the bottom with a “Showing X to Y of Z” count. If nothing matches, the section offers Create your first code.
Creating or editing a discount code
Click New Code at the top right of the Discount Codes section, or click an existing row. The editor opens as a dialog. When you are editing an existing code, two tabs appear at the top: Details and Usage History — the latter lists who redeemed the code, the original and final amounts, the discount given, the document, and when.
Step by step
- Enter a Code (required) — what customers type at checkout. It is forced to upper case, and accepts letters, numbers, hyphens and underscores only. The field is locked once the code exists, so choose carefully.
- Enter a Name (required) — the label shown under the code in the table.
- Choose the type: Percentage or Fixed Amount.
- Enter the Discount Value (required, greater than zero). A percentage cannot exceed 100.
- Optionally set Usage Limits — a total number of uses and a per-user limit. Leave either empty for unlimited.
- Use the Active toggle to decide whether the code is live immediately.
- Open Advanced Options if you need the extra controls below.
- Click Create Code (or Update Code when editing).
Advanced options
| Option | What it does |
|---|---|
| Validity Period | Tick Permanent (no expiration) for no expiry, or untick it to set a Start Date and End Date. |
| Recurring Discount | Off: the discount applies to the first invoice only. On (Apply to every renewal): it is re-applied to every renewal invoice for the life of the service. |
| Minimum Order Amount | The smallest subtotal required before the code can be used. |
| Max Discount | A cap on the discounted amount. Shown for percentage codes only. |
| Product Restrictions / Applies To | Restrict the code to All Products, Specific Products, or Specific Categories. The matching checkbox list appears when you choose one of the latter two. |
| Description | Optional internal notes about this discount. |
Note: Code and Name are both required and the discount value must be greater than zero; a percentage above 100 is rejected. Because the code text cannot be changed after creation, deactivate or delete an unwanted code and create a new one if you need a different string.
Common tasks
- Run a promo: click New Code, set a percentage or fixed amount, optionally add a validity period and usage limit, and save.
- Pause a code: use the activate/deactivate button in the row's Actions, or the Active toggle inside the editor.
- Copy a code to share: click the copy icon next to the code in the table — the icon turns into a green tick and a confirmation appears.
- Review redemptions: open a code and switch to the Usage History tab.
- Reward referrers: enable the referral programme, set the commission and lifetime, and Save Settings.
Related
Discounts and Discount Editor for a deeper walkthrough of every code field, Referrals for tracking who referred whom, and Settings: Billing and Reseller Program for other ways to manage pricing and partner incentives.