
New Ticket
Open a support ticket on behalf of a customer: pick the user, optionally link a service, set subject, department, priority, and the opening message.
What the New Ticket page is for
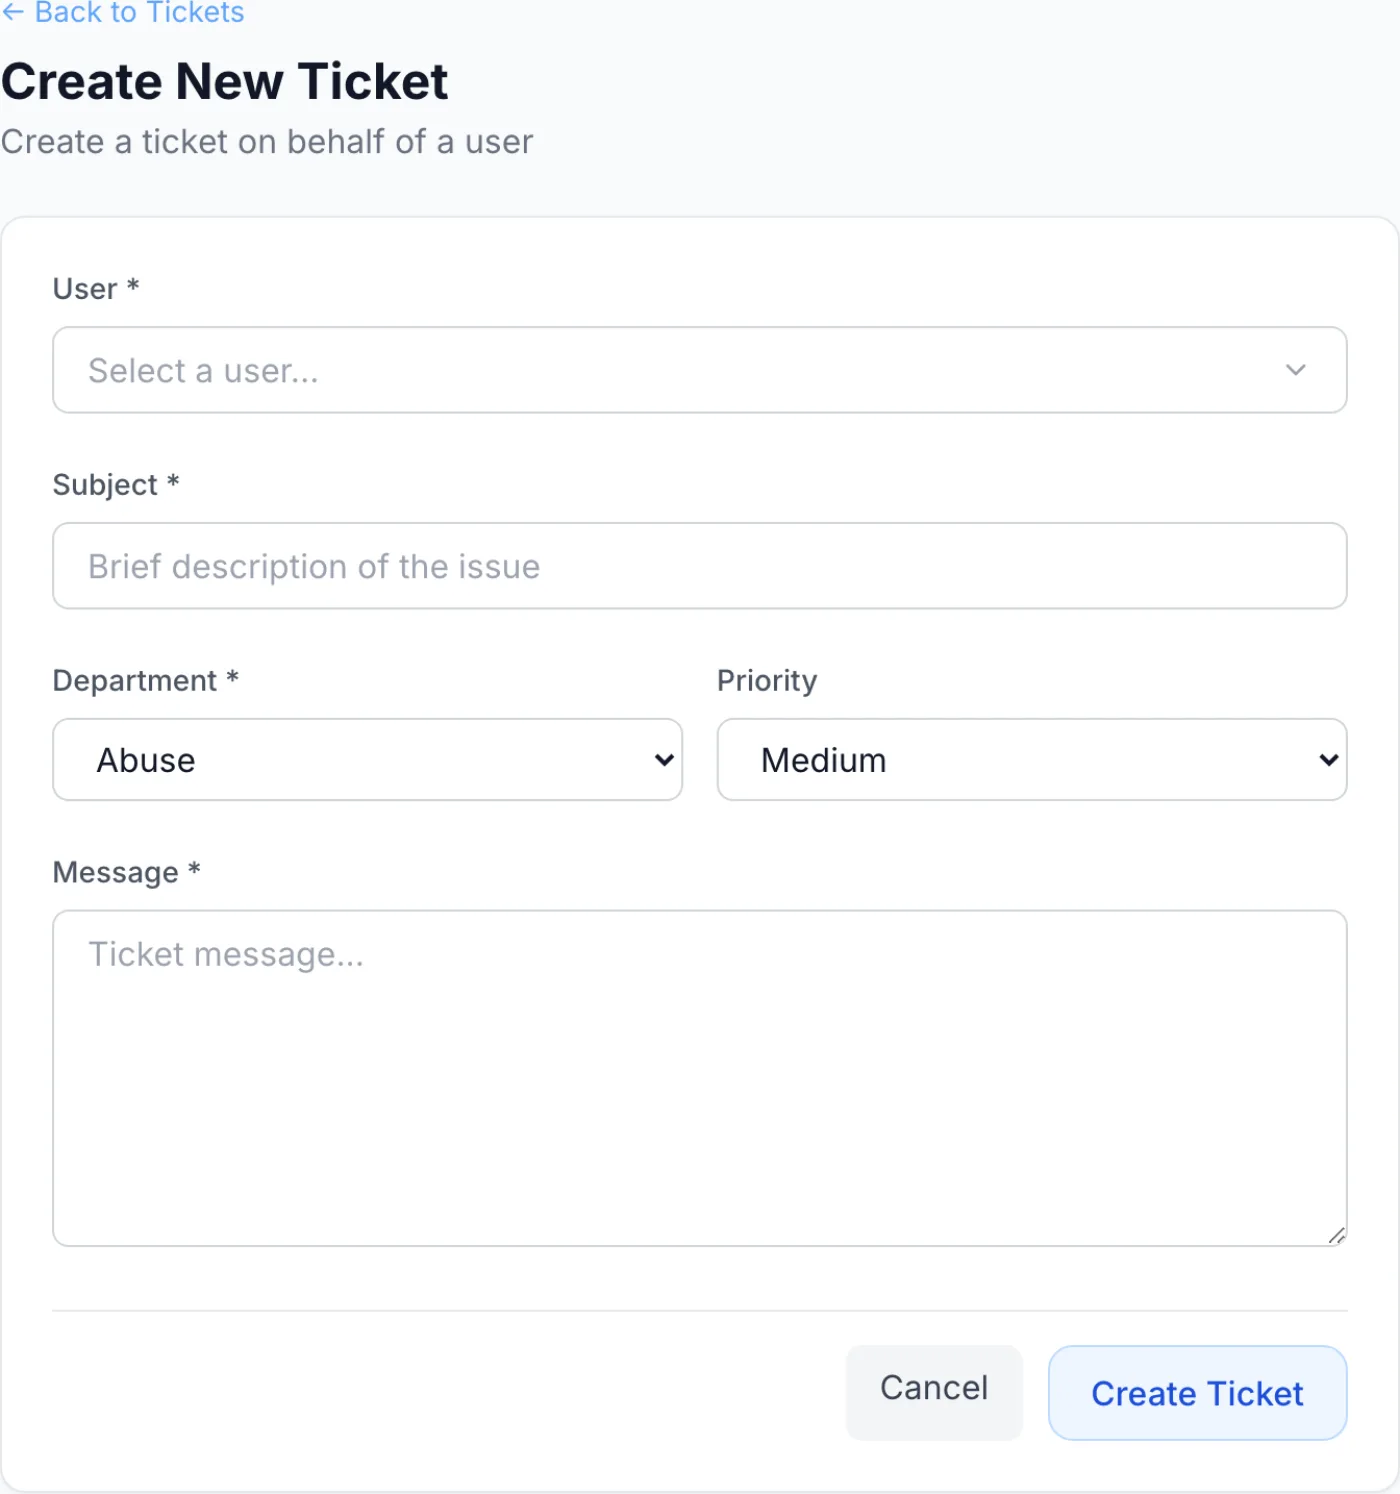
The New Ticket page lets a staff member open a support ticket on behalf of a customer. The page heading reads Create New Ticket with the subtitle Create a ticket on behalf of a user. Use it whenever a request arrives through a channel that bypasses the client area — a phone call, a conversation you want to put on record, a walk-in — or whenever you need to start a conversation with a customer yourself, so it is captured in the same queue as everything else and the customer can follow it from their own account.
Important: The message you type here is posted as a staff reply, not as the customer's words. It is shown to the customer with a Staff badge, your personal signature is attached to it if you have one enabled, and the customer receives a "ticket created" e-mail containing a link to the conversation. Write it as the message you want the customer to read.
How to reach it
Open Tickets from the sidebar and click the New Ticket button in the top corner. You can also start a ticket from a customer's profile in Client Details: open the customer, switch to their Tickets tab and click Open Ticket — when you arrive that way, the User field is already filled in with that customer. To leave without saving, use the ← Back to Tickets link above the form or the Cancel button at the bottom; both return you to Support Tickets.
Creating a ticket step by step
- Choose the customer. Click the User selector (it reads Select a user... until you pick someone). Start typing in the search box (placeholder Search by name or email...) to filter by first name, last name or e-mail address; matching people appear below with their name and address. Click one to select them. Only customer accounts are listed — you cannot raise a ticket against a staff account. If nothing matches you see No users found. This field is required.
- Optionally link a service. Once a user is chosen, a Related Service section appears listing that customer's services, each with its name, the product it came from, and a status pill. Click one service to attach the ticket to it, or leave None selected to keep the ticket unlinked. Only one service can be linked here; you can attach more later from the ticket itself. If the customer has no services you see No services found for this user.
- Enter a subject. Type a short summary of the issue in the Subject box (placeholder Brief description of the issue). Required.
- Check the department. The Department dropdown is pre-selected for you — your Support department if one exists, otherwise the first department you have access to. Change it if the request belongs elsewhere. Required.
- Set a priority. Leave the default Medium or change it to Low, High or Urgent.
- Write the message. Enter the opening message in the Message box (placeholder Ticket message...). Required.
- Create the ticket. Click Create Ticket. The button reads Creating... while it saves, then you are returned to Support Tickets where the new ticket appears in the list with a Staff badge and the status Open.
Field reference
| Field | Required | What it does |
|---|---|---|
| User | Yes | The customer the ticket belongs to. A searchable picker over your customer accounts; type a name or e-mail to filter. The chosen customer sees the ticket in their own client area. |
| Related Service | No | Appears after a user is selected. Links the ticket to one of that customer's services so the context travels with the conversation. Select None to leave it unlinked. |
| Subject | Yes | A short headline shown in the ticket list and used as the conversation title. |
| Department | Yes | The team that receives and works the ticket. The list holds the departments you have access to; a super administrator sees all of them. |
| Priority | No | One of Low, Medium (default), High or Urgent. Colour-codes the ticket in the queue. |
| Message | Yes | The opening message, posted as a staff reply and e-mailed to the customer. |
There is no file attachment control on this form. To send the customer a file, create the ticket first and attach the file to a reply from Ticket Details.
Buttons
- Create Ticket
- Validates the form, saves the ticket, and returns you to the ticket list. If a required field is missing, a red banner appears at the top of the form (Please select a user, Please select a department, Subject is required or Message is required) and nothing is saved.
- Cancel / ← Back to Tickets
- Leave the form without creating a ticket and return to the ticket list.
What happens after you click Create Ticket
- The ticket is created with the status Open and the priority you chose.
- Your message is stored as the first reply in the thread, marked as coming from staff, with your signature attached if you have one switched on in Account.
- The customer receives the Ticket Created e-mail with the ticket number, the subject and a link straight to the conversation. You can edit the wording of that e-mail in Email Templates.
- The ticket shows a Staff badge in the queue so everyone can see it was opened on the customer's behalf, and hovering the badge names who opened it.
- The customer's reply moves the ticket to Customer Reply, exactly as on any other ticket.
Tips and notes
Keep internal remarks out of this box. Everything typed here is delivered to the customer. If you need to record context for colleagues, create the ticket first, then open it and switch the composer to Internal note.
Priority is advisory. It colour-codes the ticket and can be changed at any time from Ticket Details, but it does not assign the ticket to anyone or move it up a queue on its own.
Departments must exist first. If no department has been created, or you have not been added to one, the dropdown is empty and the form cannot be submitted. Set departments up in Departments first.
Your draft is held while you stay signed in. If you navigate away mid-entry, the form contents are kept in your browser session and are still there when you come back. Submitting the ticket clears the draft, and opening the form pre-filled from a customer's profile starts fresh rather than restoring an older draft.