
Languages & Translations
Set language detection, the default language, which languages your panels offer, and edit any on-screen wording with overrides that survive updates.
What this page does
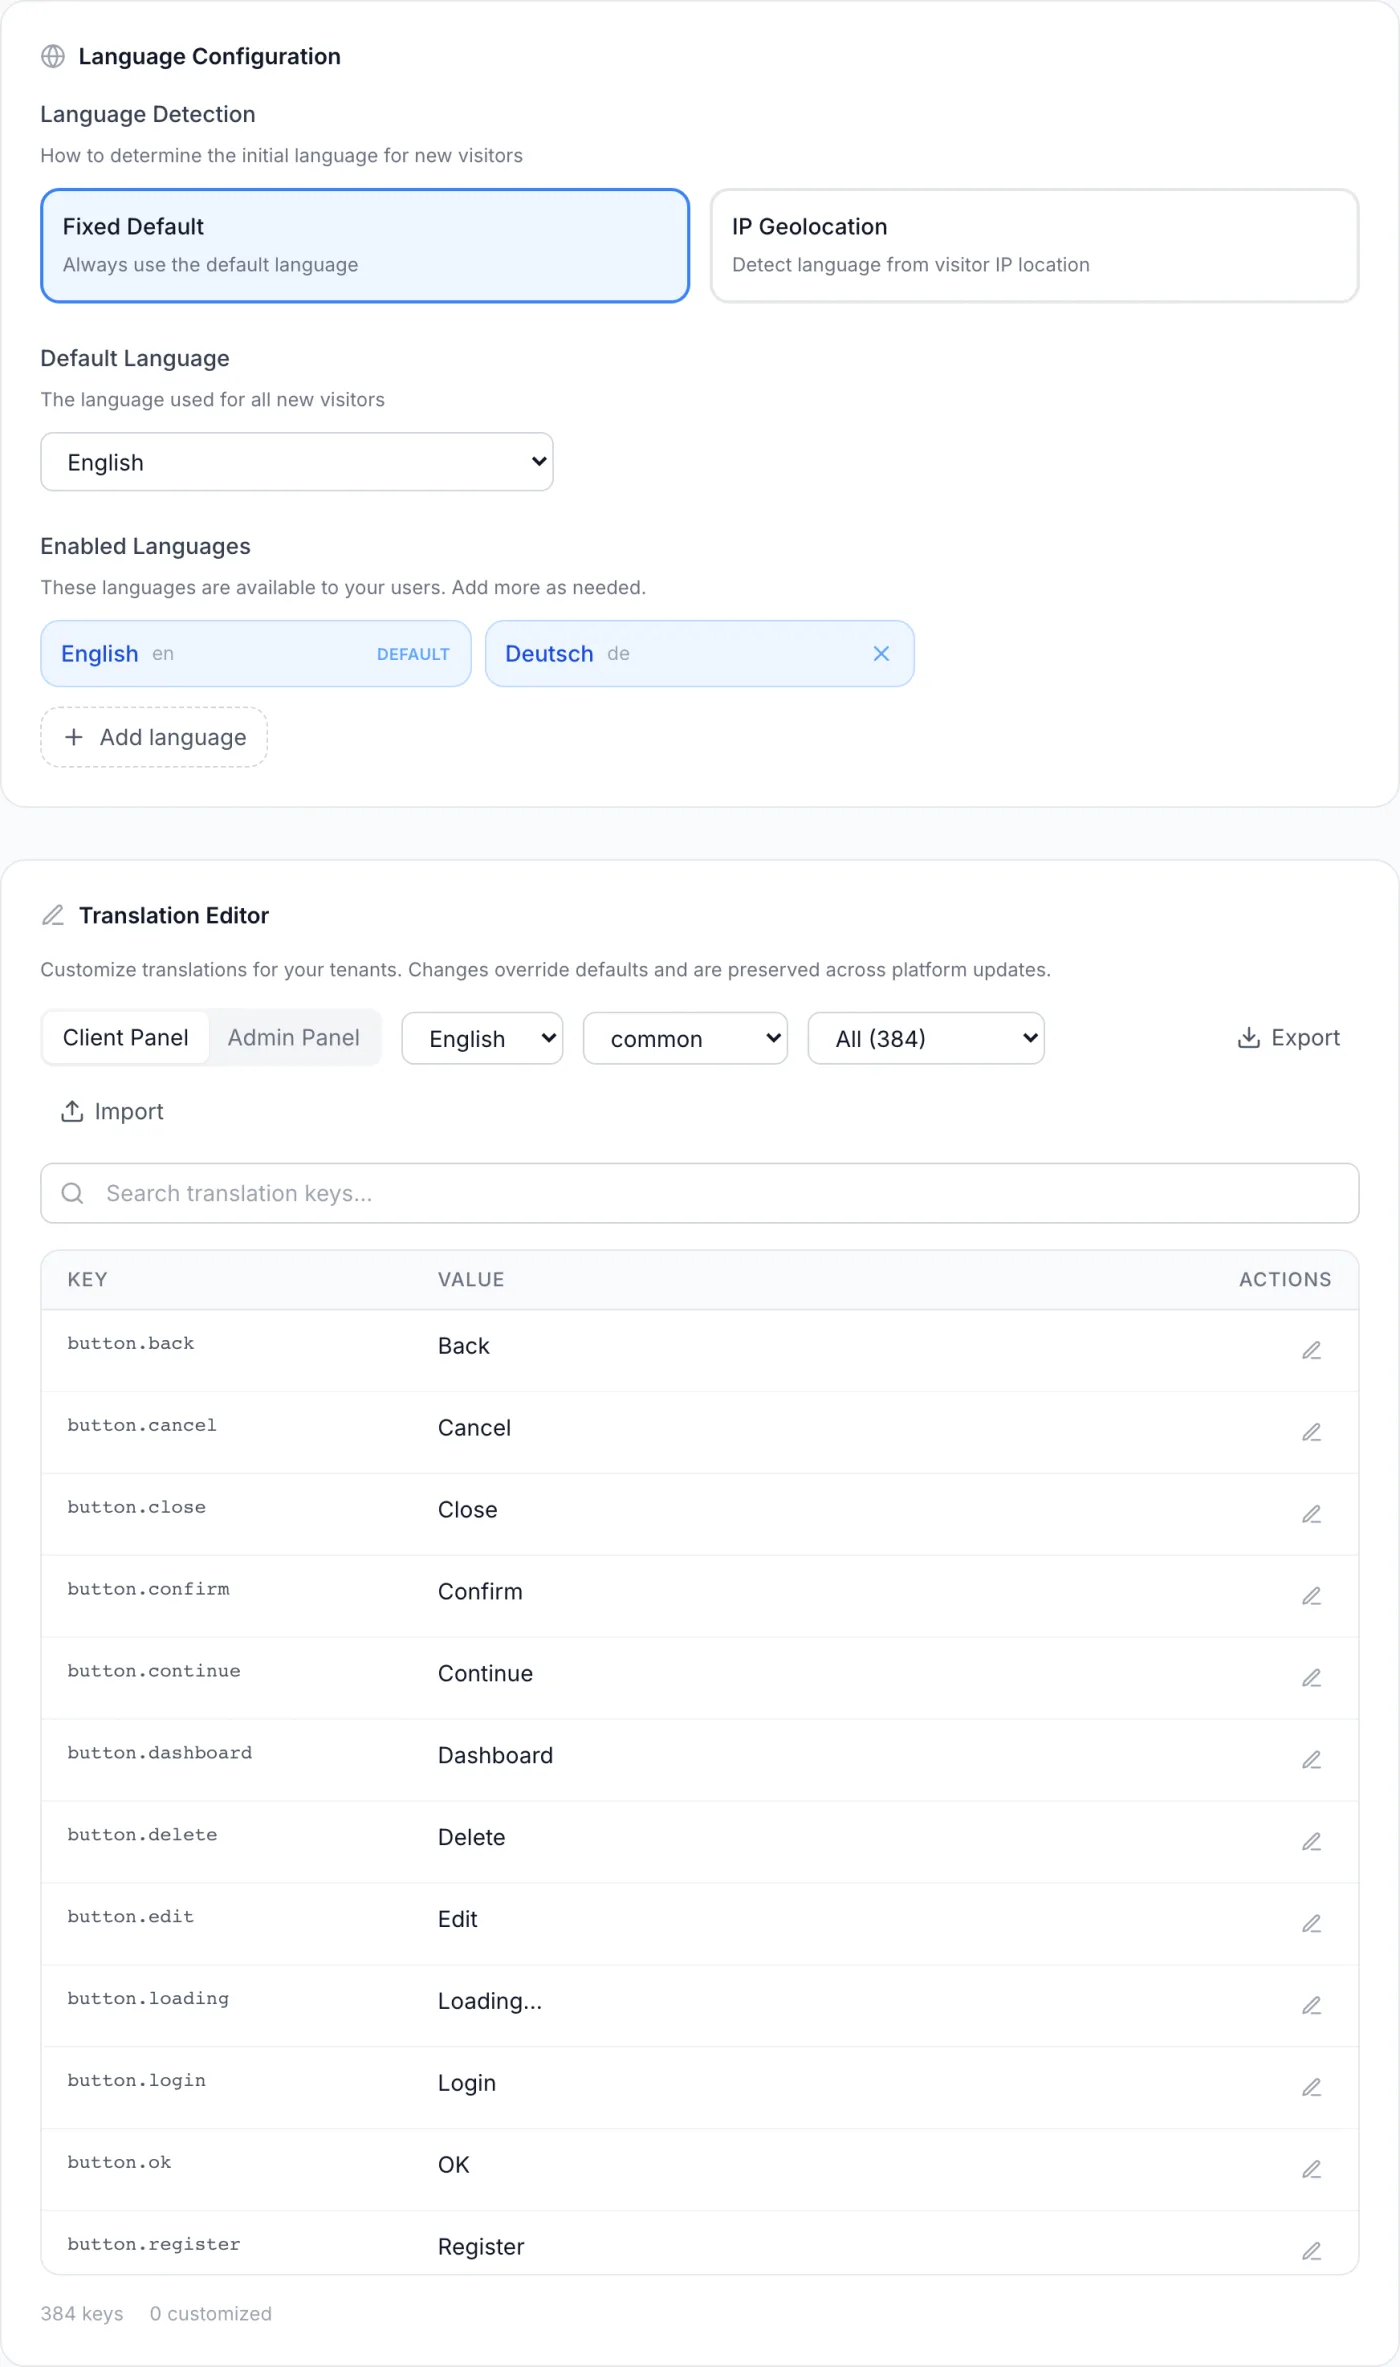
The Languages & Translations page is where you control which languages your client and admin panels are offered in, which language a first-time visitor lands on, and the exact wording of any on-screen text. You can rename a button, reword a notice, or translate a whole panel into another language without touching anything technical. Every wording change is stored as an override on top of the built-in text and is kept when the platform is updated.
How to reach it
Open Settings in the admin panel, then under the Localization group click Languages & Translations. The page is two cards: Language Configuration at the top and the Translation Editor below it.
Language Configuration
This card decides which languages exist and which one is the default. Everything in it saves the moment you change it — there is no save button on this page.
Language Detection
Two selectable buttons sit side by side, each with a short description beneath its name. Click one to select it; the highlighted button is the current choice.
- Fixed Default — described as always using the default language.
- IP Geolocation — described as detecting the language from the visitor’s location.
Default Language
Pick the default language from the dropdown, which lists only the languages you have enabled. The help text above it changes with the detection mode: in Fixed Default it reads “the language used for all new visitors”, and in IP Geolocation it reads “fallback language when geolocation cannot determine a language”. In both modes it is the language a visitor ends up on when nothing more specific can be matched.
Enabled Languages
Below the default selector is the list of languages currently available to your users, each shown as a chip with its own name and its short code. These are the languages offered in the language switcher in your panels.
- To add a language, click Add language. A search box opens listing every language you have not enabled yet. Type to filter by name or code, then click one to enable it. It becomes available in the switcher straight away.
- To remove a language, click the small X on its chip. It leaves the switcher immediately.
Note: The default language carries a Default badge in place of its remove button — you cannot remove the language currently set as the default. To drop it, choose a different default first. English stays enabled in all cases: it is the base every other language falls back to for any wording that has not been translated.
How a visitor’s language is chosen
For someone who has never picked a language in your panel, the choice is made in this order:
- The country the visitor is connecting from, if it maps to one of your enabled languages.
- Otherwise, the first of the visitor’s own browser language preferences that you have enabled.
- Otherwise, your Default Language.
Only enabled languages are ever chosen. As soon as a visitor picks a language from the switcher themselves, that choice is remembered in their browser and used on every later visit, regardless of where they are connecting from.
Translation Editor
The lower card lets you change the wording of individual strings, or supply translations for a language you have enabled. Changes are saved as overrides on top of the built-in text and are preserved across platform updates.
Choosing what to edit
A row of controls at the top of the editor narrows down which strings you see:
| Control | What it does |
|---|---|
| Client Panel / Admin Panel tabs | Switch between the text used in the customer-facing client panel and the text used in the staff-facing admin panel. |
| Language dropdown | Pick which language’s wording you are editing. Only enabled languages appear. |
| Namespace dropdown | Text is grouped into namespaces — broad areas such as common, billing, dashboard or tickets. The list is loaded for whichever panel tab you are on, so switching panels can change which namespaces are offered. |
| Filter dropdown | Show All keys, only Customized ones (those you have overridden), or only Default ones (still on their built-in wording). Each option carries a live count. |
| Search box | Filters the table by key name, by the built-in text, or by your overridden text. |
The translation table
Each row is one string, shown in three columns:
- Key — the short internal name of the string. Overridden rows carry a small Custom label and a light highlight.
- Value — the text actually shown to users in the selected language. When you are editing anything other than English, the column heading names the language code. An overridden row also lists the built-in default beneath the value, and — in a non-English language — the English text for reference. A string with no text at all shows a grey empty marker.
- Actions — the edit button, plus a reset button on rows you have customised.
Editing a single string
- Find the string using the namespace, filter and search controls.
- Click the pencil icon in the Actions column. The value turns into an editable box, pre-filled with the current text.
- Type your new wording. The box grows to several lines for longer text.
- Click the green check to save, or the X to cancel. Once saved, the row is marked Custom and counts toward your customised total.
Resetting a string
A customised row shows a reset (circular arrow) icon. Click it to discard your override and return that single string to its built-in wording. When the current namespace holds at least one override, a red Reset All button appears in the toolbar; after a confirmation prompt it clears every override in the panel, language and namespace you currently have selected — nothing outside that selection is touched.
Export and Import
For bulk work, use the toolbar’s Export and Import buttons:
- Click Export to download the currently selected panel, language and namespace as a JSON file, named after those three choices. It contains the built-in text merged with your overrides, so it is a complete starting point for a translator.
- Edit the values in that file, leaving the keys alone.
- Click Import, choose your edited file, and the changes are applied to the panel, language and namespace you currently have selected. A message then reports how many entries were added, updated and left unchanged. Values that match the built-in text are not turned into overrides.
Tip: Export and import always act on the namespace, language and panel selected at that moment, so double-check those three controls before importing. To translate a whole language, work through each namespace in turn.
Tracking your progress
Beneath the table a small summary shows the total number of keys in the current namespace and how many you have customised; while a search is active it also shows how many rows match. Combined with the Customized / Default filter, this makes it easy to see how much of a language still needs wording.
Notes and gotchas
Note: Your wording changes are stored separately from the built-in text. When the platform is updated, new default strings appear automatically and your existing overrides are left intact — an update never overwrites your custom wording.
Note: The Client Panel and Admin Panel are edited independently. A wording change in one does not affect the other, so switch the panel tab if you need to update both.
Tip: Enabling a language makes it selectable immediately, even before you have translated anything. Anything you have not translated falls back to English, so a half-finished language shows a mix — finish the common namespace first, since it supplies the navigation and buttons visitors see everywhere.