
Tickets
Configure ticket auto-close, attachment retention, reply ratings, and a public submission form with copy-paste embed code in FluxBilling.
What ticket settings control
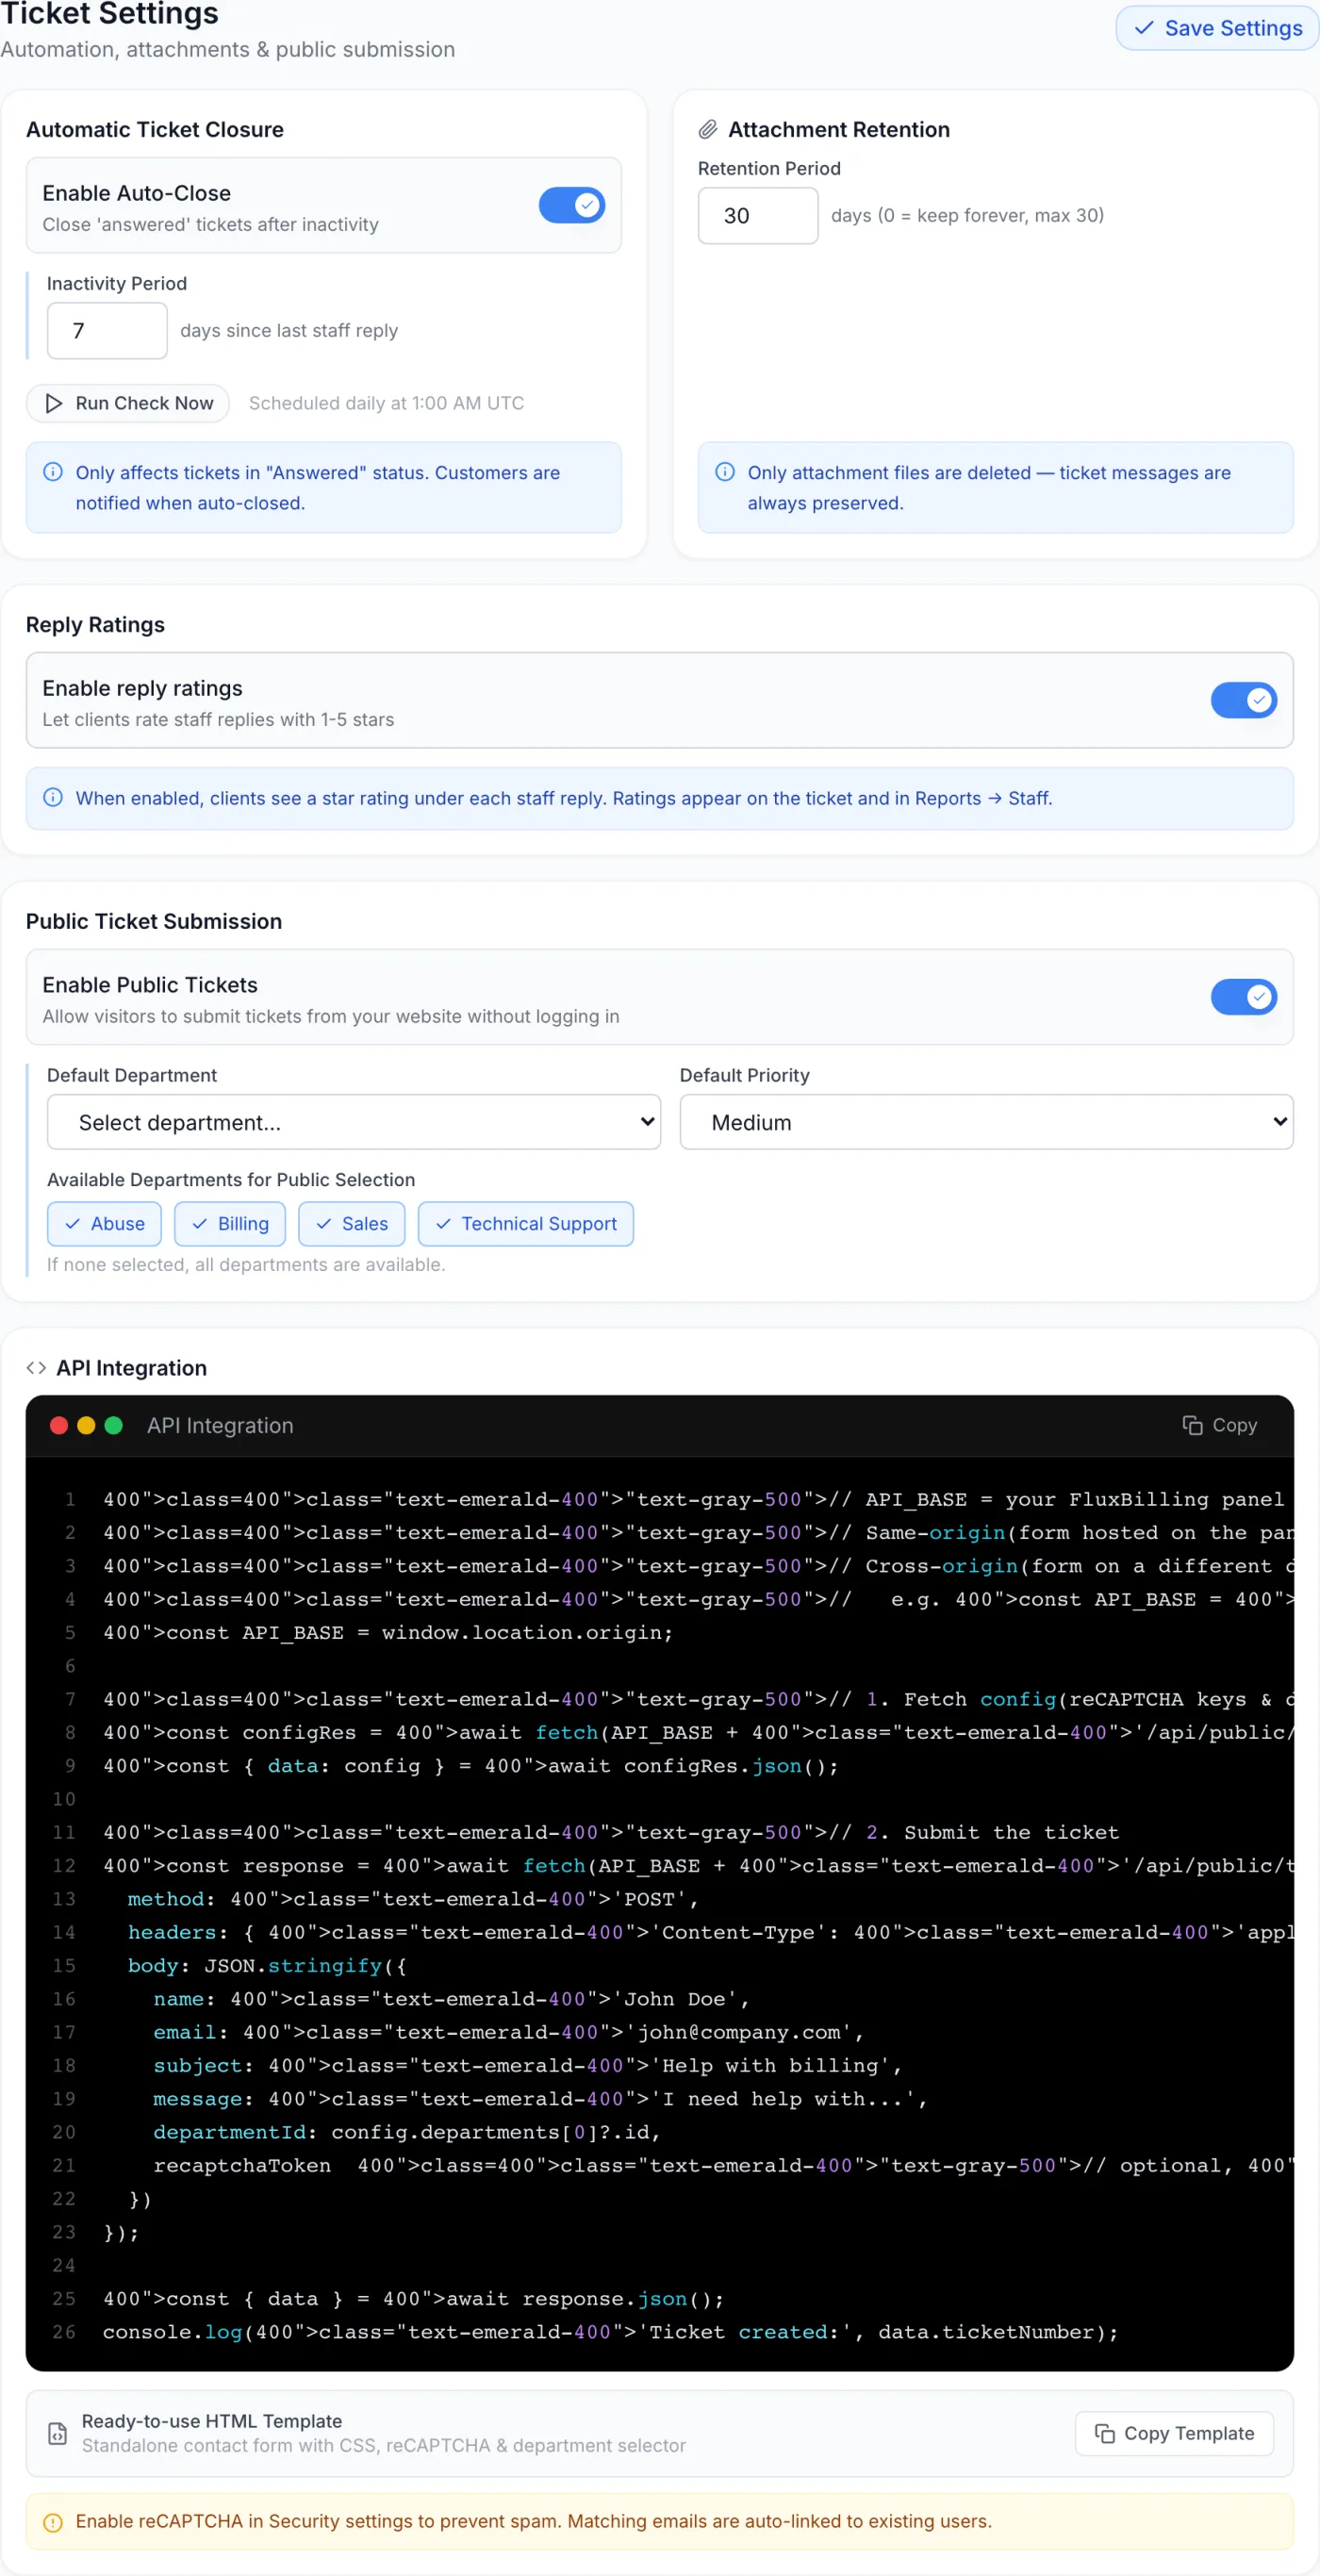
The Tickets settings page governs how your support desk behaves automatically: when answered tickets close themselves after inactivity, how long file attachments are kept, whether customers can rate your staff replies, and whether visitors can open tickets from a public form on your website without signing in. When public submission is turned on, the page also hands you ready-to-paste code so you can drop a contact form onto any external site.
How to reach this page
Open Settings from the admin sidebar, then in the settings menu choose the Communication group and click Tickets. Every change you make is staged in the page until you click Save Settings in the top-right corner, which commits all sections at once. A green banner confirms the save; a red banner appears if a value is out of range, and nothing is saved until you correct it.
Automatic ticket closure
Tickets you have answered but that get no further customer response can sit in your queue indefinitely. Auto-close finishes them for you on a schedule.
- Turn on the Enable Auto-Close toggle.
- An Inactivity Period field appears, starting at 7. Enter the number of days since the last staff reply after which an idle, answered ticket should close. The value must be between 1 and 365.
- Click Save Settings. From then on, the check runs automatically once a day — the note beside the button confirms it is scheduled daily at 1:00 AM UTC.
- To process the queue immediately instead of waiting, click Run Check Now. A confirmation prompt appears first; when the run finishes, a banner reports how many tickets were closed.
The Run Check Now button and the inactivity field are only shown while auto-close is switched on.
Note: Auto-close only affects tickets in the Answered status — those where your team replied last and the conversation is waiting on the customer. Customers are notified when a ticket is auto-closed. Leaving this off means answered tickets stay open until a staff member closes them by hand.
Attachment retention
This setting controls how long files attached to tickets are kept before they are purged to save space. Enter a number of days in the Retention Period field; the allowed range is 0 to 30 days, where 0 keeps attachments forever. The starting value is 30. The field is always visible — there is no toggle in front of it.
Note: Purging removes only the attached files. The ticket conversation and its messages are always preserved, so the support history stays intact after old attachments are cleared.
Reply ratings
Turn on Enable reply ratings to let customers rate the helpfulness of individual staff replies. When it is on, clients see a 1–5 star control under each staff reply in their client panel. Collected ratings appear on the ticket itself and are rolled up under Reports → Staff, giving you a feedback signal on support quality without adding any extra workflow. It is off to begin with. Remember to click Save Settings after changing the toggle.
Public ticket submission
Public submission lets anyone open a ticket through a form hosted outside the client panel, without an account. This suits a “Contact Us” page on your marketing site.
- Turn on the Enable Public Tickets toggle. A configuration block expands beneath it.
- Pick a Default Department — where a public ticket goes when the submitter does not choose one. The dropdown lists your active departments only.
- Pick a Default Priority for public tickets: Low, Medium or High. It starts on Medium.
- Under Available Departments for Public Selection, click the department chips you want to offer visitors. Selected chips are highlighted with a check; click again to deselect. This list appears only if you have at least one active department.
- Click Save Settings.
Note: If you select no departments under Available Departments, all of your active departments are offered on the public form rather than none. To restrict the visitor’s choice, select only the departments you want to expose.
Field reference
| Field | What it does |
|---|---|
| Enable Auto-Close | Switches on the daily job that closes answered, idle tickets. Off by default. |
| Inactivity Period | Days since the last staff reply before an answered ticket closes. 1–365; starts at 7. |
| Run Check Now | Runs the auto-close check immediately and reports how many tickets it closed. |
| Retention Period | How long ticket attachments are kept before purging. 0–30 days; 0 means keep forever. Starts at 30. |
| Enable reply ratings | Lets customers rate individual staff replies with 1–5 stars. Off by default. |
| Enable Public Tickets | Allows ticket creation from an external form without signing in. Off by default. |
| Default Department | Department a public ticket goes to when none is chosen. Active departments only. |
| Default Priority | Priority assigned to public tickets: Low, Medium or High. |
| Available Departments for Public Selection | The departments shown as options on the public form. If none are selected, all active departments are available. |
Embedding the form on your site
Once public tickets are enabled and saved, two extra resources appear at the bottom of the page so you can wire up an external form.
- API Integration — a short worked example showing the two-step flow: first fetch the form configuration (the available departments and, if you use it, the spam-protection site key), then submit the ticket with the visitor’s name, email, subject, message and chosen department. The submission returns a ticket reference number you can show the visitor.
- Ready-to-use HTML Template — a complete, styled contact form, including its own styling, spam protection and department selector. Click Copy Template to copy the whole page; the button briefly changes to Copied! to confirm. Paste it into a file on your site and it works on its own, including a success screen showing the ticket reference.
Note: Both snippets assume the form lives on the same domain as your panel. If you host it elsewhere, edit the one clearly marked configuration line near the top of the copied code to point at your panel’s address.
Tips and gotchas
- Protect the public form from spam. A public form with no spam protection attracts automated junk quickly. Enable reCAPTCHA on the Security page first; the supplied code detects and applies it automatically.
- Set up departments first. The Default Department dropdown and the department chips list active departments only. Create and activate what you need on the Departments page before configuring public submission.
- Save once for everything. All sections on this page share the single Save Settings button. Switching to another settings tab without saving discards your changes.
- Matching emails are linked automatically. When a public submitter’s email address matches an existing customer, the new ticket is linked to that account so replies thread correctly in their client panel.