
OS Images
Build the operating-system catalogue for bare metal provisioning: add images, import official sources, set requirements, and control order-time availability.
What OS Images is for
The OS Images page is the catalogue of operating systems your platform can install. Every image in it is a candidate for the operating-system picker on a dedicated-server order form and for the image used when a machine is imaged during provisioning or reinstalled later. Where the virtual-server module is in use, the same catalogue also feeds the image list customers see when they order a VPS.
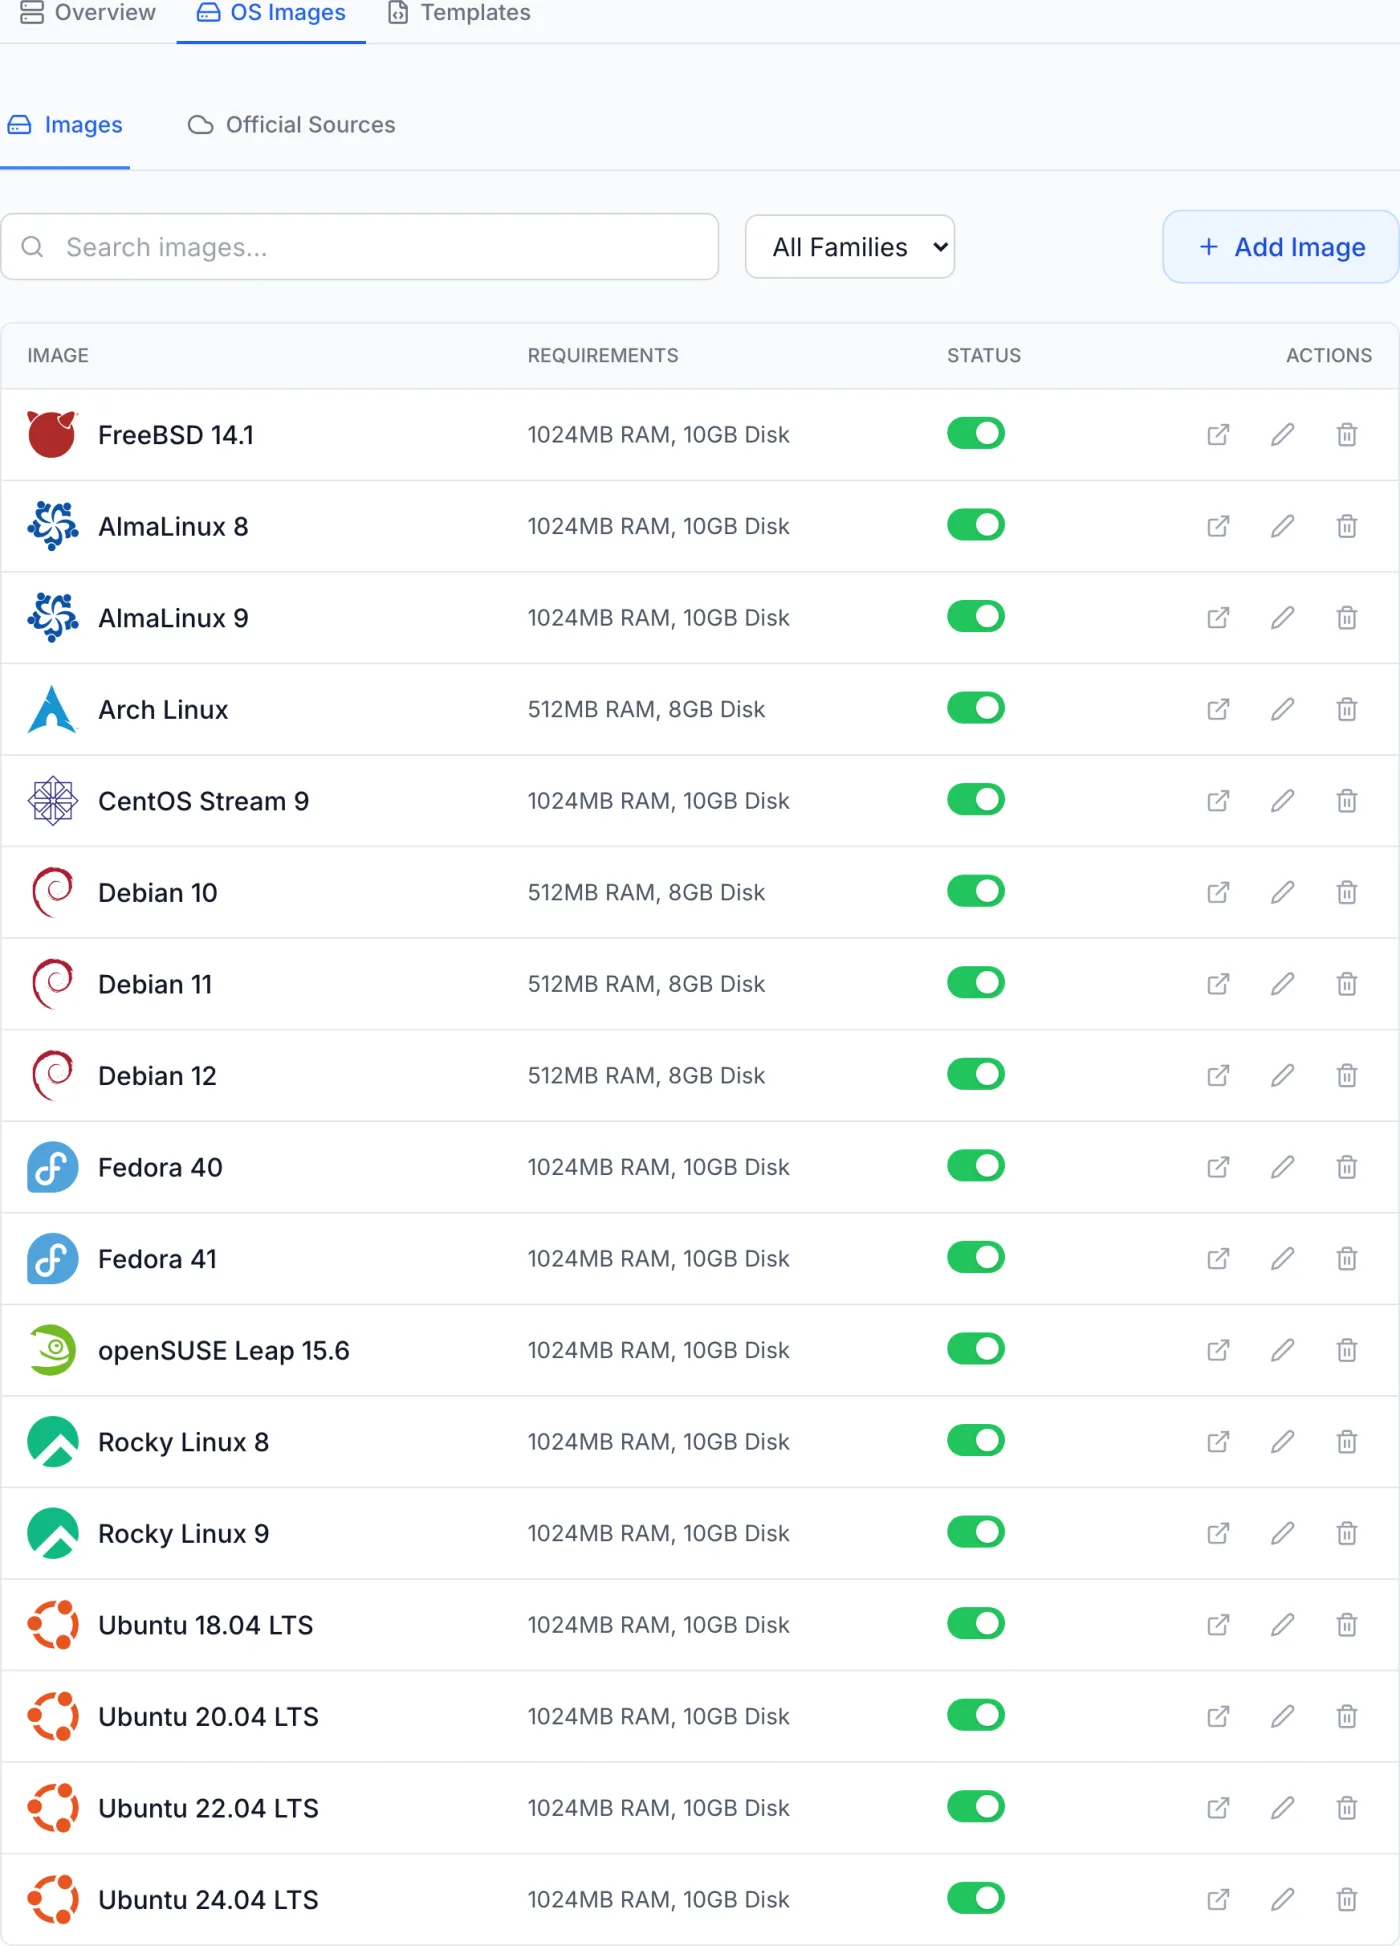
How to reach it
OS Images is a sub-tab inside the Bare Metal settings, not a top-level sidebar entry:
- Open Settings from the admin sidebar.
- Under Infrastructure, select Bare Metal.
- Choose the OS Images sub-tab (next to Overview and Templates).
Note: The Bare Metal tab only appears when the Inventory module is enabled for your company. If you do not see it, that module is switched off. See Bare Metal.
The catalogue is published for you
The image catalogue is maintained centrally and arrives on your instance ready to use, so there is nothing to download, host or keep current yourself. Rows that come from that published catalogue are marked with a lock and a Platform catalogue badge, and their Status toggle, Edit and Delete controls are switched off — hovering any of them explains that the row is read-only on this instance. New images and updated download links appear on their own.
What you control is which of those images each of your products offers, and — when the virtual-server module is present — whether an image is offered for VPS. Both are covered below.
Note: If the list is empty, the page says so and adds that the OS image catalogue is published by the platform operator. There is nothing to fill in; the catalogue arrives on its own.
Reading the list
A Search box (matching the image name, its short identifier and the distribution) and an OS Family dropdown (All Families, Linux, Windows, FreeBSD or Other) sit at the top to narrow a long list. The table has these columns:
| Column | What it shows |
|---|---|
| Image | The image logo and its display name, plus the Platform catalogue lock badge on published rows. |
| Requirements | The minimum memory and disk the image needs, shown as e.g. 2048MB RAM, 20GB Disk. |
| Status | A green/grey switch. Green means the image is active and can be offered to customers; grey means it is retired and hidden everywhere. |
| VPS | Only present when the virtual-server module is available. A badge saying how the image behaves for VPS orders — see below. |
| Actions | A link icon that opens the image's download URL in a new tab, plus edit and delete buttons (disabled on published rows). |
The VPS badge
When the virtual-server module is present, each row carries a VPS badge you can click to change. It always tells you exactly what a customer would see:
| Badge | What it means |
|---|---|
| On (green) | Customers can order a VPS on this image. |
| Off (grey) | Not offered for VPS. Bare metal can still deploy it. Click to enable. |
| No image (amber) | Offered for VPS, but there is no downloadable cloud image to build from — every order for it would fail. Supply a VPS source URL. |
| Hidden (amber) | Offered for VPS, but the image itself is switched off in the Status column, so no customer can see it. |
Clicking the badge opens a small window where you tick whether to offer the image to the virtual-server module and, optionally, give a direct VPS source URL and its checksum. Leave the URL empty to build VPS disks from the catalogue's own image link. VPS availability is yours to set even on published rows — but once you change it, that row keeps your answer and stops following catalogue updates for those two fields. The badge then carries a small lock, and a Follow the catalogue again button in the same window puts it back under central control.
Note: The On badge means the row passes the checks the catalogue can make from the row itself — enabled, active, and a properly formed download link. The link is not fetched, so a URL that no longer resolves still reads as On.
Turning an image on or off
Where the Status switch is available, it takes an image out of circulation without deleting it. An inactive image disappears from the operating-system picker on order forms and from the reinstall dialog, but stays in the catalogue and remains recorded against services that already use it.
On published rows the switch is disabled. To stop offering such an image, untick it on the products that offer it — that is the control you always have.
Make images orderable on each product
Having an image in the catalogue does not put it on any order form by itself. Each dedicated-server product carries its own list of offered operating systems, chosen from the active images in the catalogue:
- Open Products from the admin sidebar and edit a dedicated product. (Save the product first if you are creating it — the image list needs an existing product.)
- Go to the Delivery section and find the OS Images panel.
- Tick every image the product should offer. Images are grouped by family, and a counter reads N of M images selected. Select all and Deselect all links sit beside it.
- Click the star on one ticked image to make it the pre-selected default.
- Save the product. The ticked images now appear in the operating-system picker on that product's order page.
Follow the catalogue instead of pinning a list
At the top of the same panel is a checkbox: Follow the OS image catalogue — Offer every active image automatically, including ones added later. Untick to pick a fixed set.
- Ticked, the product offers every active image in the catalogue, and any image added later is offered too without you touching the product again. Ticking it also selects everything currently in the catalogue, so the panel matches what customers will see.
- Unticked, the product offers exactly the images you have ticked and nothing else. Anything added to the catalogue later is ignored until you come back and tick it.
Unticking any individual image switches the follow checkbox off automatically — a deliberate subset is no longer "whatever the catalogue has". The same happens if you use Deselect all.
Warning: An operating system is required to order. A dedicated product with no images assigned shows the warning No OS images assigned — clients cannot order this product in the editor, and on the order page the customer sees an amber notice that no operating systems are configured, with no way to complete checkout. After creating a dedicated product, always assign at least one image and mark a default.
Where images are used
- On the order form. The customer picks one of the product's ticked images; the choice is required.
- At provisioning. The chosen image is written to the machine the order allocated.
- On reinstall. The Install OS action on a device in Inventory lists every active image, and pairs it with an optional Deployment Template.
- For virtual servers. Images whose VPS badge reads On appear in the VPS image list.
Tips and notes
- Assign images to every dedicated product. The catalogue is only the source list — each product's own selection controls what customers can pick, and a product with nothing assigned cannot be ordered.
- Use the follow switch for new products. It saves you from revisiting every product each time the catalogue grows, and you can always untick it later to freeze a list.
- Pair images with a template. An image only describes the operating system. To apply a first-boot configuration automatically, choose a Deployment Template alongside it.
- Watch the amber VPS badges. No image and Hidden both mean an image is on offer that a customer cannot actually receive.
- Retire by unticking, not by deleting. Removing an image from a product's list stops new orders using it while leaving existing services untouched.