
Team Members
Invite people to your account, grant granular permissions by section, manage pending invitations, edit access, and remove members from the Team Members tab.
What the Team Members area is for
Team Members lets you invite other people to your account so they can help manage services, billing or support on your behalf. Each person you invite signs in with their own login and can only do what you allow. The account owner always keeps full access and cannot be locked out.
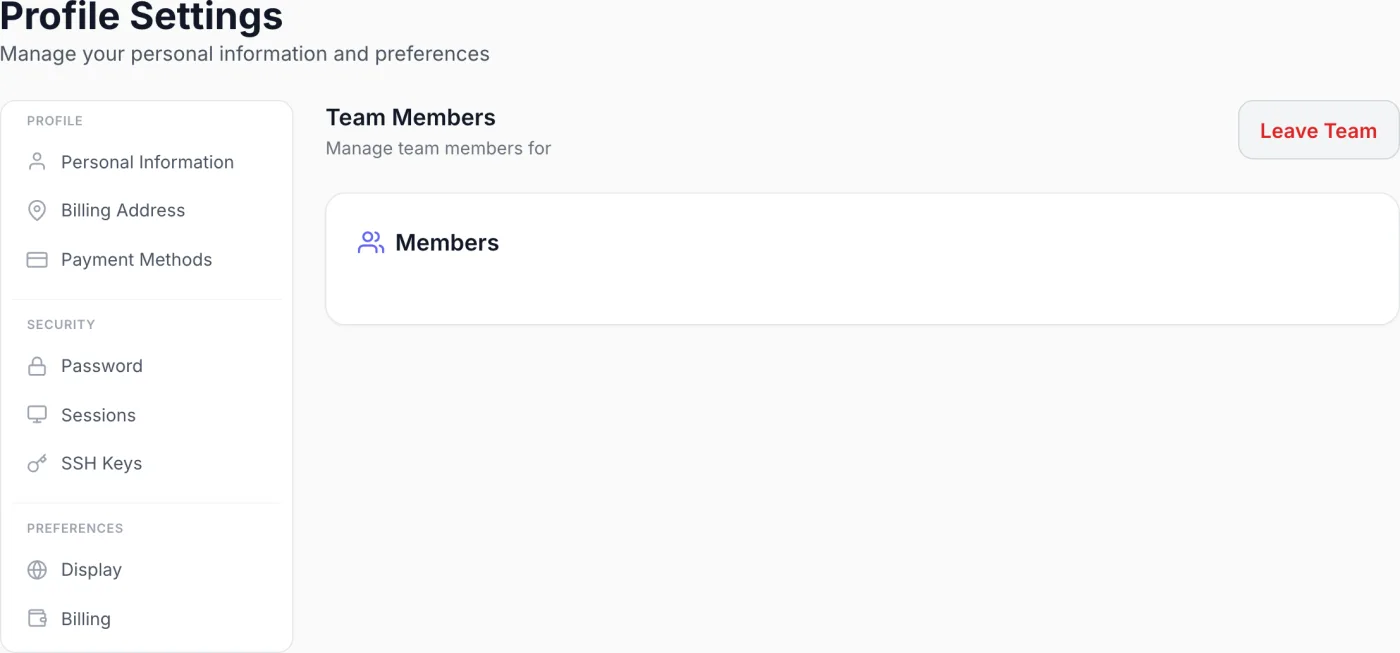
How to reach Team Members
Open your account settings — the Profile item in the account menu (top-right) and the Settings item in the sidebar both open the same page. Then choose Team Members in the left-hand menu, under the Team heading. The item only appears when your login belongs to a shared account. If you are a standalone customer who has never created or been added to a shared account, it is hidden.
The section is headed Team Members with the subtitle Manage team members for your account name.
What you see on the page
- Members — everyone who currently has access. Each row shows the person's name and email, a permission count (for example 5 permissions), and Last login with how long ago it was. The owner's row is highlighted in amber with a crown and an Owner badge; your own row carries a small You badge.
- Pending Invitations — invitations sent but not yet accepted, each showing the recipient's email, Invited by and Expires. This section appears only when you hold the View Team permission and at least one invitation is outstanding.
- Invite Member — opens the invite form. Shown only when you hold the Invite Members permission; the owner always sees it.
- Leave Team — shown to members who are not the owner, and lets you remove yourself from the shared account.
Inviting a team member
- Select Invite Member to open Invite Team Member.
- Enter the person's Email Address.
- Under Permissions, tick what the person should be able to do. Permissions are grouped into five sections (Services, Billing, Support, Team, Account), each with a Select All / Deselect All shortcut. At least one permission is required.
- Select Send Invitation (or Cancel to back out).
An invitation email is sent to that address and the entry appears under Pending Invitations. The link inside is valid for 3 days.
Note: You can only grant permissions you already hold. If you tick one you do not have, the invite is refused with a message naming it. If that email is already on the team you get This user is already a member of your account, and if an invitation is already outstanding you get An invitation has already been sent to this email — revoke the old one first if you need to change its permissions.
Accepting an invitation
The invited person opens the link in their email and lands on Team Invitation, which names the account, who invited them, the address the invitation was sent to, and how many permissions it grants. What they see next depends on their situation:
- No login yet — the page says Create an account or log in to accept this invitation and offers Log In and Sign Up. Sign Up starts account creation with the invitation email already filled in.
- An account already exists for that email — the page says so and offers Log In to Accept.
- Already signed in with the right email — a green note confirms who they are signed in as, and Accept & Join Team completes the join.
- Signed in with a different email — an amber warning names both addresses and offers Log in with correct account.
An expired or already-used link shows Invalid Invitation with the reason and a Go to Login button. When someone joins, the account owner is notified by email.
Editing a member's permissions
- Select the shield icon on the member's row. It only appears if you hold the Manage Team permission.
- Edit Permissions opens with the same grouped checkboxes, and the same Select All / Deselect All shortcuts.
- Select Save Permissions.
You cannot change the owner's permissions, you cannot edit your own row here, and you cannot grant a permission you do not hold yourself.
Removing a member
- Select the trash icon on the member's row (requires Manage Team).
- Remove Team Member warns that the action cannot be undone and that the member loses access immediately.
- Confirm with Remove Member.
Access is revoked at once and the removed person is notified by email. The account owner cannot be removed.
Revoking a pending invitation
In Pending Invitations, select the cancel icon next to the invitation (requires Manage Team). The link stops working immediately and the entry disappears.
Leaving a team
If you are a member but not the owner, select Leave Team. The confirmation warns that you will need a new invitation to rejoin and that you will lose access to all shared resources; confirm with Leave Team. You are returned to your own account. The owner does not see this button and cannot leave their own account.
Permissions reference
When inviting or editing a member you choose from five sections. At least one permission is required. The owner always holds every permission, and theirs cannot be changed.
| Section | Permission | What it allows |
|---|---|---|
| Services | View Services | View service list and details. |
| Manage Services | Modify service settings, order options. | |
| Power Controls | Start, stop, restart servers. | |
| Console Access | Access the console for servers. | |
| Cancel Services | Request service cancellation. | |
| Billing | View Invoices | View invoice list and details. |
| Pay Invoices | Make payments on invoices. | |
| Download Invoices | Download invoice PDFs. | |
| View Billing | View payment methods and credits. | |
| Manage Billing | Add or remove payment methods. | |
| Support | View Tickets | View support tickets. |
| Create Tickets | Create new tickets. | |
| Reply to Tickets | Reply to tickets. | |
| Team | View Team | View team members. |
| Invite Members | Invite new team members. | |
| Manage Team | Edit and remove members, and revoke invitations. | |
| Account | Account Settings | Modify account settings. |
Tips and notes
Tip: Grant only what each person needs. A billing contact, for example, needs View Invoices, Pay Invoices and Download Invoices — not the whole Billing set. Keeping permissions tight limits what a departing or compromised member can touch.
- If someone leaves your company, remove them promptly so they no longer have access, and check Sessions on your own profile at the same time — see Account Security.
- Invitations expire after 3 days. If a link has lapsed, send a new invitation rather than reusing the old email.
- Manage Team is powerful — it lets a member edit and remove other members and revoke invitations. Hand it out sparingly.