
Bank Transfer: wire payments with manual confirmation
Set up the Bank Transfer plugin: up to five bank accounts, payment references, what customers see at checkout and how to confirm and refund transfers.
The Bank Transfer plugin adds bank or wire transfer as a payment method in your client area. When a customer chooses it, FluxBilling shows your bank details and a payment reference built from the invoice or proforma number. The customer sends the money from their own bank. When the money reaches your account, you confirm the payment on the invoice in the admin panel, and FluxBilling marks it paid and delivers what was ordered. Nothing is charged automatically and no payment provider is involved. The plugin is free and is listed in the plugin marketplace of every FluxBilling panel.
This guide covers plugin version 2.5. It follows the setup in the order you do it, then explains what your customers see, how you confirm payments and what to check when something does not work.
Who supports this integration. The plugin is built and maintained by FluxBilling. If something does not work, contact FluxBilling support at contact@fluxbilling.app or through fluxbilling.app/contact. Questions about your bank account, transfer fees or how long transfers take go to your bank.
What you need before you start
- A business bank account that can receive transfers from your customers. You can list up to five accounts, for example one per currency.
- The details your customers need to pay you: the account holder name exactly as your bank has it, the IBAN or domestic account number, the bank name, and where relevant the SWIFT/BIC code and a routing number or sort code. Your bank shows them in online banking or on your account statement.
- A way to see incoming transfers, such as online banking or a bank statement, so you can match each transfer to its reference and confirm it in FluxBilling.
There are no API keys, no webhook and no test mode to set up. For transfers in euro, the rules for what a payer can put in the transfer description are set by the SEPA Credit Transfer scheme; see the European Payments Council's SEPA Credit Transfer rulebook.
Step 1: Install the plugin
- In the FluxBilling admin panel, open Settings (the gear icon in the top bar).
- Under Integrations, open Marketplace. Stay on the Browse tab.
- Open the Bank Transfer card and click Get for Free.
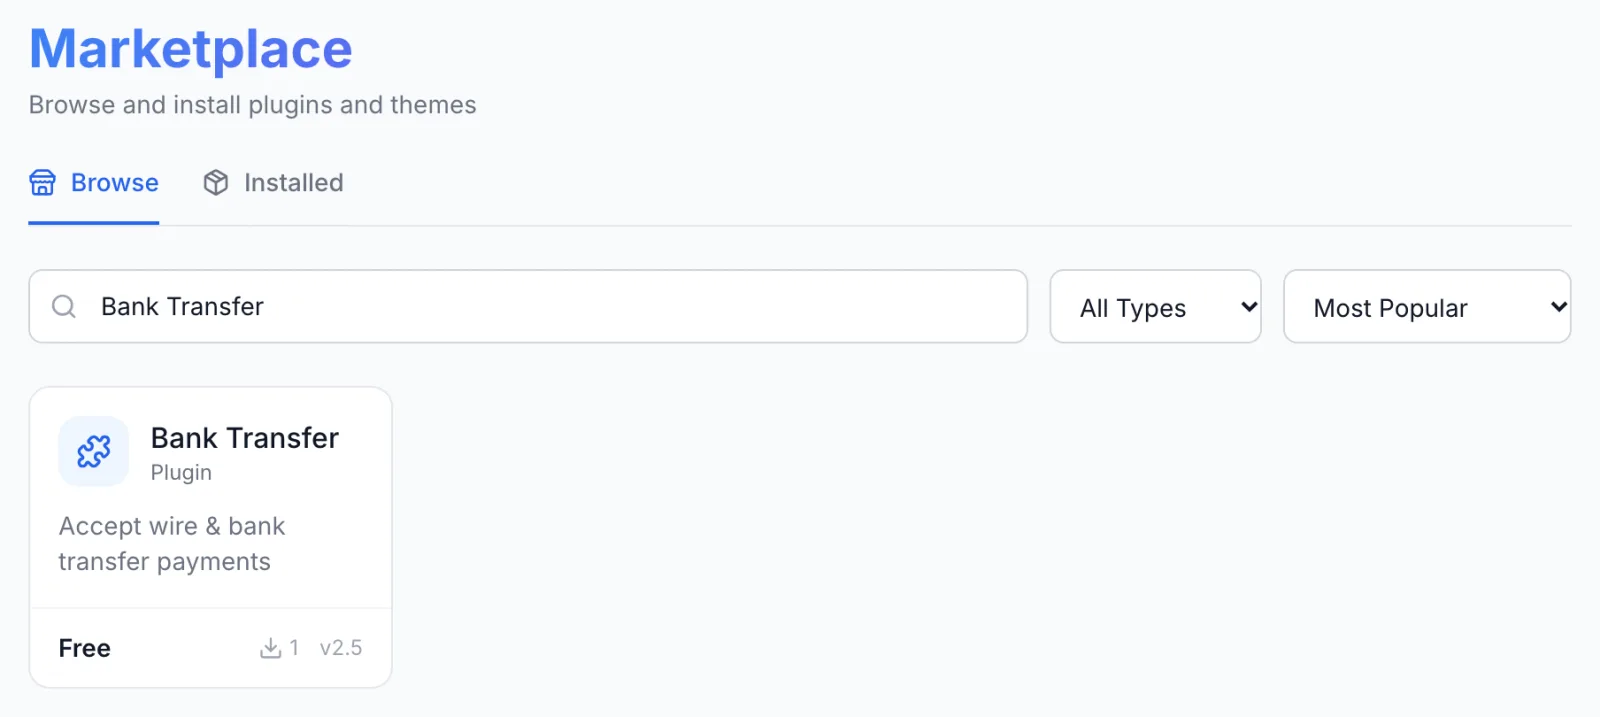
FluxBilling confirms with Plugin "Bank Transfer" installed and ready to use. The plugin is switched on straight away and appears under Settings → Integrations → Plugins as Bank Transfer, marked Active. Customers do not see it at checkout until you have entered at least one bank account in the next step.
Step 2: Enter your bank details
- Open Settings → Integrations → Plugins.
- On the Bank Transfer card, click Configure. The dialog opens on the Settings tab.
- Leave Enabled checked.
- Check the Payment Instructions and the Reference Prefix. Both come filled in with a suggested text and PAY; change them if you like.
- Fill in Bank Account 1: at least the Label, Bank Name, Account Holder and IBAN / Account Number.
- To offer more accounts, fill in Bank Account 2 to Bank Account 5 the same way. Leave an account's fields empty to leave it out.
- Click Save Configuration. FluxBilling confirms with Configuration saved successfully.
If a required field is empty, the dialog keeps your input and says Saved, but the plugin is not configured until these are fixed: followed by the field, for example Bank Account 1 — Bank Name is required. Bank Transfer stays off the checkout until you fix it.
| Field | Required | What it does |
|---|---|---|
| Enabled | No | Offers Bank Transfer to customers. It is the same switch as the Bank Transfer toggle under Settings → Financial → Payment Gateways. |
| Payment Instructions | No | Your own text, shown to the customer in a highlighted Important: box under the bank details. Use it for anything extra, such as how long you take to confirm a transfer. The notice telling the customer to quote the payment reference is always shown by FluxBilling, whatever you write here. |
| Reference Prefix | No | Put in front of the invoice or proforma number to make the payment reference. With PAY and invoice INV-2026-0042, the reference is PAY-INV-2026-0042. If you leave it empty, PAY is used. Keep it short: in SEPA transfers the reference field is limited, and the whole reference should fit. |
| Field | Required | What it does |
|---|---|---|
| Label | Yes for account 1 | The account's name for the customer, for example EUR Account. With more than one account, each label becomes a tab the customer can switch between. |
| Bank Name | Yes for account 1 | The name of the bank, shown as Bank Name. |
| Account Holder | Yes for account 1 | The beneficiary name, shown as Account Holder. Use the name exactly as your bank holds it. |
| IBAN / Account Number | Yes for account 1 | The IBAN or domestic account number, shown as IBAN / Account Number. |
| SWIFT / BIC | No | Needed by customers paying from abroad. Shown as BIC/SWIFT. |
| Routing / Sort Code | No | A US routing number, UK sort code or similar domestic code. Shown as Routing Number. |
| Currency | No | The currency the account is held in, for example EUR. It is shown to the customer as information; every account you list is offered for every invoice, whatever its currency. |
| Additional Info | No | Free text shown under the account, such as a branch address or an intermediary bank. |
An account is shown to customers only when it has both a Label and an IBAN / Account Number. Fields you leave empty are simply not shown, so a customer never sees a blank line.
Checkout Display
Switch to the Checkout Display tab of the same dialog to choose how the method looks at checkout:
- Display Name (required): the name customers see, for example Bank Transfer.
- Description: an optional line under the name, for example Usually confirmed within two business days.
- Icon: a Preset icon or a Custom URL to your own image (PNG, SVG or JPG, about 64×64 px).
The Preview shows the result. Click Save Configuration.
Bank Transfer now appears under Settings → Financial → Payment Gateways with an Enabled badge. Use the toggle there to take it off checkout without losing your bank details. It applies to every product: there is nothing to attach to products or categories.
Step 3: Try it
- Log in to the client area as a test customer and open an unpaid invoice.
- Choose Bank Transfer and continue. The Bank Transfer Details page opens with your accounts, the payment reference and the amount.
- In the admin panel, open the same invoice and confirm the payment as described in Confirming a payment. The invoice shows as paid.
If you tried this on a real customer's invoice, nothing has been charged: choosing Bank Transfer only shows the details.
What your customers see
Bank Transfer is listed with your display name, description and icon wherever the customer pays: when paying an invoice or proforma, at the end of a new order, and when adding credit to their balance. A bank transfer payment must be at least 1 in the currency it is requested in; below that the customer sees Minimum payment amount is 1 followed by the currency.
After choosing Bank Transfer, the customer sees the Bank Transfer Details page for that invoice or proforma. After a new order, it opens straight away with the message Order placed! Please complete the bank transfer. The page shows, from the top:
- A highlighted box, Include the payment reference, saying for example: You must write PAY-INV-2026-0042 in the transfer description. A transfer without it cannot be matched to invoice INV-2026-0042, which delays or blocks confirmation of your payment. The reference has a copy button.
- With more than one account, a tab per account, named by its Label.
- The account's details: Bank Name, Account Holder, IBAN / Account Number, BIC/SWIFT, Routing Number, Currency, then the Reference (highlighted, with the hint Copy this into the transfer description / payment details field.) and the Amount still owed. Every line has a copy button. Your Additional Info text follows.
- The Important: box with your Payment Instructions.
- Two buttons: Choose Another Method goes back to the payment methods, and Done returns to the invoice list.
The invoice stays unpaid until you confirm the payment. The customer can open the details again at any time by paying the same invoice with Bank Transfer again; this never blocks them or creates a second charge. They can also switch to another payment method meanwhile.
When you confirm the payment, the customer gets the usual payment confirmation email, and anything waiting on the payment, such as a new service, goes ahead. Bank details are not printed on invoice PDFs by this plugin. To print them there too, add them to the invoice footer under Settings → Billing → Invoicing; see Invoice language and document texts.
Confirming a payment
FluxBilling never marks a bank transfer paid by itself: there is no bank connection, and pending bank transfers are never cancelled automatically, however long the money takes to arrive. When a transfer reaches your account:
- Find the invoice from the reference on your bank statement. The part after the prefix is the invoice or proforma number.
- Open it in the admin panel under Invoices and click Confirm Payment.
- In the Confirm Payment dialog, set Payment Gateway to Bank Transfer. If the list shows Bank Transfer twice, either entry records the payment as a bank transfer.
- Leave Amount empty to record the full amount still due, or enter what actually arrived.
- Optionally enter the bank's reference in Transaction ID and a note in Notes.
- Click Confirm.
When the amount covers the invoice, FluxBilling says Payment confirmed, marks the invoice paid and runs everything that follows a payment, such as setting up a new service or extending a renewal. A smaller amount is recorded as a part payment, for example Partial payment recorded: €40.00 paid, €10.00 remaining, and the invoice stays open for the rest.
For a proforma, open it and click Confirm Payment in the same way. As the dialog says, this converts the proforma to an invoice and records the payment. Credit top-ups paid by bank transfer are proformas too: confirming one adds the credit to the customer's balance.
Payments over time
Renewals
Bank Transfer cannot be saved as a payment method or charged automatically. Renewal invoices paid by bank transfer are paid the same way as the first one: the customer opens the invoice, chooses Bank Transfer and sends the money, and you confirm it. Customers who want automatic renewals need a gateway that saves a payment method; see Billing Automation.
Refunds
FluxBilling cannot send money back to the customer's bank. To refund a bank transfer, send the money back from your bank yourself, then record it on the invoice: click Refund and choose Manual (Mark as refunded without gateway call). Or choose To balance to give the customer account credit instead of money. See Invoice details.
Updating the plugin
Open Settings → Integrations → Marketplace, switch to Installed and click Check for Updates. When a new version is available, click Update to v…. Your bank details and texts are kept.
Troubleshooting
| Message or symptom | What to check |
|---|---|
| Bank Transfer is not offered at checkout | Check that Bank Account 1 has its Label, Bank Name, Account Holder and IBAN / Account Number filled in and saved, and that Bank Transfer is Enabled under Settings → Financial → Payment Gateways. |
| Saved, but the plugin is not configured until these are fixed: … | A required field of Bank Account 1 is empty. Fill in the field named in the message and save again. |
| An account you filled in does not appear for customers | It has a Label but no IBAN / Account Number, or the other way round. Both are needed. |
| Minimum payment amount is 1 followed by a currency | The amount still due is below 1. Settle it another way, for example from the customer's credit balance or with Confirm Payment. |
| A transfer arrived without the reference | Match it by amount and payer name, then confirm it on the right invoice. Remind the customer to copy the reference next time. |
| Payment amount exceeds the outstanding balance of … | The customer sent more than the invoice still owes. Record the amount due, then refund the difference from your bank or add it to the customer's credit. |
| Invoice is already paid, Invoice is already fully paid or Cannot pay a cancelled invoice | The invoice was paid another way or cancelled after the customer chose Bank Transfer. Return the money from your bank, or add it to the customer's credit balance. |
Limits
- Payments are confirmed by hand. The plugin does not read your bank account or statements.
- Up to five bank accounts. Every account is offered for every invoice; the customer chooses which one to pay into.
- No refunds through FluxBilling: you return the money from your bank and record the refund on the invoice.
- No saved payment methods and no automatic charging of renewals.
- Bank details appear on the payment pages of the client area, not on invoice PDFs, unless you add them to the invoice footer.
- The payment reference is always the prefix plus the document number. It cannot be changed per customer.
SWIFT is a trademark of its respective owner. FluxBilling is not affiliated with SWIFT or the European Payments Council.