
GoCardless Direct Debit
Set up the GoCardless plugin: access token, required webhook, checkout display, saved Direct Debit mandates, renewals, refunds and troubleshooting.
The GoCardless plugin lets your customers pay FluxBilling invoices by bank Direct Debit. At checkout the customer is sent to a GoCardless payment page, enters their bank details and authorises a Direct Debit mandate. GoCardless then collects the payment from their bank account and tells FluxBilling when it is confirmed, and the invoice is marked paid. The same mandate can be saved, so later renewal invoices are collected automatically. The plugin is free and is listed in the plugin marketplace of every FluxBilling panel.
This guide covers plugin version 2.8. It walks through the setup in the order you do it, then explains how payments, saved mandates and refunds work and what to check when something does not work.
Who supports this integration. The plugin is built and maintained by FluxBilling. If something does not work, contact FluxBilling support at contact@fluxbilling.app or through fluxbilling.app/contact. Questions about your GoCardless account, its verification, payouts or fees go to GoCardless support.
What you need before you start
- A GoCardless account. For testing, create a free sandbox account at manage-sandbox.gocardless.com. Sandbox and live are separate accounts with separate dashboards, and a token from one does not work in the other. To take real payments you need a live account that GoCardless has verified.
- An account admin in GoCardless. Only admins can create access tokens.
- A FluxBilling panel that GoCardless can reach over HTTPS. Direct Debit payments complete through GoCardless webhooks, so your panel's public address must accept requests from the internet.
- A charge currency GoCardless can collect for your account, for example GBP through Bacs or EUR through SEPA. FluxBilling charges the invoice in its own currency when that is your base currency or a currency listed for the gateway; otherwise it converts the amount and charges your base currency. Which schemes are available depends on your GoCardless account and country; see GoCardless's own documentation.
- Refunds enabled in GoCardless, if you want to refund from FluxBilling. GoCardless switches refunds off by default. See Refunds.
Step 1: Create an access token in GoCardless
The plugin calls the GoCardless API with an access token. Create the token in the same environment you want to use, sandbox or live.
- Sign in to the GoCardless dashboard: manage-sandbox.gocardless.com for sandbox, manage.gocardless.com for live.
- Open Developers and choose to create an access token.
- Give it a name, for example FluxBilling, and choose Read-write access. The plugin creates billing requests, payments and refunds and cancels mandates, so a read-only token is not enough.
- Copy the token straight away. GoCardless shows it only once.
GoCardless documents these steps in Set up and in its help article How to create an access token. The dashboard labels can differ slightly between dashboard versions.
Step 2: Install the plugin
- In the FluxBilling admin panel, open Settings (the gear icon in the top bar).
- Under Integrations, open Marketplace. Stay on the Browse tab.
- Open the GoCardless card and click Get for Free.
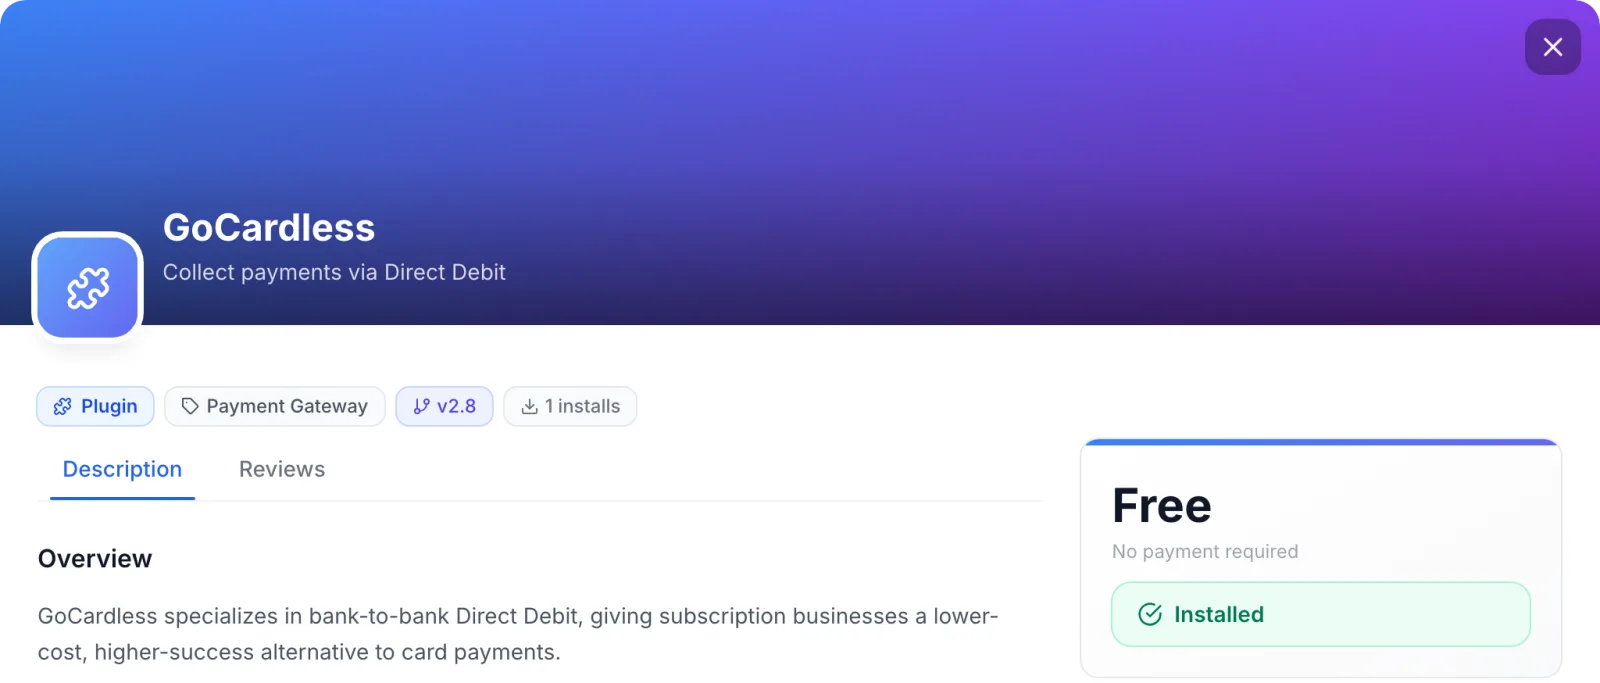
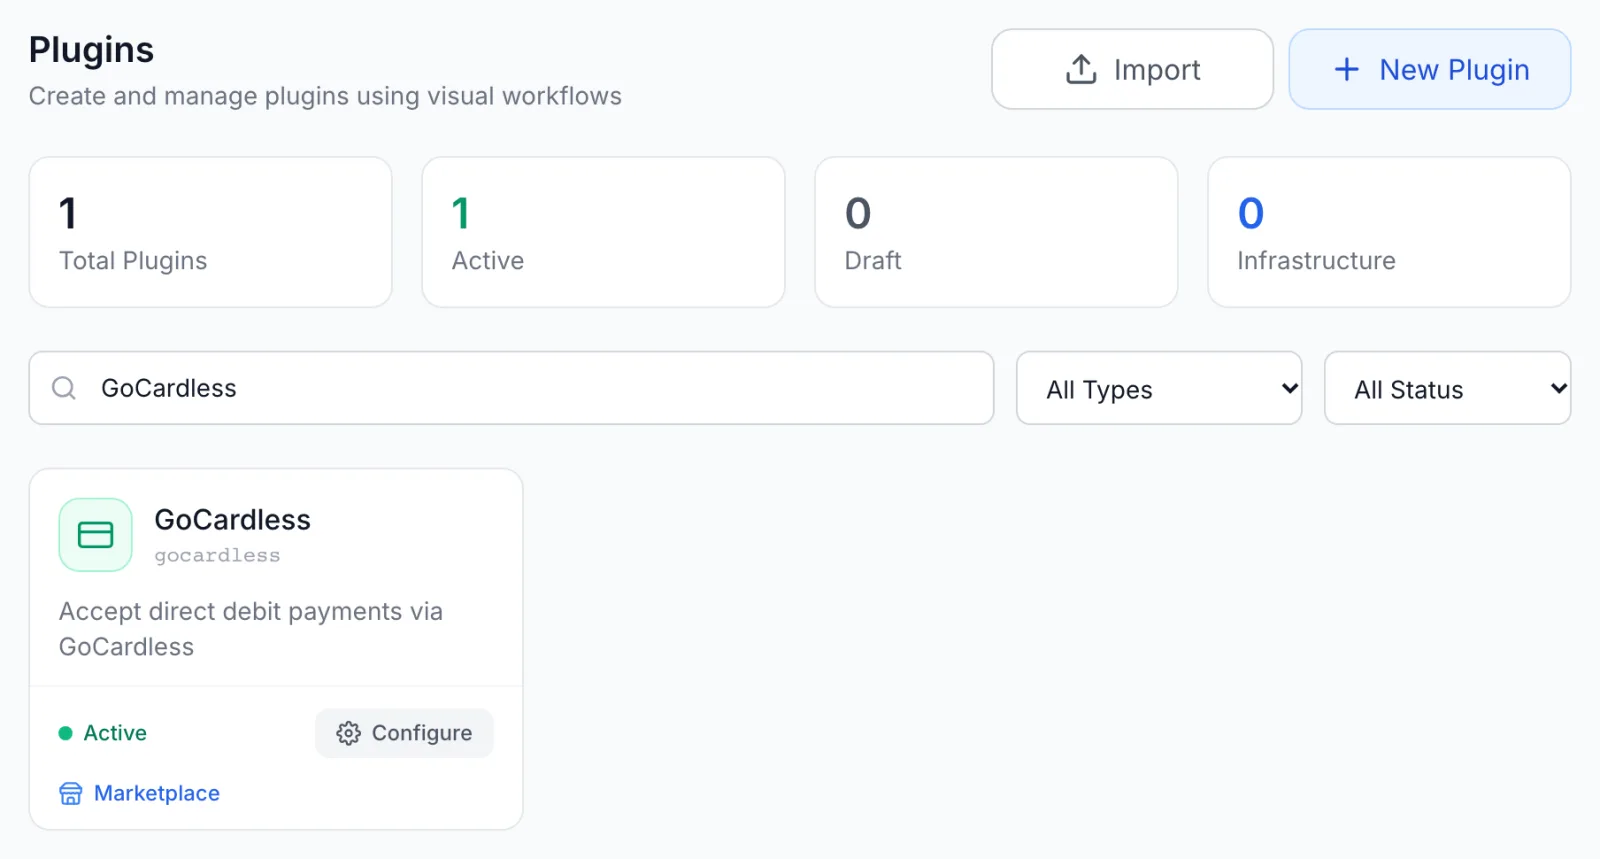
FluxBilling confirms with Plugin "GoCardless" installed and ready to use. The plugin is switched on straight away and appears under Settings → Integrations → Plugins, marked Active. Customers do not see GoCardless at checkout yet: a gateway is offered only once its access token is saved.
Step 3: Enter the access token
- Open Settings → Integrations → Plugins.
- On the GoCardless card, click Configure. The dialog opens on the Settings tab.
- Fill in the fields below. Leave Webhook Secret empty for now; you get it in step 4.
- Click Save Configuration. FluxBilling shows Configuration saved successfully.
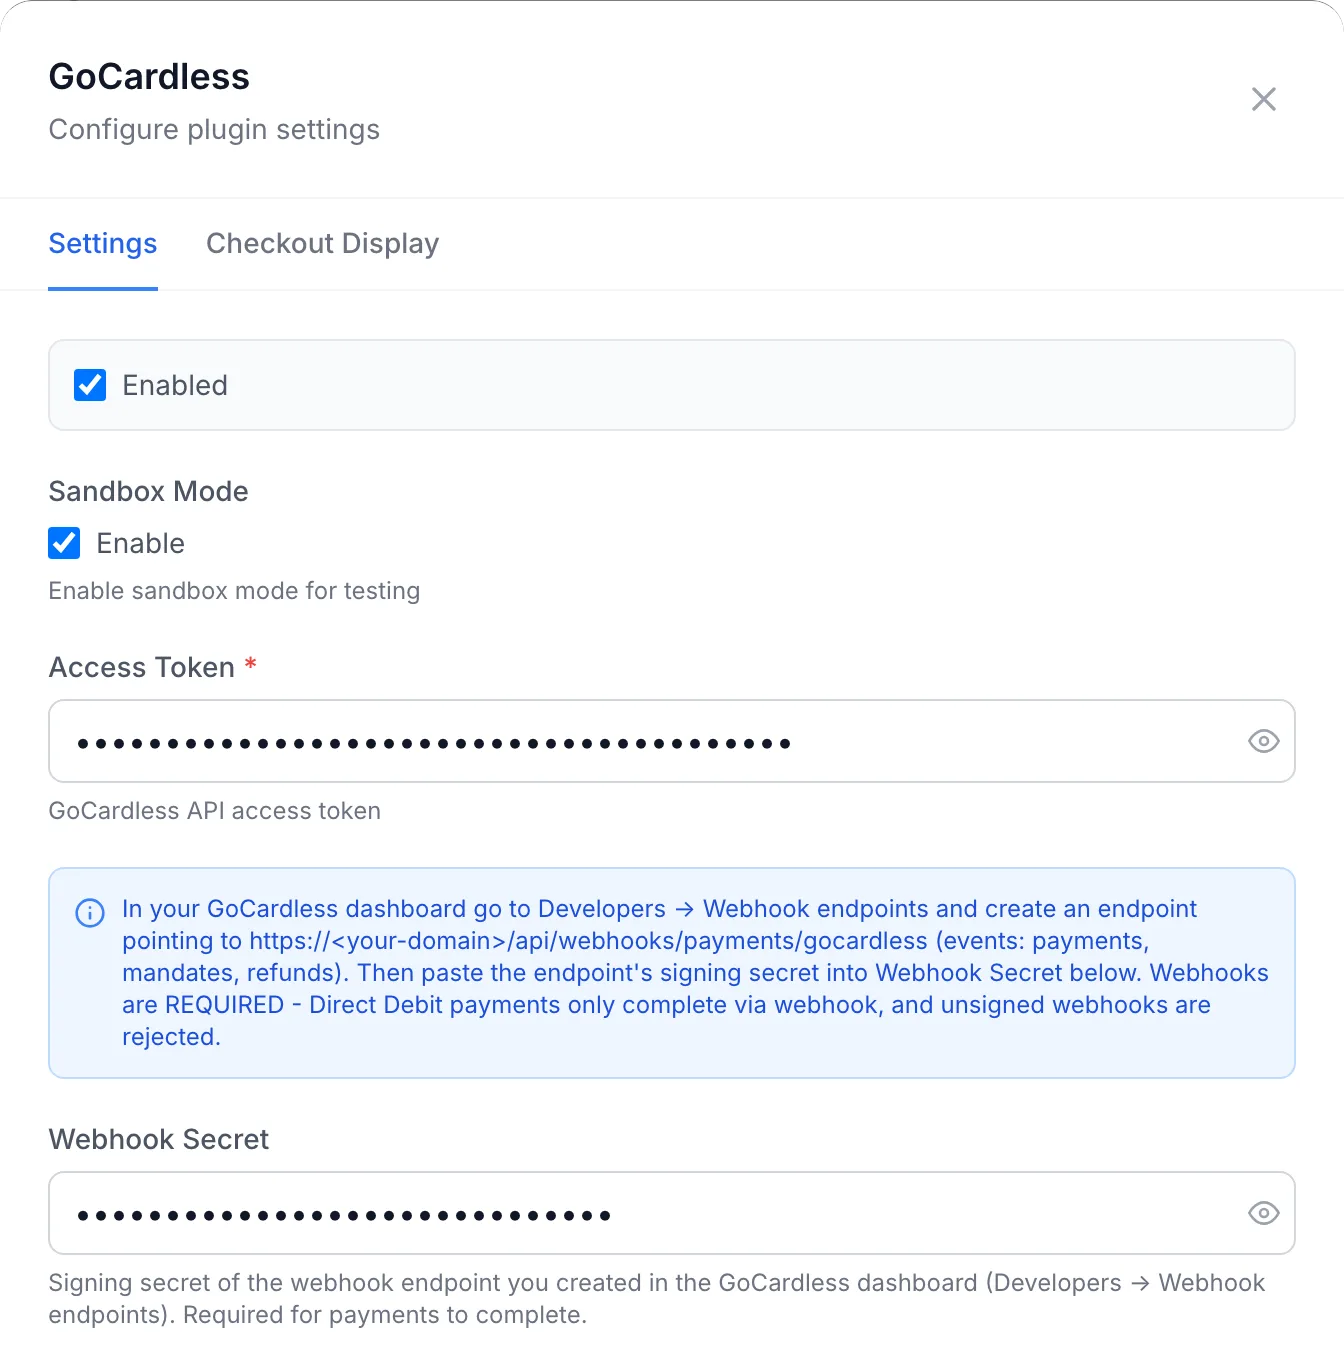
| Field | Required | What it does |
|---|---|---|
| Enabled | Yes, to take payments | Offers GoCardless at checkout. Untick it to hide the gateway without removing its settings. |
| Sandbox Mode (Enable) | No | Ticked: the plugin talks to the GoCardless sandbox, where no real money moves. Unticked: it talks to your live GoCardless account. The access token and webhook secret must come from the same environment. It is ticked when you first open the dialog; untick it when you go live. |
| Access Token | Yes | The read-write token from step 1. |
| Blue information box | - | Not a field. It explains the webhook setup in step 4. |
| Webhook Secret | For payments to complete | The secret of the webhook endpoint you create in GoCardless in step 4. FluxBilling uses it to check that each webhook really comes from GoCardless. |
The access token and webhook secret are stored encrypted. The dialog opens with the stored values filled in and the secrets hidden; to change one, type the new value over it. If the Access Token field is empty when you save, FluxBilling saves the form but shows Saved, but the plugin is not configured until these are fixed: Access Token is required.
The dialog has no connection test. The quickest check is a sandbox payment: see step 6.
Step 4: Create the webhook endpoint in GoCardless
Webhooks are not optional for this plugin. A Direct Debit payment is collected days after the customer authorises it, and FluxBilling learns the result from GoCardless's webhook. Webhooks that are not signed with the endpoint's secret are refused.
- In the Configure dialog, find the box Webhook configuration required. It shows the exact webhook address of your panel. Click Copy URL.
- In the GoCardless dashboard, open Developers → Webhook endpoints and create a webhook endpoint. Paste the URL and give the endpoint a name.
- Open the new endpoint and copy its secret.
- Back in FluxBilling, paste it into Webhook Secret and click Save Configuration.
GoCardless describes the webhook screens in Stay up to date with webhooks and the signature in its webhooks reference. Each endpoint has its own secret, so if you create a second endpoint, use that endpoint's secret.
The webhook box in the Configure dialog also shows what FluxBilling has seen on that address, for example No deliveries received yet, Receiving deliveries with a count, or Deliveries failing, and the time of the last delivery. To check the setup, use Send test webhook in the GoCardless dashboard and reopen the dialog.
Step 5: Check how GoCardless appears at checkout
Open Settings → Financial → Payment Gateways. Every installed gateway has a card there with an Enabled or Disabled badge and a switch. The switch turns the GoCardless plugin itself on or off.

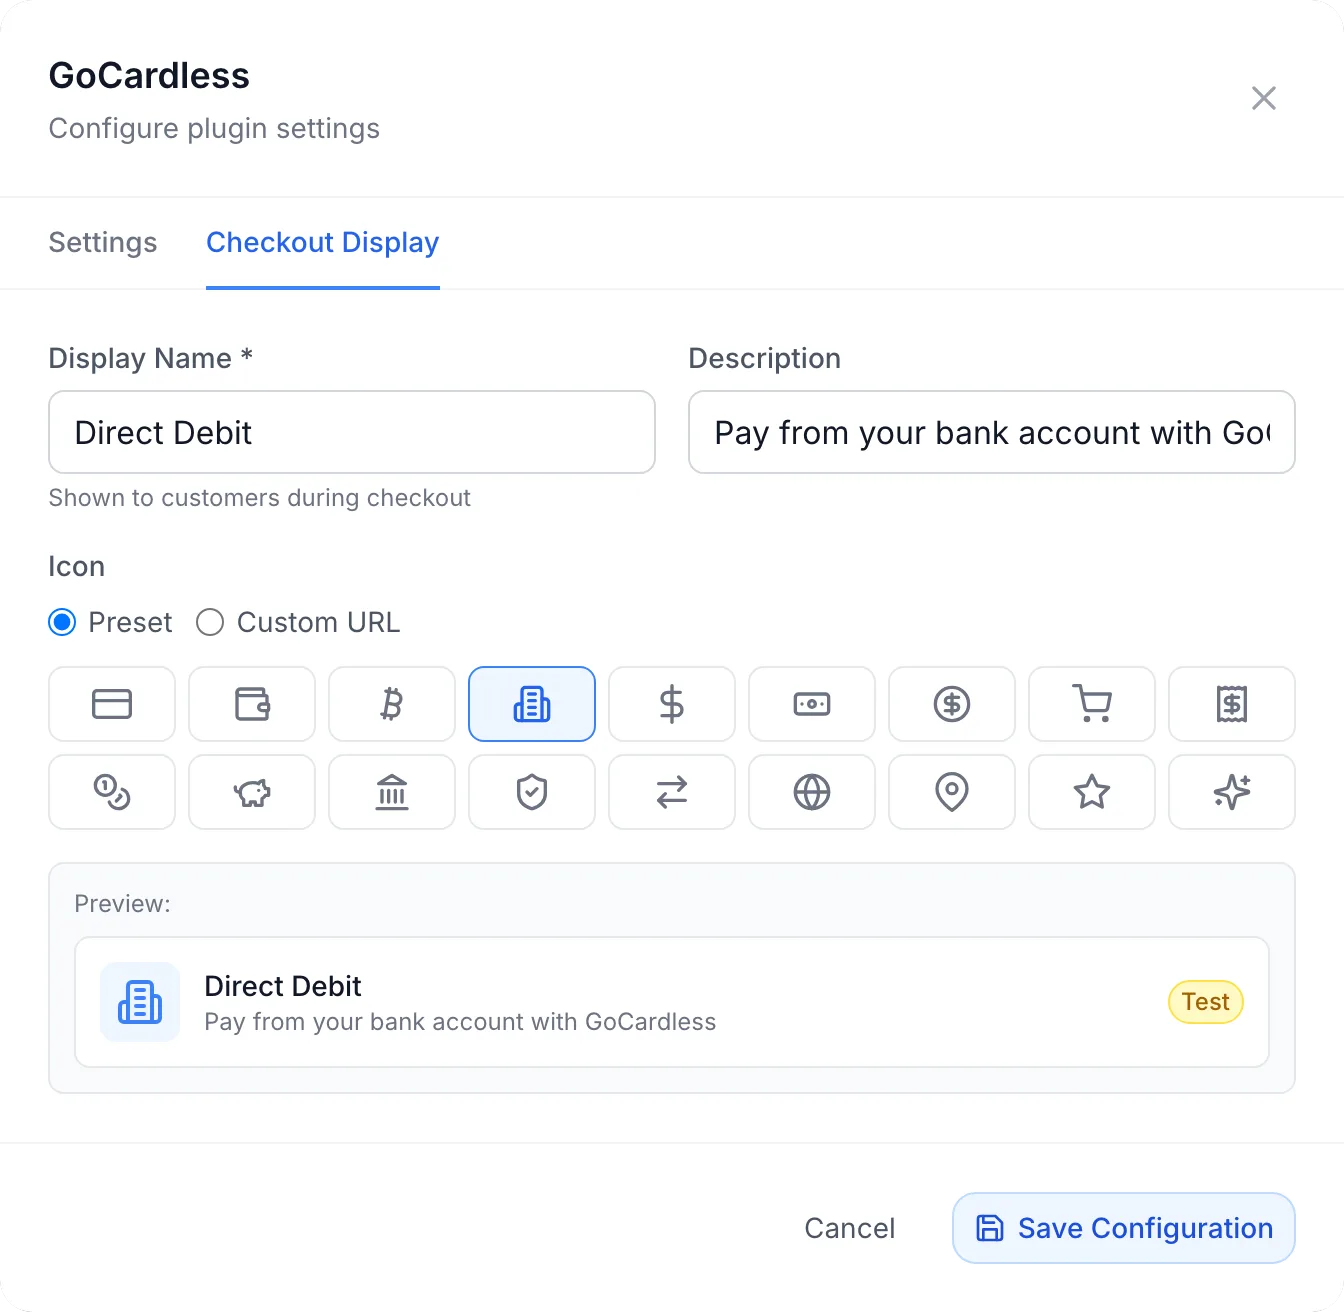
To change what customers see, open the plugin's Configure dialog again and switch to the Checkout Display tab:
- Display Name: the name in the list of payment methods, for example Direct Debit.
- Description: an optional line under the name, for example Pay from your bank account.
- Icon: a preset icon or the address of your own image.
The Preview shows the result. While Sandbox Mode is on, the preview carries a Test label.
GoCardless is not tied to products or categories. Once it is configured and enabled, it is offered for every invoice, order and credit top-up, next to your other gateways.
Step 6: Place a test payment
With Sandbox Mode on, pay a small invoice from a test client account. In the GoCardless sandbox no real money moves. Check that:
- the customer is sent to GoCardless and back to the client area;
- the webhook box in the Configure dialog changes to Receiving deliveries;
- the invoice turns paid once GoCardless confirms the payment.
What your customers see
Paying an invoice
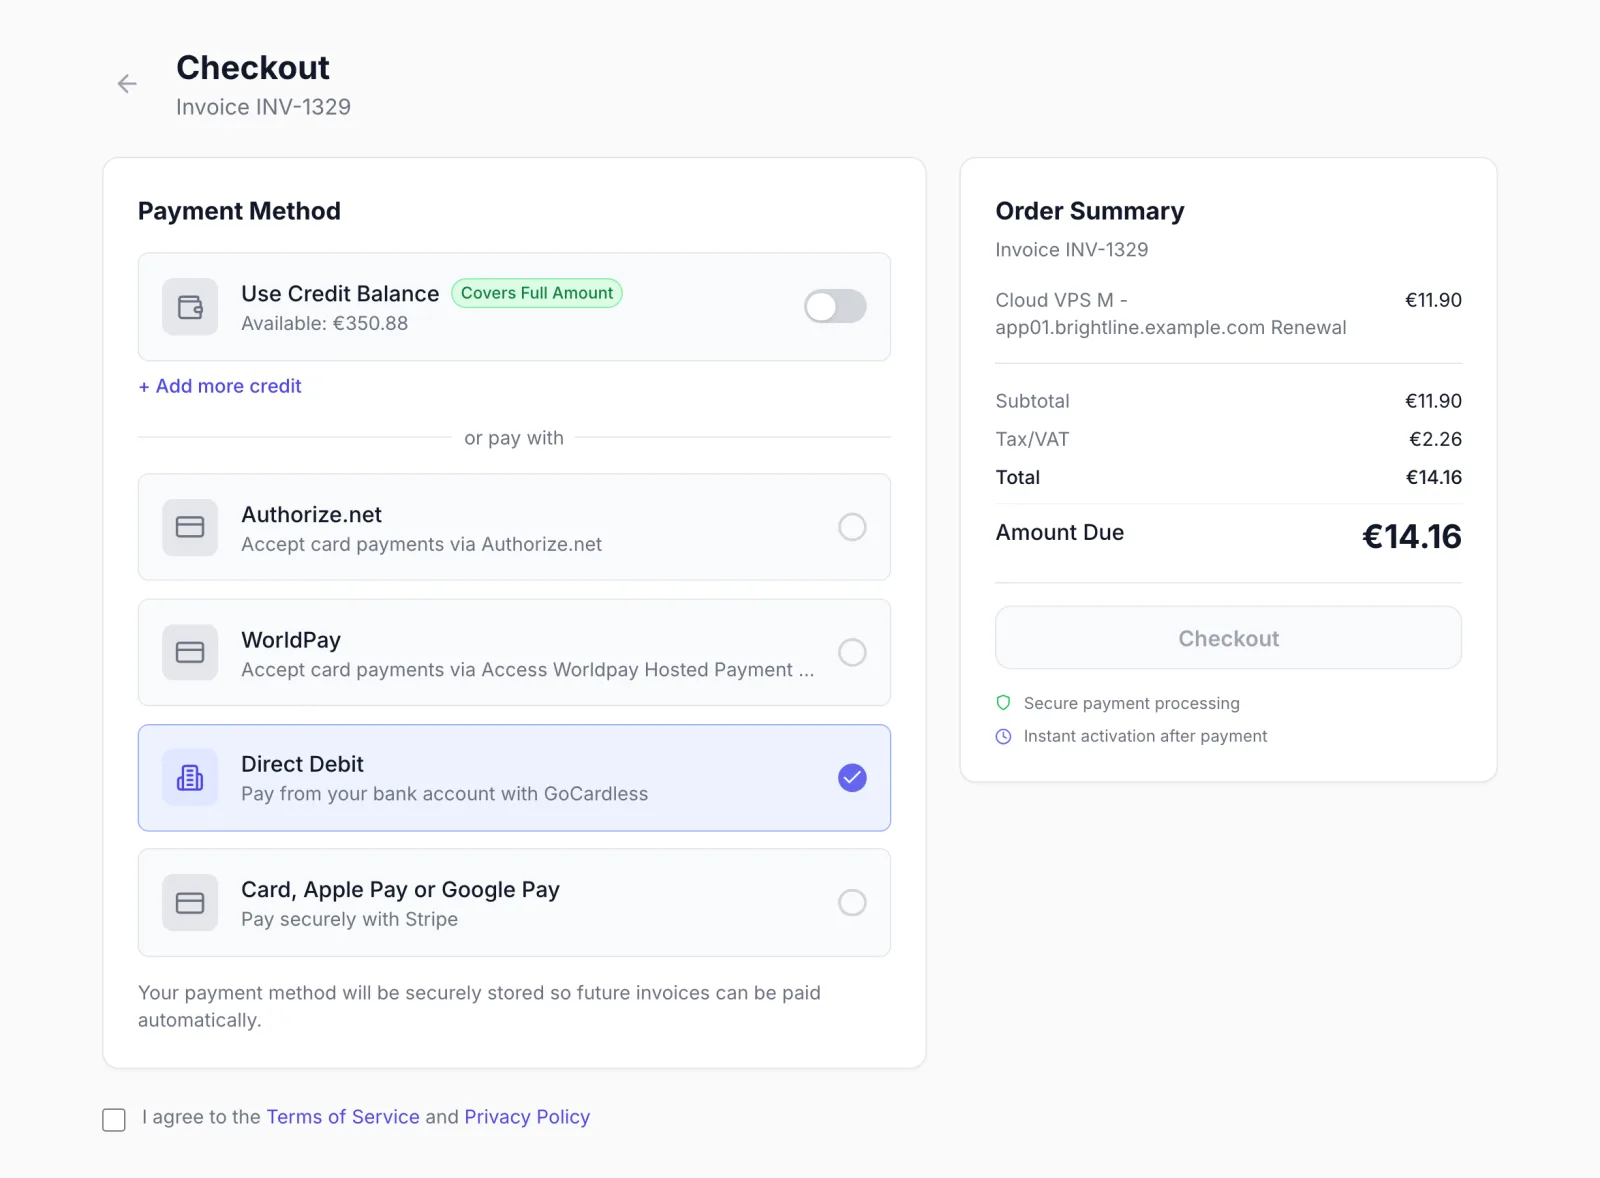
- The customer chooses GoCardless (under the display name you set) on the checkout page and continues.
- FluxBilling sends them to GoCardless's hosted payment page. There they enter their name, email and bank details and authorise the Direct Debit mandate together with this payment.
- GoCardless sends them back to the FluxBilling client area. Because a Direct Debit is not collected instantly, they usually see Payment is being processed. This may take a moment... and then Payment is still processing. Please check back shortly. The invoice stays unpaid for now.
- When GoCardless confirms the payment, the invoice is marked paid, the usual paid-invoice emails go out and any service on the order is set up. With GoCardless this normally takes several working days after the mandate is authorised.
If the customer leaves the GoCardless page without finishing, they come back to FluxBilling and can pick another payment method.
Saving the mandate for future invoices
GoCardless supports saved payment methods. When a payment is saved, FluxBilling stores the customer's mandate as Direct Debit (GoCardless), Bank Direct Debit, and can collect later invoices against it without sending the customer to GoCardless again.
- With Require saving the payment method switched on under Settings → Billing (Auto-Payment for Renewals), checkout shows a notice that the payment method will be stored, and every GoCardless checkout saves the mandate. With it off, the customer decides with the tick-box Save this payment method for future purchases.
- Customers can also add a mandate without paying anything: in the client area, Settings → Payment Methods → Add payment method, choose GoCardless and authorise the mandate at GoCardless. On return they see Payment method saved — future invoices can now be paid automatically.
- A mandate saved during checkout is stored once GoCardless confirms the first payment, not at the moment the customer returns from the payment page. A mandate added from Add payment method is stored when the customer returns.
- When a customer deletes the saved method in their profile, FluxBilling also cancels the mandate in GoCardless.
Automatic collection of renewals
Renewal invoices are charged to a saved mandate by FluxBilling's auto-payment, set under Settings → Billing in the card Auto-Payment for Renewals: Enable Auto-Payment, Days Before Due, Max Retries and Retry Interval. FluxBilling creates the payment against the mandate in GoCardless; the invoice is marked paid when GoCardless confirms it, a few working days later. Plan for that delay when you choose Days Before Due, so the money arrives before the due date and your suspension rules.
Payment lifecycle
FluxBilling follows the events GoCardless sends to the webhook:
| GoCardless event | In FluxBilling |
|---|---|
Payment confirmed or paid_out | The payment is completed and the invoice is marked paid. If the customer chose to save the method, the mandate is stored. |
Payment failed | The payment is marked failed, with the reason GoCardless gives. The invoice stays unpaid. |
Payment cancelled | The payment is marked failed. The invoice stays unpaid. |
Payment charged_back | The payment is marked disputed and the invoice is put on hold for staff to review. |
Mandate cancelled, expired or failed | The saved Direct Debit method is switched off, so auto-payment stops using it and moves to the customer's next saved method if there is one. |
Refund created | The payment is recorded as refunded. A refund you made from FluxBilling is recognised and not booked twice. |
Each GoCardless payment in FluxBilling carries the GoCardless payment ID (it starts with PM) once the payment is confirmed, so you can find it in the GoCardless dashboard. While it is still waiting, the row carries the ID of the billing request (it starts with BRQ).
A payment GoCardless has not reported on stays pending. FluxBilling also asks GoCardless about pending payments from time to time, and gives up on one only after 21 days without a result, which leaves room for mandate setup and collection.
Refunds
You can refund a GoCardless payment from the invoice in the admin panel: open the invoice, click Refund, choose Via Gateway under Refund Method, and enter an amount, or leave it empty for a full refund. Partial refunds are supported, and a second partial refund of the same payment is possible as long as something is left to refund. FluxBilling shows Refund processed via gateway when GoCardless accepts it.
- GoCardless must allow refunds on your account. They are off by default; an account admin can enable them in the GoCardless dashboard or ask GoCardless support. See Refund a payment.
- GoCardless can refuse a refund, for example for a payment that is too recent. FluxBilling then shows GoCardless's own message.
- Only a confirmed payment can be refunded. A payment that is still pending cannot.
- Make refunds from FluxBilling rather than from the GoCardless dashboard, so the refunded amount is recorded on the invoice exactly.
Going live
- In the live GoCardless dashboard, create a read-write access token and a webhook endpoint with the same URL as before.
- In FluxBilling, open Configure, switch Sandbox Mode off, replace the Access Token and Webhook Secret with the live values, and save.
- Pay a small invoice with a real bank account to check the whole path, then refund it if you like.
Switching Sandbox Mode changes the environment for every action, including refunds and charges against saved mandates. Mandates created in the sandbox do not work in live, so test customers will need to set up a new mandate.
Updating the plugin
Open Settings → Integrations → Marketplace, switch to Installed and click Check for Updates. When a new version is available, click Update to v…. Your settings are kept.
Troubleshooting
| Message or symptom | What to check |
|---|---|
| GoCardless is not offered at checkout | The access token is missing, Enabled is unticked in the Configure dialog, or the plugin is switched off under Settings → Financial → Payment Gateways. |
| Saved, but the plugin is not configured until these are fixed: Access Token is required | Enter the access token and save again. |
| Failed to create GoCardless billing request, or a message from GoCardless when the customer clicks to pay | GoCardless refused to start the payment. Check that the token is a read-write token from the same environment as Sandbox Mode (sandbox token with it ticked, live token with it unticked) and has not been revoked, and that the charge currency (the invoice currency, or your base currency when the amount is converted) is one your GoCardless account can collect. GoCardless's own message is shown when it gives one. |
| Minimum payment amount is 1 … | The amount to pay is below the plugin's minimum of 1 in the charge currency. |
| The customer paid, but the invoice stays unpaid for more than a week | Check the webhook box in the Configure dialog. No deliveries received yet: the endpoint in GoCardless is missing or points elsewhere. Deliveries failing: most often the Webhook Secret is empty or belongs to another endpoint or environment. Also look at the endpoint's delivery list in the GoCardless dashboard, where you can resend a webhook. |
| Could not verify payment with GoCardless — webhook will be retried | FluxBilling received the webhook but could not read the payment back from GoCardless, for example because the access token was changed. GoCardless retries the delivery; fix the token and the next attempt goes through. |
| Failed to create Direct Debit setup flow (customer adding a method in their profile) | The customer sees this when they choose GoCardless under Add payment method. Same checks as for the billing request: token and environment. |
| Mandate not yet authorised or billing request incomplete | The customer came back from GoCardless before the mandate was authorised. They can start Add payment method again. |
| Failed to create payment against mandate, or a GoCardless message on a renewal charge | GoCardless refused to collect against the saved mandate, for example because the mandate was cancelled at the bank. A mandate that is cancelled, expired or failed is switched off in FluxBilling when GoCardless reports it; the customer needs to set up a new one. |
| Refund failed, or a GoCardless message when refunding | Refunds may not be enabled on your GoCardless account, or GoCardless's refund rules do not allow this refund yet. See Refunds. |
| Can only refund paid invoices | The invoice is not paid yet, for example because GoCardless has not confirmed the payment. Wait until it does. |
| That payment has already been refunded in full | Nothing is left to refund on this payment. |
Limits
- Payments are not instant. An invoice paid by GoCardless is marked paid only when GoCardless confirms the collection, usually several working days later.
- Each FluxBilling panel connects to one GoCardless account and one environment (sandbox or live) at a time.
- The webhook endpoint is set up by hand in GoCardless. The plugin does not create it for you.
- The plugin uses GoCardless's hosted payment pages. Customers enter their bank details at GoCardless, never in FluxBilling.
- The plugin does not use GoCardless subscriptions or instalment schedules. Recurring payments are FluxBilling renewal invoices collected against a saved mandate.
- There is no retry inside the plugin. Retries of failed renewal charges follow your Auto-Payment for Renewals settings, and any retry features of your GoCardless account apply on the GoCardless side.
- When a mandate ends, FluxBilling switches the saved method off but does not ask the customer to set up a new one. They add a new method from their profile or pay the next invoice at checkout.
- A refund is returned to the customer's bank account through GoCardless. To give account credit instead, use the To balance refund option on the invoice.
GoCardless is a trademark of GoCardless Ltd. FluxBilling is not affiliated with GoCardless Ltd.