
Software License: sell licences fulfilled by your team
Set up the Software License plugin: sell Windows Server, SQL Server, CALs and Microsoft 365 licences, add unit add-ons and deliver encrypted keys to customers.
The Software License plugin lets you sell software licences that your team fulfils by hand, such as Windows Server, SQL Server, Windows Server CALs, RDS CALs, Microsoft 365 or any other licence you resell. FluxBilling takes the order, sends the invoice and collects the payment. When the invoice is paid, the service becomes active straight away; your staff then buy or assign the licence at your distributor or vendor portal as usual and enter the key on the service. The customer sees the licence details in the client area and reveals the key when they need it. The plugin is free and is listed in the plugin marketplace of every FluxBilling panel.
This guide covers plugin version 1.1.1. It walks through the setup in the order you do it, then explains what happens to a licence over its life and what to check when something does not work.
Who supports this integration. The plugin is built and maintained by FluxBilling. If something does not work, contact FluxBilling support at contact@fluxbilling.app or through fluxbilling.app/contact. Questions about a licence itself, its terms or its activation go to the vendor or distributor you bought it from.
What you need before you start
The plugin does not connect to any vendor. There is no API key to create, no webhook to register and nothing to configure in the plugin itself. What you need is on your side of the business:
- FluxBilling 0.0.1572 or newer. Plugin version 1.1.1 needs it.
- A way to buy or assign the licences you sell, such as a distributor account or a vendor portal. For Microsoft products, hosting companies usually license through the Services Provider License Agreement (SPLA) or resell through the Cloud Solution Provider (CSP) program. Check with your vendor which licences you may resell and to whom.
- Staff who fulfil the orders. Every paid order needs someone to obtain the licence and enter its key on the service. The plugin does not create, check or revoke licences at the vendor.
- Your prices and units. Decide one product per licence SKU, how many units (CALs, cores, seats) the product price includes, and whether customers can buy extra units.
Step 1: Install the plugin
- In the FluxBilling admin panel, open Settings (the gear icon in the top bar).
- Under Integrations, open Marketplace. Stay on the Browse tab.
- Open the Software License card and click Get for Free.
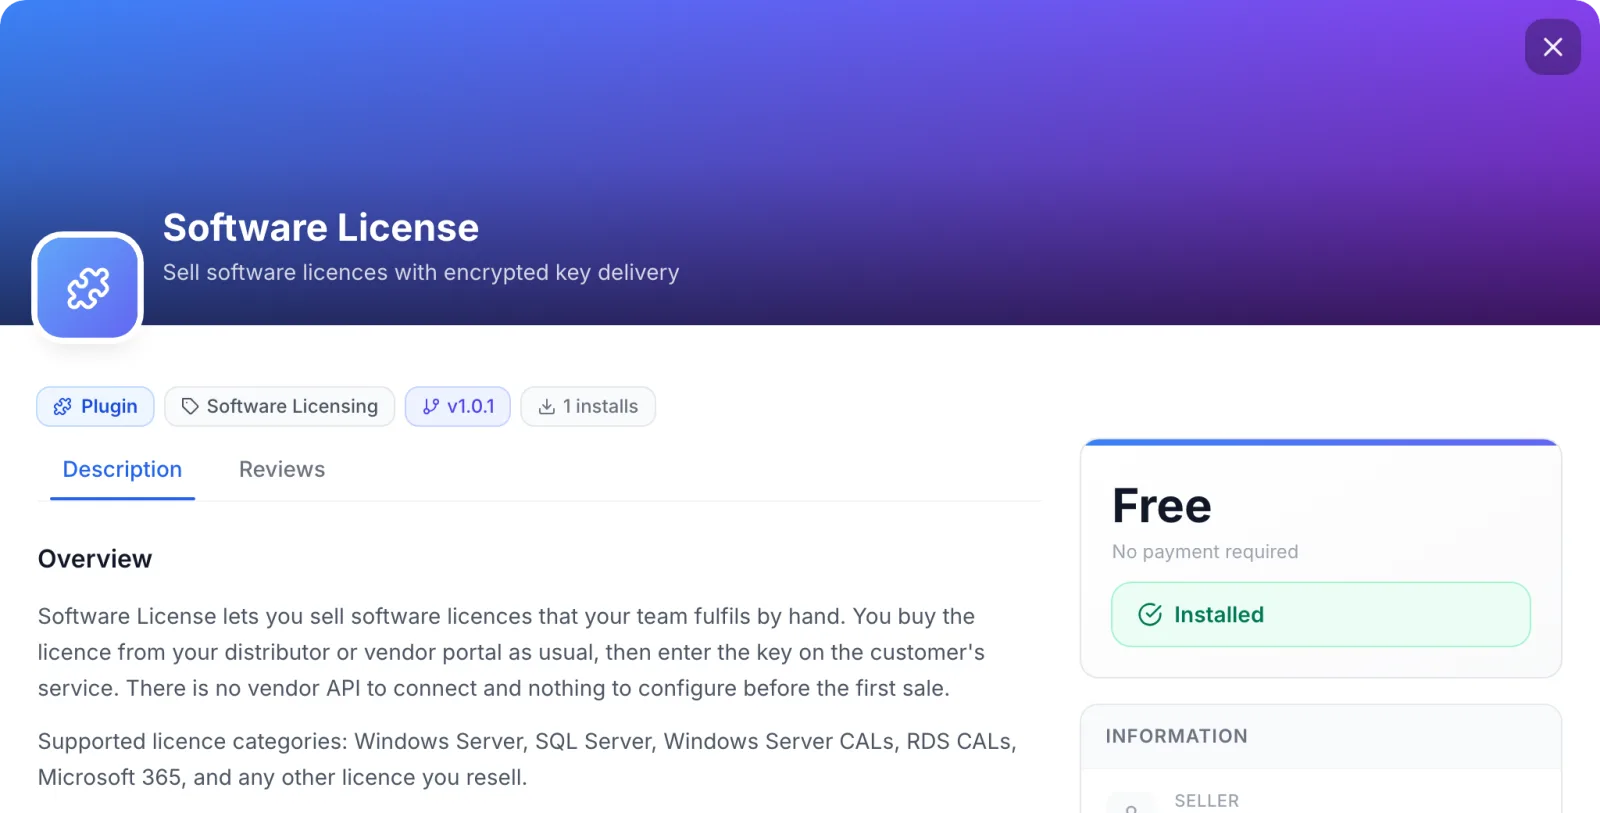
FluxBilling confirms with Plugin "Software License" installed and ready to use. The plugin is switched on straight away and appears under Settings → Integrations → Plugins as Software License.
The plugin has no connection settings. If you click Configure on its card, the dialog says No Configuration Required. Everything you set up happens on the category and the products.
Step 2: Create a category for your licences
In FluxBilling, the category decides how its products are delivered. Every product in the category is handled by the plugin you choose here.
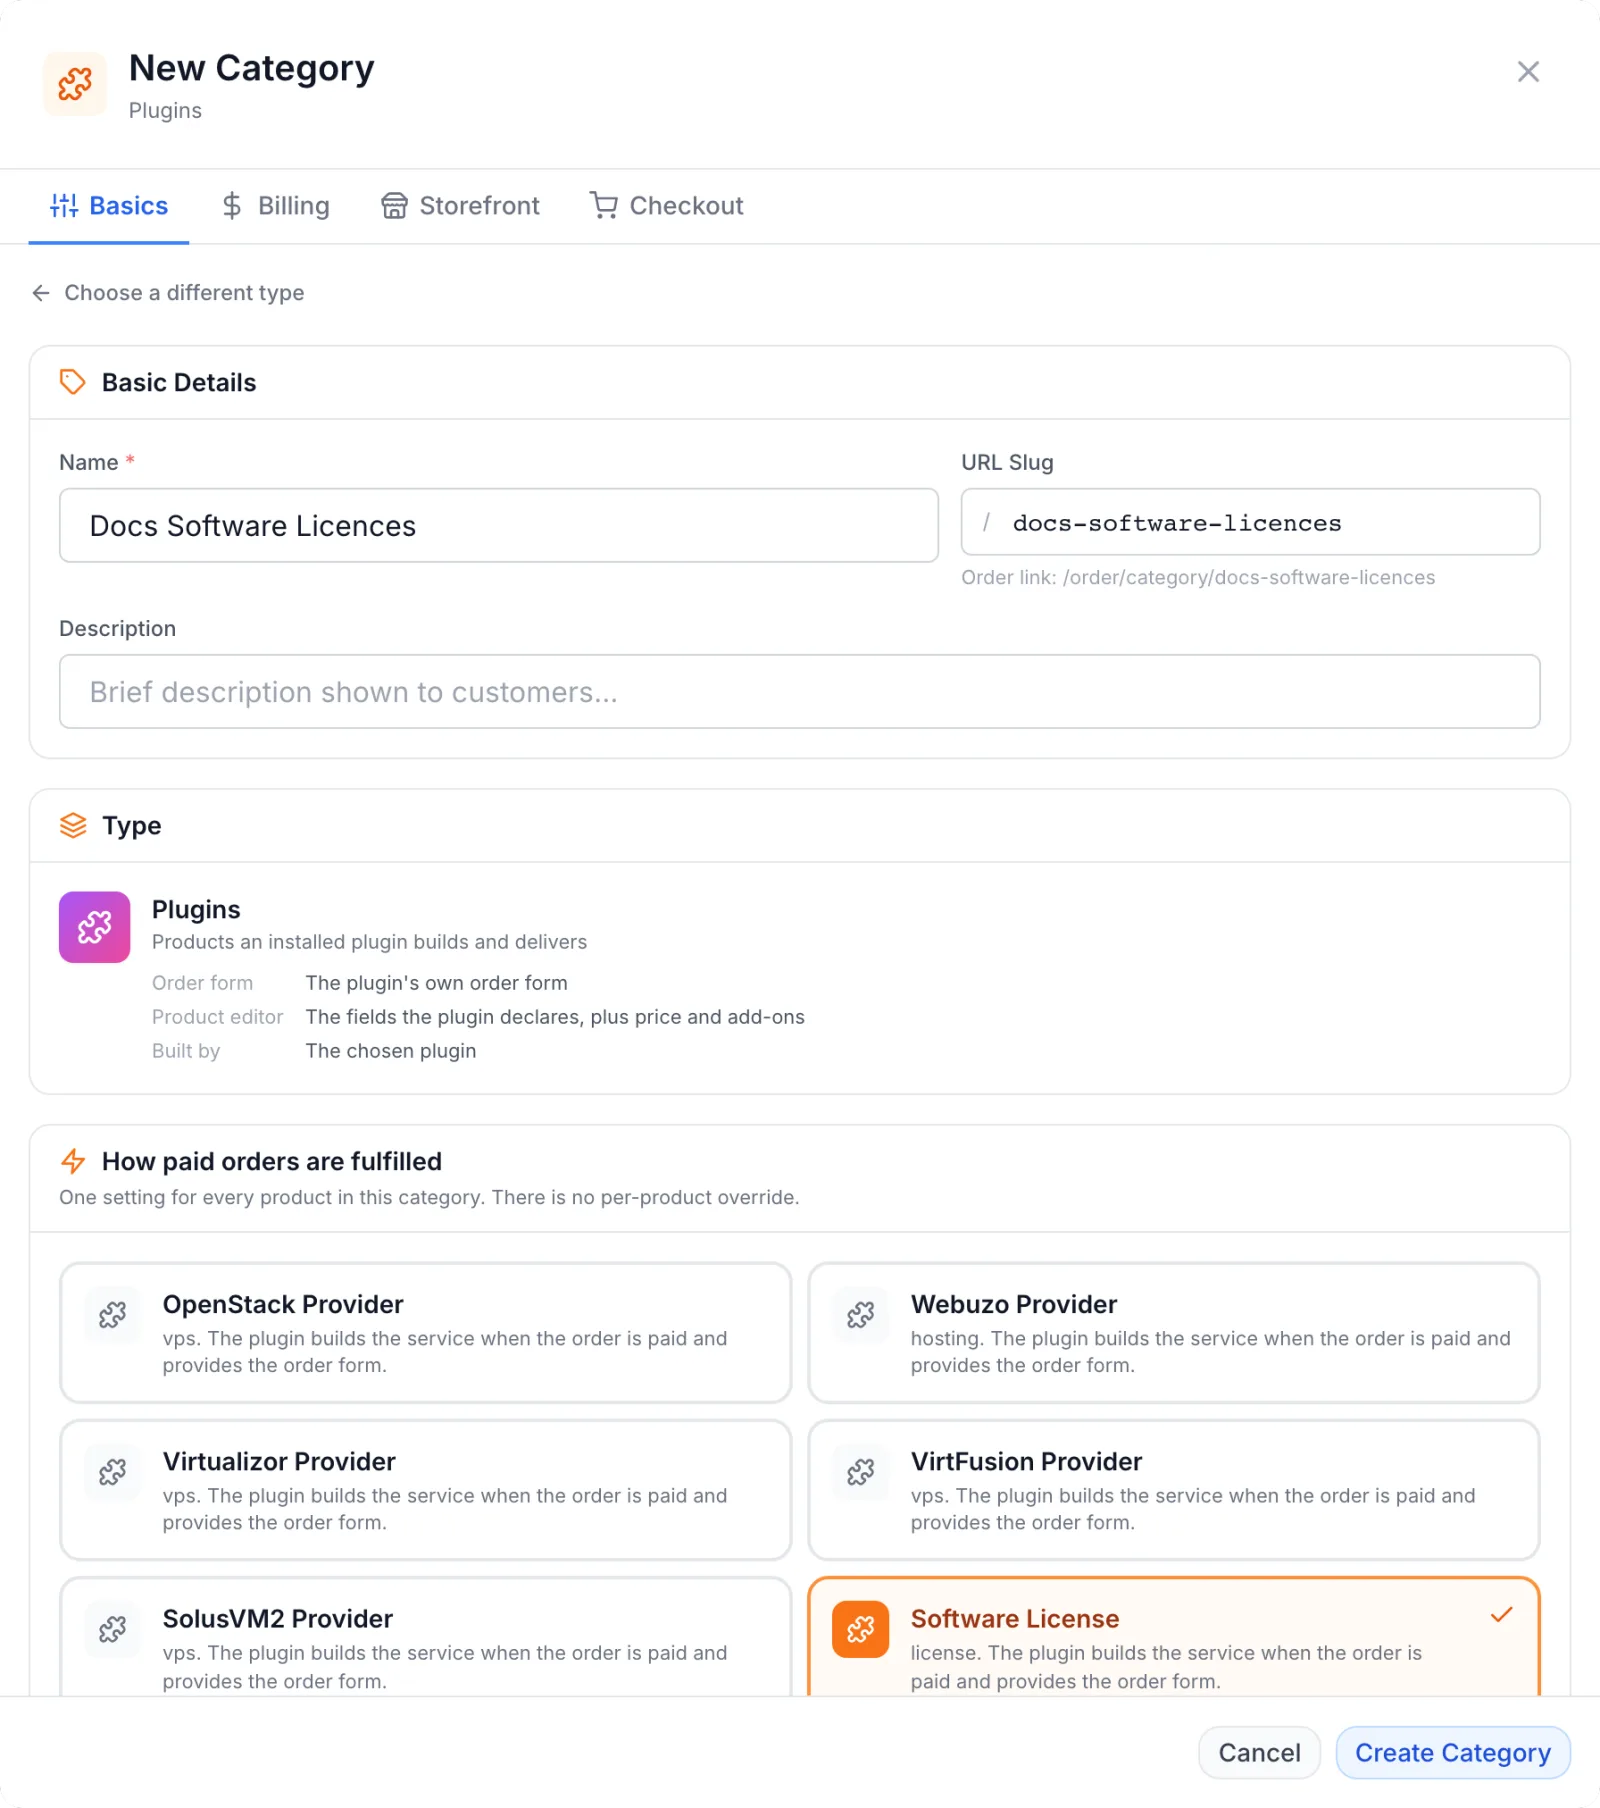
- Open Products, switch to the Categories tab and click Add Category.
- When FluxBilling asks What does this category sell?, choose Plugins.
- Enter a Name, for example Software licences. The URL slug fills in by itself.
- Under How paid orders are fulfilled, click Software License.
- Under Availability, choose Live to show the category on the order page, or Unlisted while you test.
- Click Create Category.
Step 3: Create a product for each licence
Create one product per licence SKU, for example Windows Server 2022 Standard (16 cores) or RDS CAL (per user).
- On the Products tab, click Add Product and choose the category from step 2.
- On General, enter the product name and description your customers will see. The product name is the title of the customer's licence page. The Description is shown there as About this product, unless you fill in the plugin's own About field below.
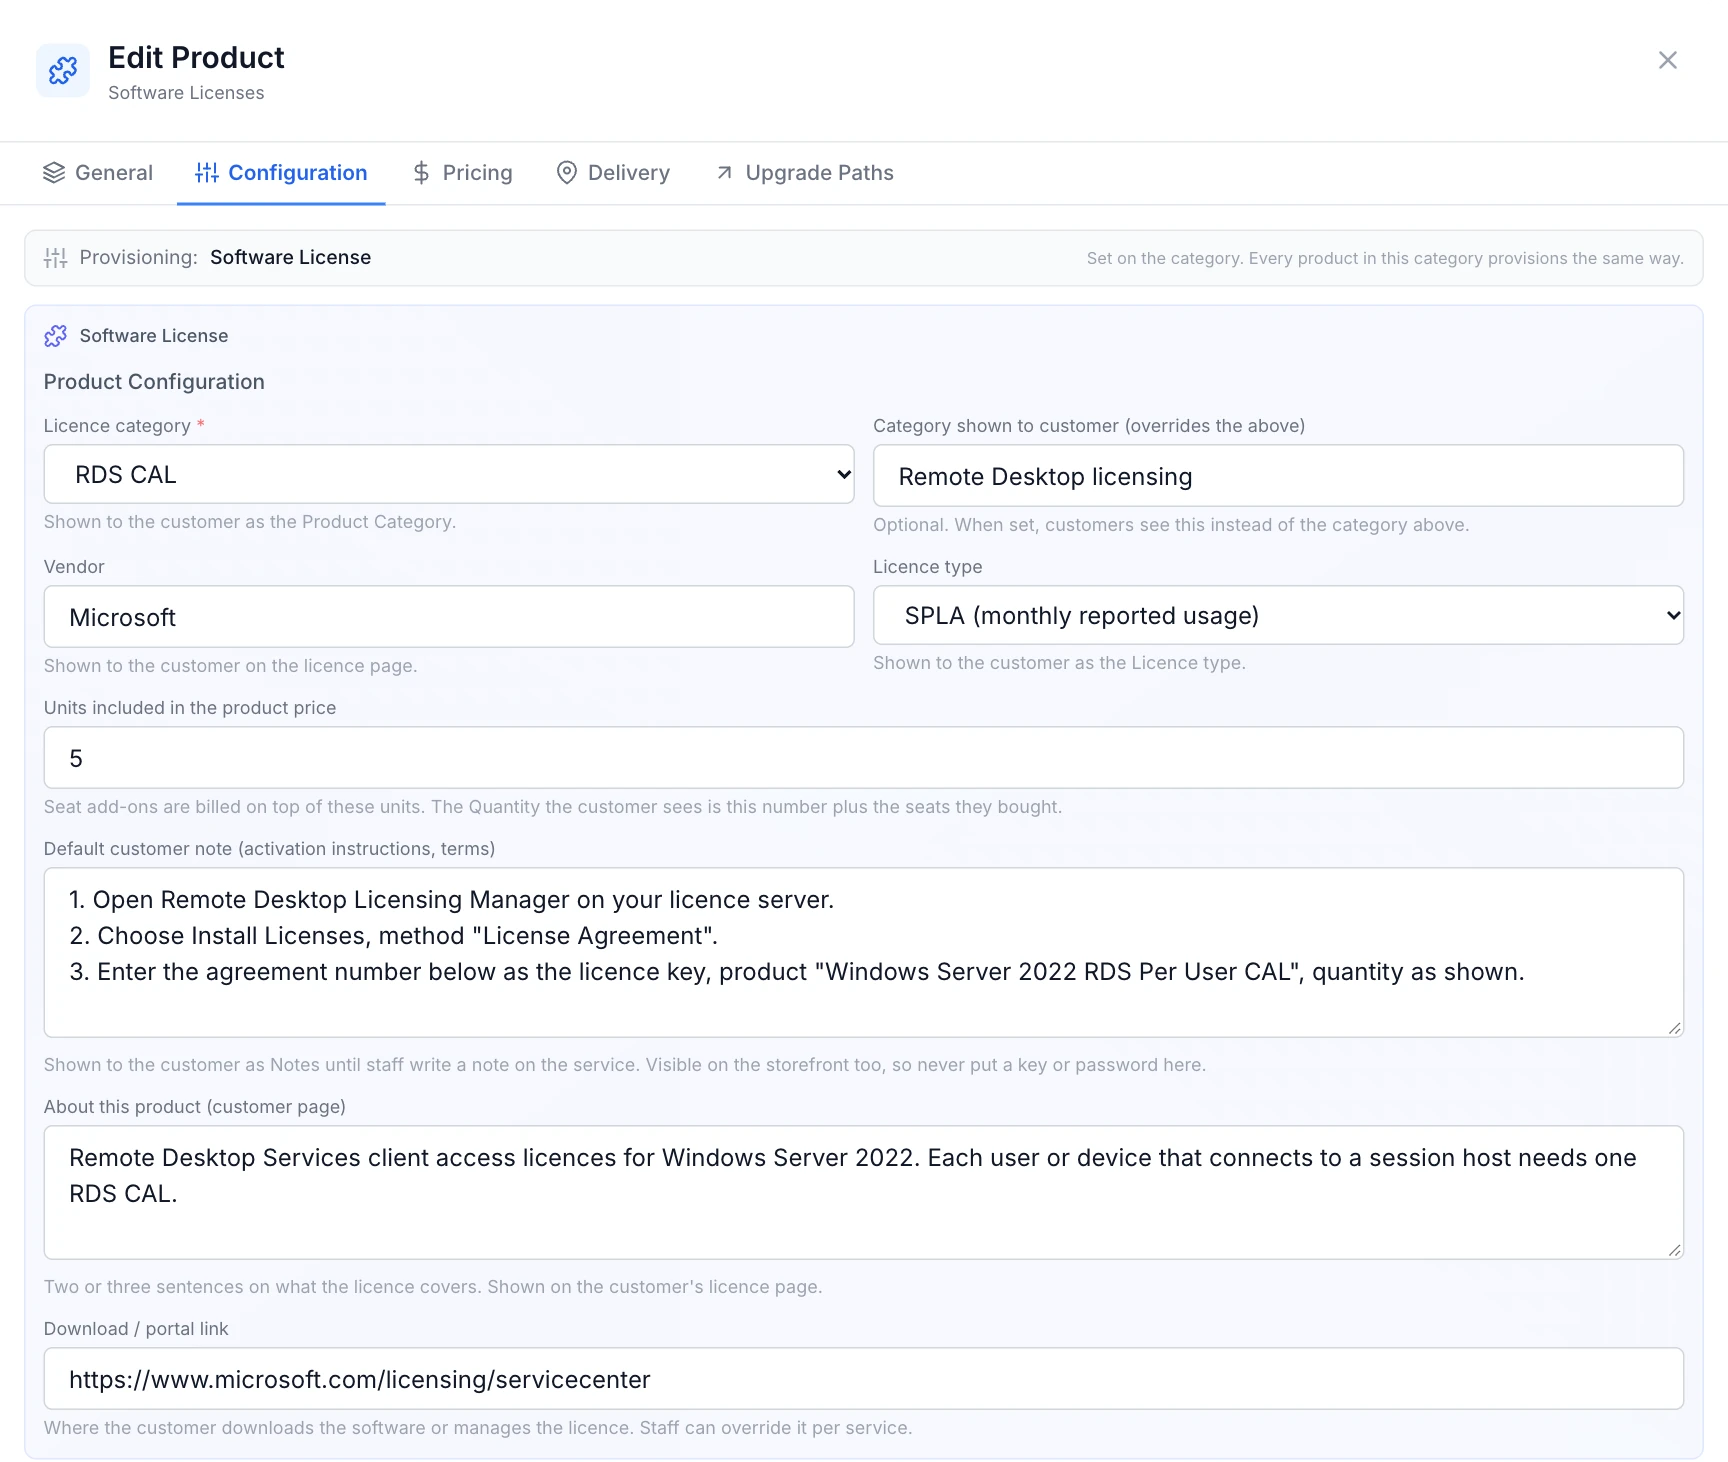
- On Configuration, fill in the fields described below.
- On Pricing, set the price and billing cycles.
- Click Create Product.
| Field | Required | What it does |
|---|---|---|
| Licence category | Yes | One of Windows Server, SQL Server, Windows Server CAL, RDS CAL, Microsoft 365 or Other. Shown to the customer as the Category. |
| Category shown to customer (overrides the above) | No | When set, customers see this text as the category instead of the licence category, for example Remote Desktop licensing. |
| Vendor | No | The software vendor, for example Microsoft. Shown to the customer on the licence page. |
| Licence type | No | Subscription (rented, ends when the service ends), Perpetual (the customer keeps it) or SPLA (monthly reported usage). Shown to the customer as the Type. |
| Units included in the product price | No | How many units (CALs, cores, seats) the product price covers. The total the customer sees is this number plus any units they buy as an add-on (step 4). |
| Default customer note (activation instructions, terms) | No | Shown to the customer as the Activation instructions until staff write a note on the service. Use it for activation steps or licence terms. Never put a key or a password here: this note is product information, visible on the storefront too. |
| About this product (customer page) | No | Two or three sentences on what the licence covers. When empty, the product's description is shown instead. |
| Download / portal link | No | Where the customer downloads the software or manages the licence, as a full address such as https://www.microsoft.com/licensing/servicecenter. Staff can change it for one service. |
Step 4 (optional): Sell extra units
To let customers buy more CALs, core packs or seats on top of the units included in the product price, create an add-on and attach it to your licence products.
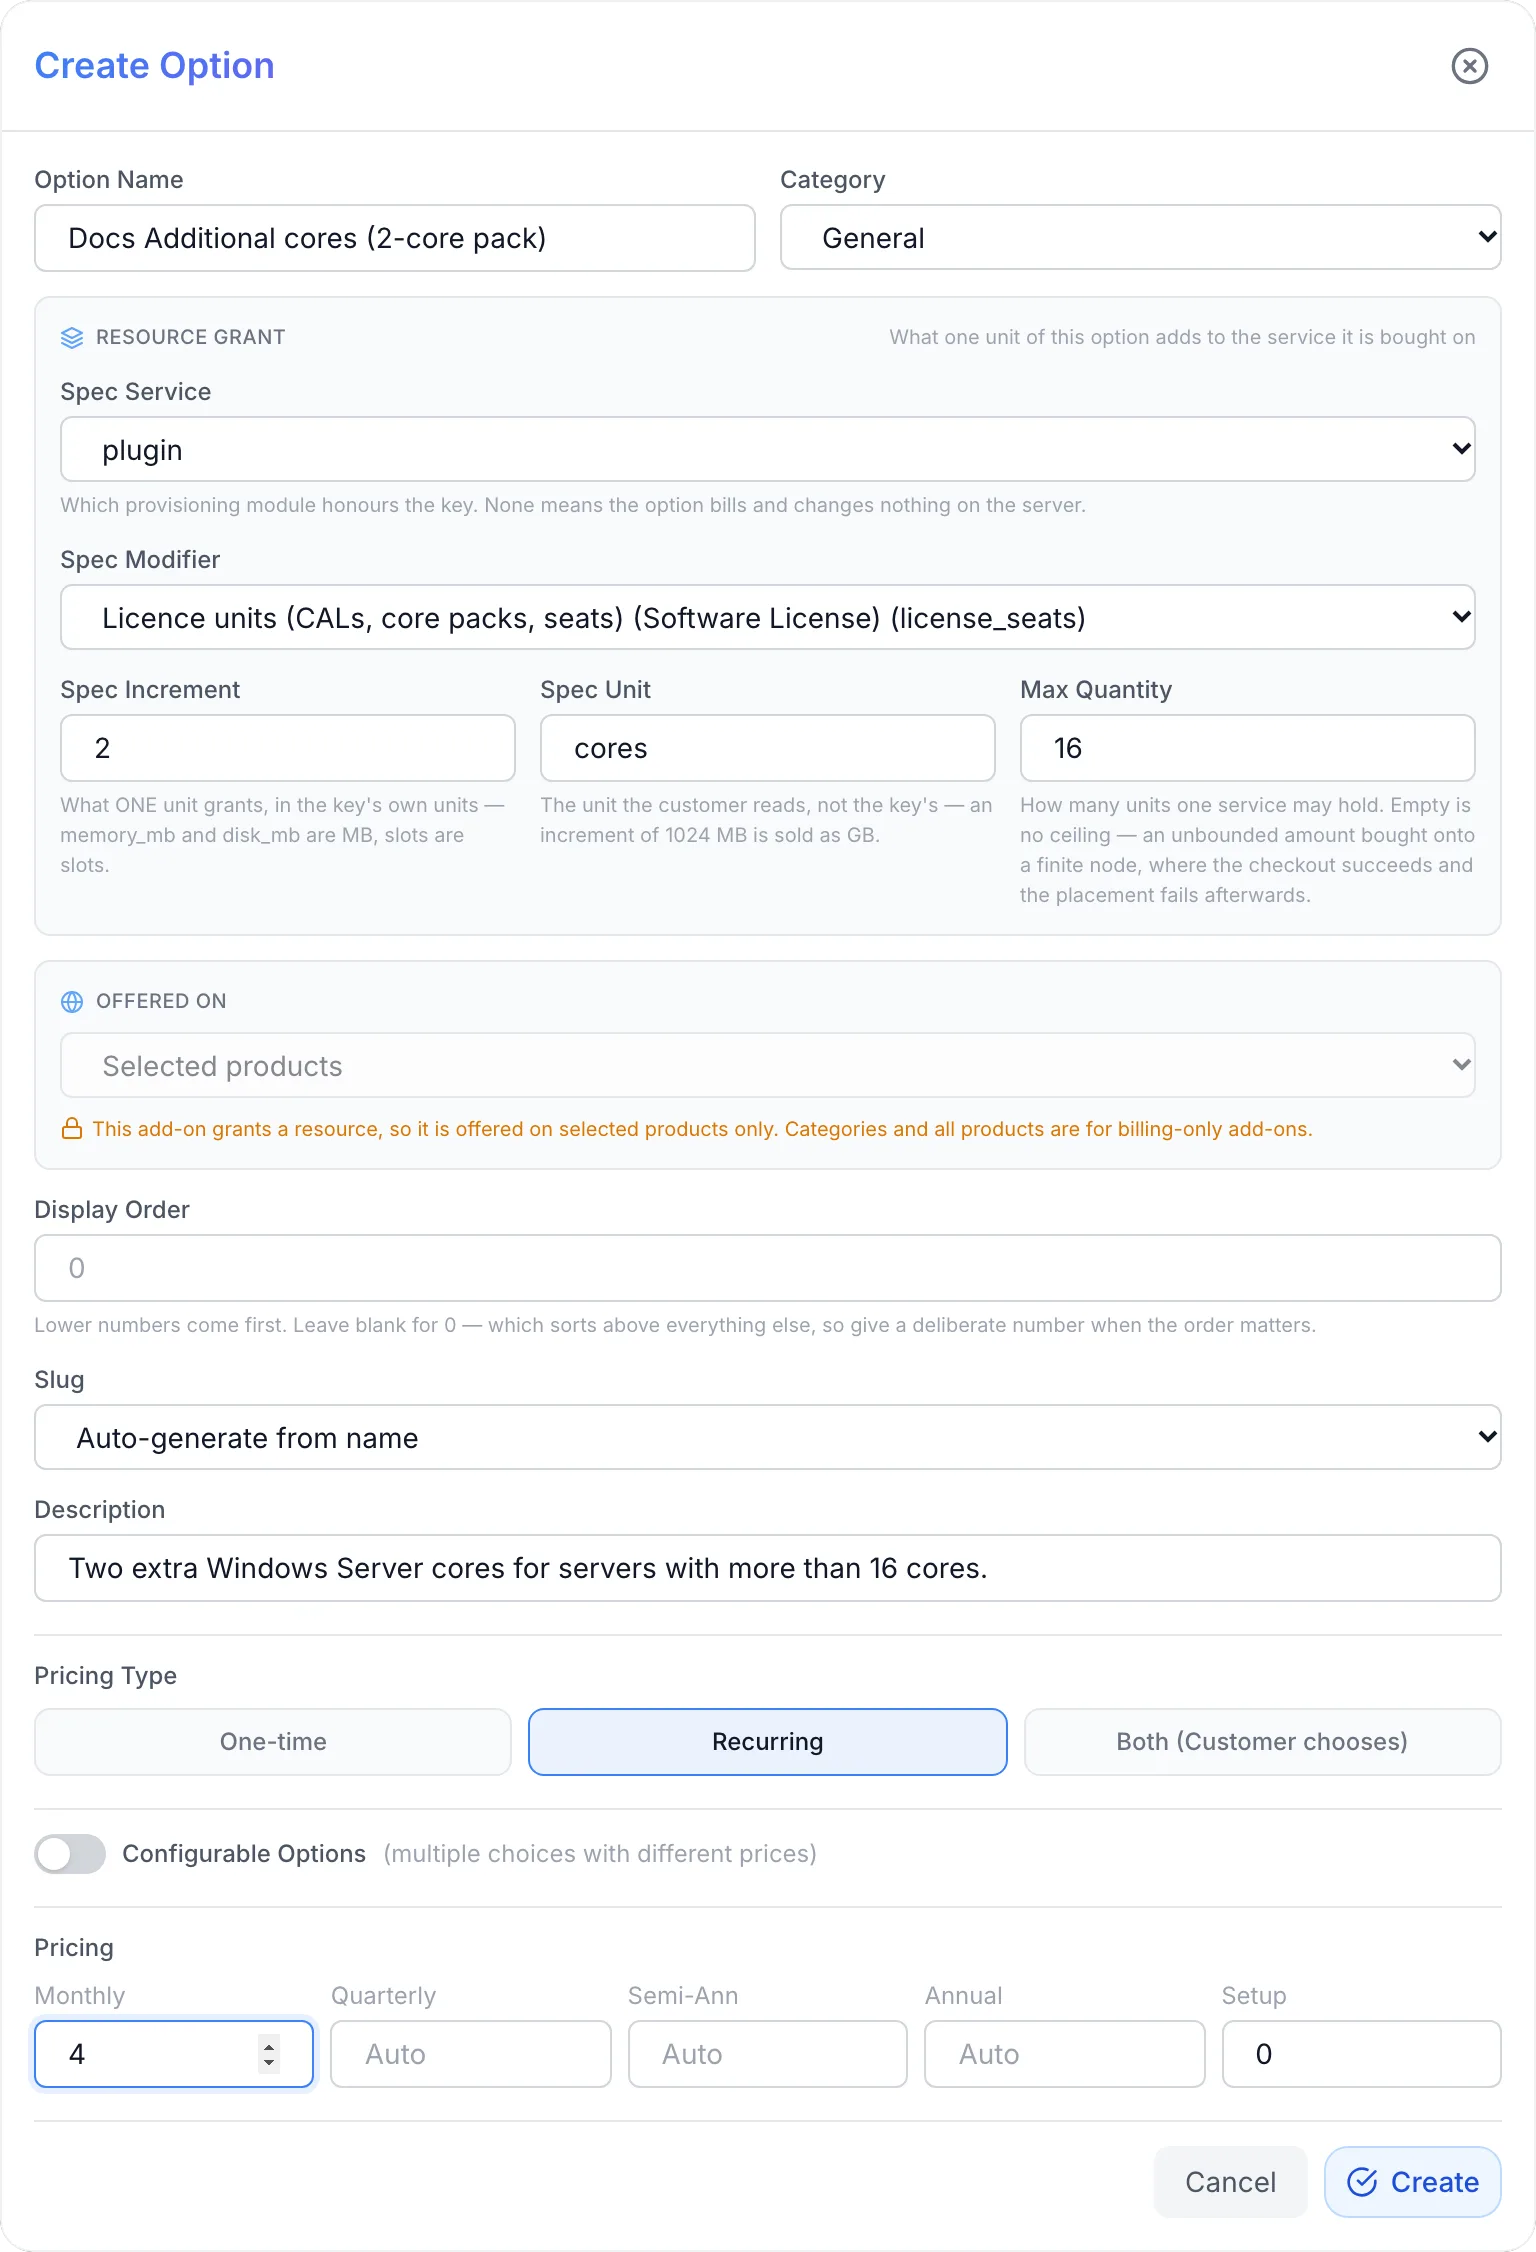
- Open Products, switch to the Options tab and click Add Option.
- Enter an Option Name, for example Additional RDS CALs or Additional cores (2-core pack).
- Under Resource Grant, set Spec Service to plugin.
- Set Spec Modifier to Licence units (CALs, core packs, seats) (Software License) (license_seats). This is the key the plugin counts. An add-on without it is billed but is not added to the Quantity.
- Set Spec Increment to the number of units one purchase adds:
1for single CALs,2for a 2-core pack,5for a 5-pack. Spec Unit is the word the customer reads, such as CALs or cores. - Optionally set Max Quantity, the most packs one service may hold.
- Under Offered On, keep Selected products. An add-on that grants a resource can only be offered on selected products.
- Choose the Pricing Type (usually Recurring), enter the price of one pack under Pricing and click Create.
- Open each licence product, go to its Pricing tab and select the add-on under Available Add-ons. Click Update Product.
On the product's Pricing tab, FluxBilling lists license_seats under Plugin expects these options. That line looks for an add-on whose Slug is license_seats; if you want it to show the add-on as attached, choose license_seats — Software License as the add-on's Slug. What the plugin actually counts is the Spec Modifier, so an add-on with another slug works the same way.
The Quantity shown on the service is worked out each time it is displayed: the product's included units plus the active add-on units on that service, each pack counted at its Spec Increment. A 5-pack bought twice counts as 10 units. A cancelled add-on no longer counts.
Step 5: Place a test order
Place an order for each product before you sell it, for example from a test client account. Besides the licence and billing cycle, the order form asks two optional questions:
- Licensed to: the company or Microsoft 365 organisation the licence is for, up to 200 characters.
- Server this licence is for (hostname or IP): up to 255 characters.
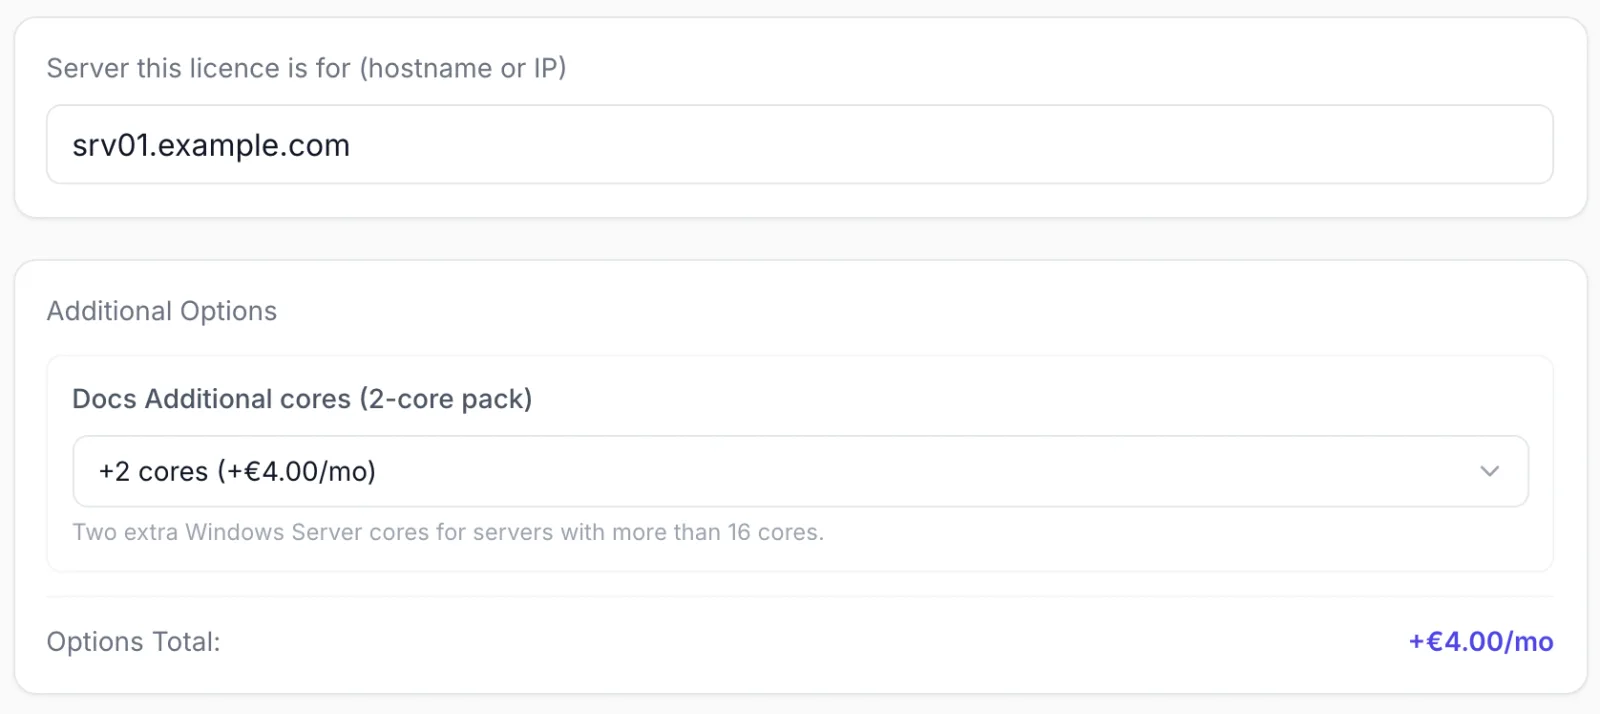
The answers become the service's Licensed To and Assigned Server. Staff can correct both later.
What happens when the invoice is paid
With Auto Provisioning switched on (see Billing lifecycle), the service becomes Active as soon as the invoice is paid. The plugin calls nothing and generates no password. Add-on units bought with the order are active at the same moment.
With the default email templates, the customer gets the Service Activated (Details) email, Your … is now active, listing the customer-visible licence details that are filled in at that moment, such as the category, vendor, licence type, quantity, licensed to, assigned server and the activation instructions. Staff-only fields are never included. At this point no key has been entered yet, so the email carries none.
Step 6: Enter the licence key
Once you have the licence from your vendor, put it on the service:
- Open the service in the admin panel. The Licence details card lists every field.
- Click Edit.
- Paste the key into Licence Key. Fill in or correct any other field if needed, for example Activation, Licensed To or Notes.
- Click Save details. FluxBilling confirms with Service details saved.
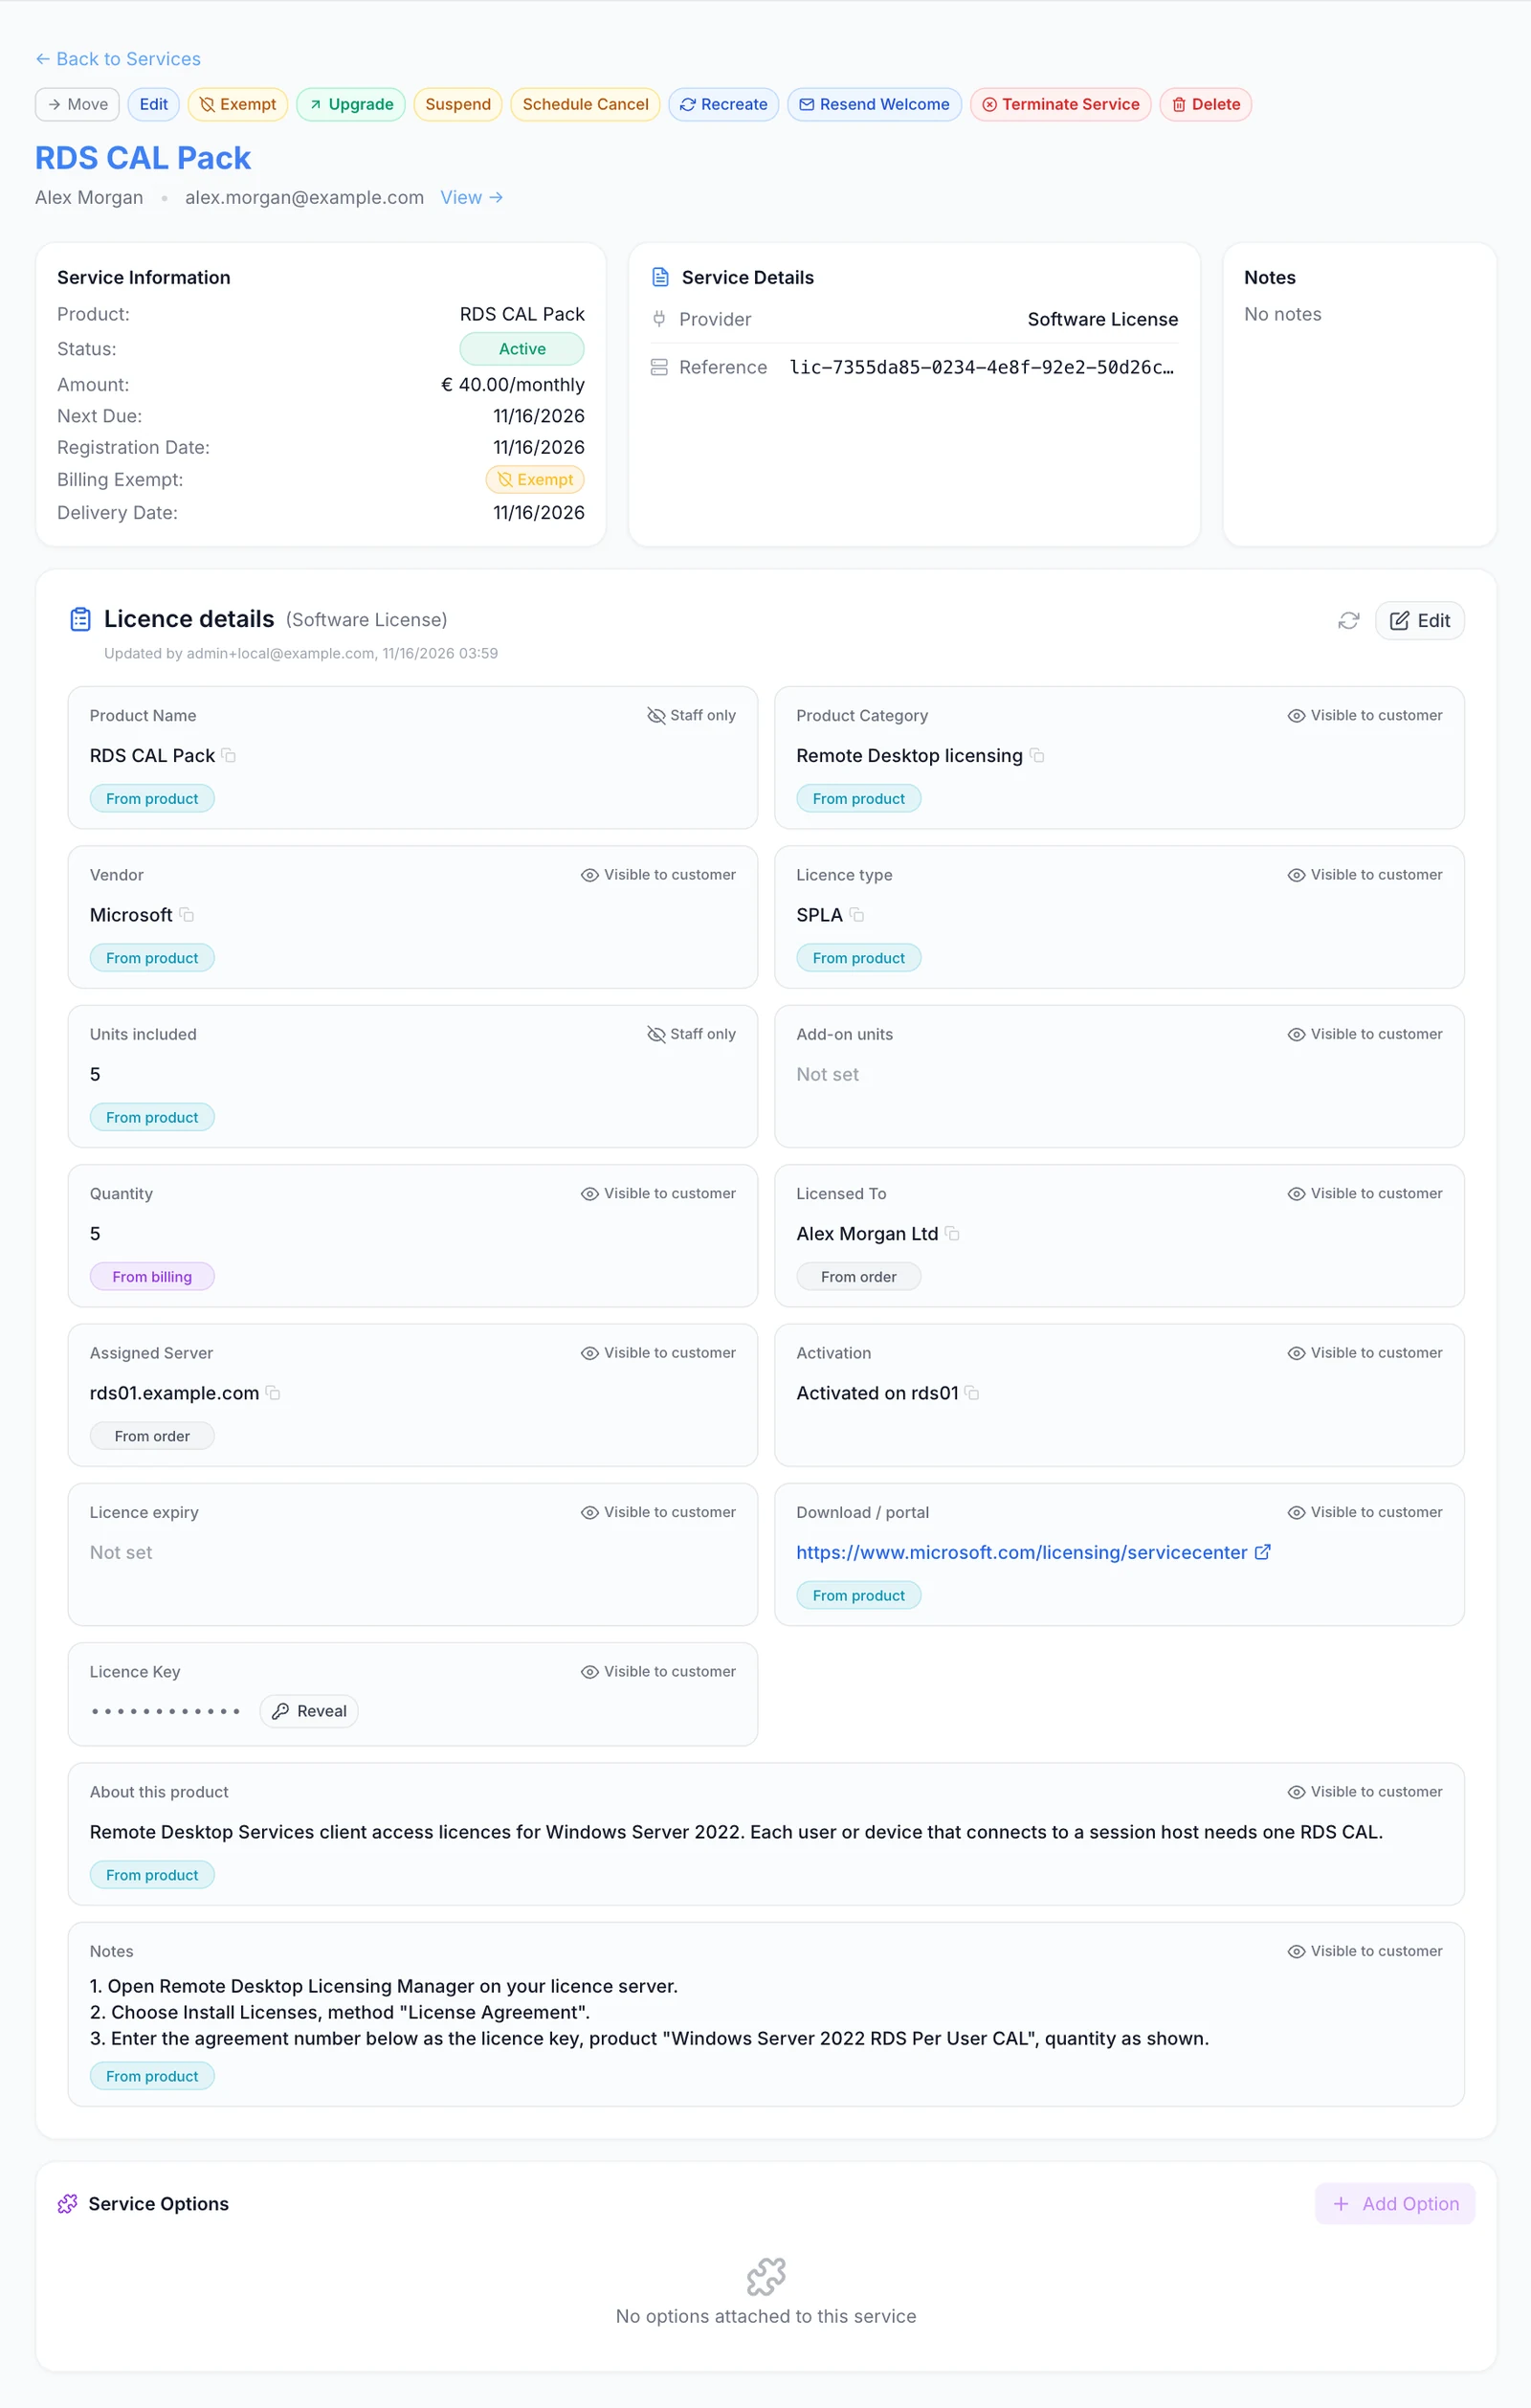
| Field | Where it comes from | Notes |
|---|---|---|
| Product Name | The product name | Staff only. Up to 200 characters. |
| Product Category | The product's Category shown to customer, otherwise its Licence category | Up to 100 characters. |
| Vendor | The product's Vendor | Up to 100 characters. |
| Licence type | The product's Licence type | Up to 50 characters. |
| Units included | The product's Units included in the product price | Staff only, for reference: the Quantity follows the product's value. |
| Add-on units | The active add-on units on the service | Display value, like Quantity. |
| Quantity | Units included in the product price plus the active add-on units | A whole number from 0 to 100000. A value typed here changes only what is displayed: invoices follow the add-ons, not this field. |
| Licensed To | The customer's answer on the order form | Up to 200 characters. |
| Assigned Server | The customer's answer on the order form | Up to 255 characters. The customer can copy it. |
| Activation | Entered by staff | What the customer should know about activation, for example Activated on web01. Up to 100 characters. |
| Licence expiry | Entered by staff | The vendor's own term end, for subscriptions whose term differs from the next invoice. Up to 50 characters. |
| Download / portal | The product's Download / portal link | A web address starting with http:// or https://. |
| Licence Key | Entered by staff | Up to 4096 characters. Stored encrypted. Leave the field blank to keep the current key, or use Remove the stored value to delete it. |
| About this product | The product's About this product, otherwise its description | Up to 2000 characters. |
| Notes | The product's Default customer note | Up to 5000 characters. Shown to the customer as the activation instructions. A note written on the service replaces the product's note for this customer. |
Every field can be edited, and each is marked Visible to customer or Staff only. A field that still follows its source is marked From product, From order or From billing. In edit mode, untick Use default under a field to type your own value; it replaces the source for this service only. To read a stored key, staff click Reveal. The key hides itself again after a minute, and every reveal is recorded against the staff account. Each save is recorded in the activity log with the names of the fields that changed, never with their values.
To email the customer their licence details with the key, click Resend Welcome on the service page after you saved the key. The Service Activated (Details) email then includes the key and adds a note asking the customer to keep the email private. If you prefer the key to stay in the client area only, do not resend the email.
What your customers see
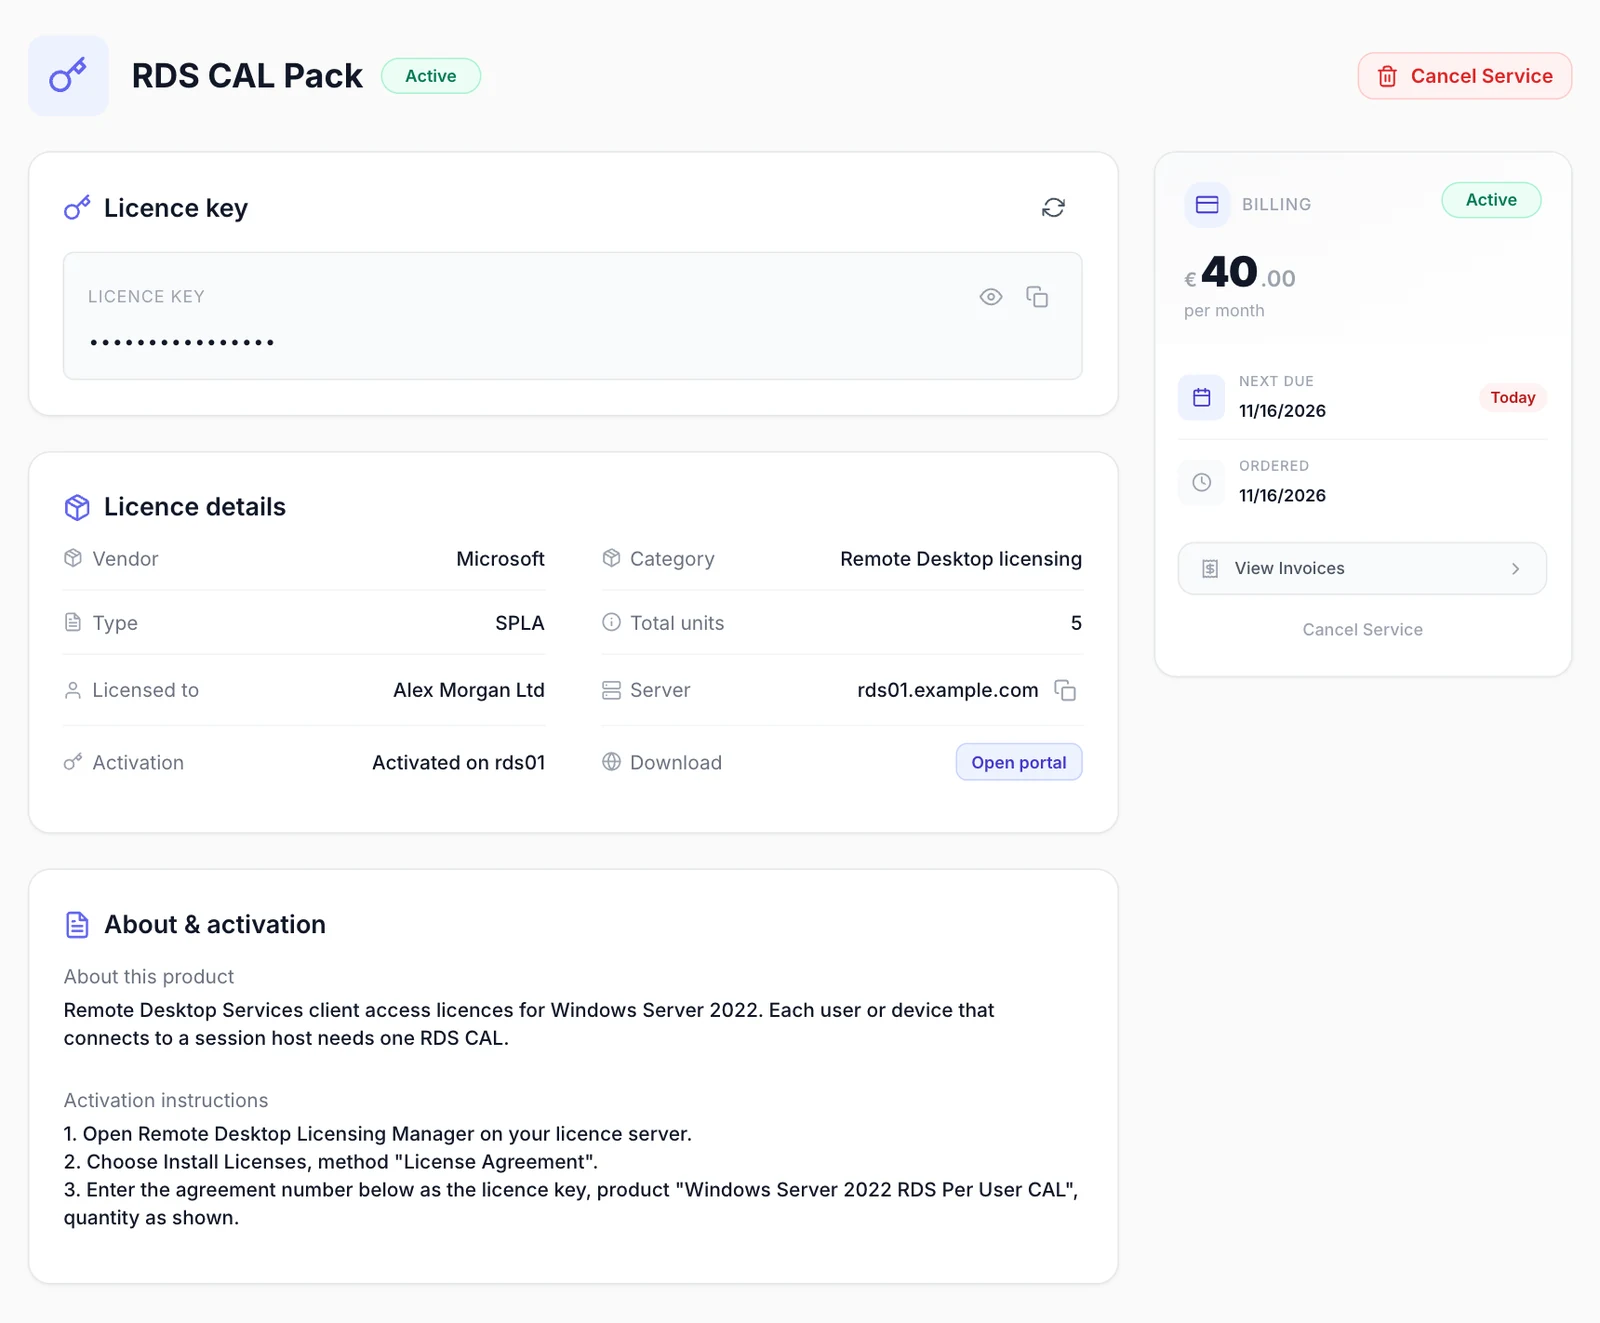
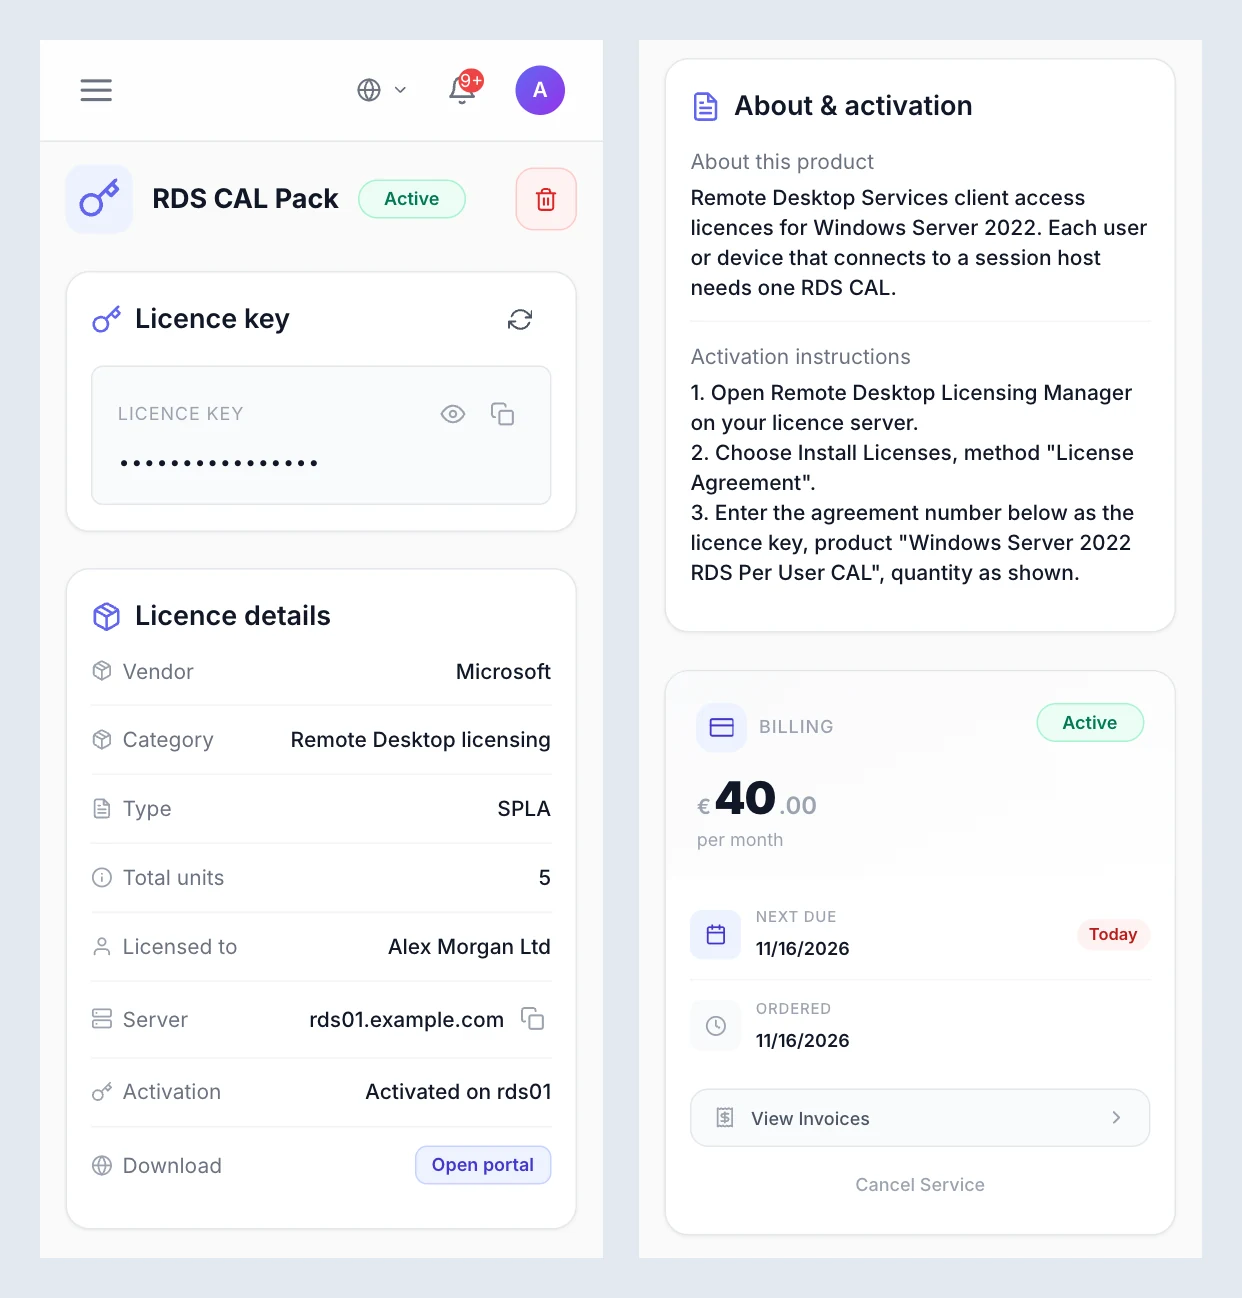
In the client area, the customer opens the service. The product name is the page title, and the page shows three cards, one under the other:
- Licence key: the key, masked, in its own box. The eye button (Reveal) shows it and the copy button copies it to the clipboard. A revealed key hides itself again after a minute. Before staff enter a key, the card says No license key has been issued yet.
- Licence details: Vendor, Category, Type, Add-on units, Total units (the Quantity), Licensed to, Server (with a copy button), Activation, Licence expiry and Download, an Open portal link. Category and Total units are always shown; the other rows only when they have a value.
- About & activation: About this product (when set) and the Activation instructions, which are the service's notes.
The key never travels with the page. Each reveal or copy fetches it once, and FluxBilling records the reveal in the activity log, without the key, before it sends it. A customer can reveal at most 10 values a minute. Only the account owner and team members allowed to manage services can reveal the key; a team member with view-only access sees the details but not the key.
While the service is suspended, the licence cards are hidden and the customer sees the Service Suspended notice with the reason instead. After termination the key can no longer be revealed.
Billing lifecycle
The invoice drives the service. The rules are set under Settings → Billing → Automation:
- Auto Provisioning: activates the service when the first invoice is paid. When it is off, the paid service waits as Pending until staff provision it.
- Auto Suspension with Suspension Grace: an invoice still unpaid that many days after its due date suspends the service. Suspension is billing-side only: nothing changes at the vendor, and the customer can no longer see the licence cards.
- Paying the overdue invoice unsuspends the service automatically, and the cards come back.
- Auto Termination with Termination Grace: a service still suspended for non-payment that many days later is terminated.
Terminating a service deletes nothing. The key and the other details stay on the service for your records, and staff can still read them. The licence is not revoked at the vendor: if your agreement requires it, revoke or stop reporting the licence there yourself.
Adding units and changing products
- More units later. When a customer buys more of the units add-on on an existing service, the new units apply as soon as they are paid and the Quantity goes up. Nothing is sent to the vendor: obtain the extra CALs or cores there and, if the key changes, update it on the service.
- Upgrades. Customers can move between licence products you link on the product's Upgrade Paths tab. When the change is paid, the service moves to the new product, and every detail that comes from the product (name, category, vendor, licence type, included units, About text, portal link and default note) follows the new product unless staff typed their own value. The key is not changed: enter the new key yourself.
Updating the plugin
Open Settings → Integrations → Marketplace, switch to Installed and click Check for Updates. When a new version is available, click Update to v…. Version 1.1.1 needs FluxBilling 0.0.1572 or newer. Your products and the details stored on your services are kept. After the update, open each licence product once to fill in the new Vendor, Licence type, About this product and Download / portal link fields.
Troubleshooting
| Message or symptom | What to check |
|---|---|
| Software License is missing under How paid orders are fulfilled, or the category says No infrastructure plugins are enabled | The plugin is not installed or is switched off. Install it (step 1) or switch it on under Settings → Integrations → Plugins. |
| The licence units key is not in the Spec Modifier list | The key is offered only while the plugin is switched on. Choose plugin as the Spec Service first, then the licence units key. |
| The product's Pricing tab says license_seats is missing from catalogue | No add-on has the Slug license_seats. Your add-on still counts if its Spec Modifier is the licence units key; set its Slug to license_seats — Software License if you want the line to show it as attached. |
| The Quantity did not change after a customer bought more units | The option does not carry the licence units key, or its Spec Increment is wrong, or the add-on is not attached to the product. Open the add-on and check its Resource Grant, then the product's Available Add-ons. |
| The customer sees Too many requests. Please wait a minute and try again. | More than 10 reveals or copies within a minute. Waiting a minute is enough. |
| The customer sees This value can only be shown while the service is active, to users allowed to manage services. | The person signed in is a team member without permission to manage services, the client account is suspended, or the service is not delivered (for example still pending or terminated). |
| The customer sees This value is no longer set. | Staff removed the key after the page loaded. Enter the key again on the service. |
| The customer sees This value is stored but cannot be read right now. Please contact support. | The stored key cannot be decrypted on this install. Enter the key again on the service. |
| The admin card says A value is stored but this server cannot read it | The stored key can no longer be decrypted on this install. Enter the key again to store a readable one. |
| Saving the details shows Check the highlighted fields, with a reason under the field such as Enter a whole number, Must be at most 100000 or Enter a full address starting with http:// or https:// | A unit field is not a whole number between 0 and 100000, or the download address is not a full web address. Fix the highlighted field and save again. |
| The customer's page has no Download row, or no Vendor or Type | Empty rows are hidden. Fill in the product's Download / portal link, Vendor or Licence type, or the field on the service. |
Limits
- The plugin does not connect to Microsoft or any other vendor. It does not buy, issue, activate, check or revoke licences, and it does not report usage to the vendor.
- Keys are entered by staff. Nothing reminds you automatically that a paid service still has no key, so check new licence services as part of your daily routine.
- The Quantity is a display value. Invoices follow the units add-on, not a Quantity typed by staff.
- Activation and Licence expiry are text that staff type. FluxBilling does not track the vendor's term or remind anyone when it ends.
- There are no service actions such as start, stop, console or password reset, and no usage figures.
- FluxBilling does not receive callbacks from any vendor. You do not need to set up anything for callbacks.
Microsoft, Microsoft 365, SQL Server and Windows Server are trademarks of the Microsoft group of companies. FluxBilling is not affiliated with Microsoft.