
CoinPayments: crypto payments for your invoices
Set up the free CoinPayments plugin: API keys, Merchant ID, IPN secret, receive coin, LTCT testing, what customers see, statuses, refunds and fixes.
The CoinPayments plugin lets your customers pay FluxBilling invoices in cryptocurrency through CoinPayments' hosted payment page. The customer chooses CoinPayments at checkout and is sent to CoinPayments, which shows the amount to send in the coin you selected and the address to send it to. The customer pays from their own wallet. When CoinPayments has confirmed the payment, it sends an Instant Payment Notification (IPN) to your panel and FluxBilling marks the invoice paid. The plugin is free and is listed in the plugin marketplace of every FluxBilling panel.
This guide covers plugin version 2.7. It walks through the setup in the order you do it, then explains what your customers see, how payment statuses and refunds work, and what to check when something does not work.
Who supports this integration. The plugin is built and maintained by FluxBilling. If something does not work, contact FluxBilling support at contact@fluxbilling.app or through fluxbilling.app/contact. Questions about your CoinPayments account, its coins, fees, wallets or payouts go to CoinPayments support.
What you need before you start
- A CoinPayments account on the Legacy platform. The plugin uses CoinPayments' Legacy API: an API key pair (public and private key), a Merchant ID and HMAC-signed IPNs, as described in CoinPayments' Legacy API documentation. CoinPayments' NEW platform works differently (API integrations with a client ID, JSON requests and webhooks, see CoinPayments' Migrating from Legacy guide) and is not supported by this plugin. If your CoinPayments dashboard has no API Keys page with public and private keys, ask CoinPayments which platform your account is on.
- The coin you want to receive, enabled in CoinPayments. The plugin creates every payment in one coin that you choose in its settings. That coin must be switched on in your CoinPayments Coin Acceptance Settings.
- A FluxBilling panel that CoinPayments can reach over the internet. Payments are confirmed by IPNs that CoinPayments sends to your panel. A panel that is only reachable inside your own network cannot confirm crypto payments.
Step 1: Create an API key in CoinPayments
The plugin signs every request to CoinPayments with your API key pair.
- Sign in to CoinPayments and open API Keys.
- Generate a new key. CoinPayments gives you a public key and a private key. Keep the private key to yourself.
- Click Edit Permissions on the new key and allow the commands the plugin uses:
create_transaction(to create a payment),get_tx_info(to read a payment's status) andget_basic_info(account information). CoinPayments notes that most commands must be enabled this way before a key can use them. - Note your Merchant ID. CoinPayments shows it in your account settings.
CoinPayments describes the keys and the HMAC signature in the introduction of its API documentation, and the command itself in Create Payment.
Step 2: Install the plugin
- In the FluxBilling admin panel, open Settings (the gear icon in the top bar).
- Under Integrations, open Marketplace. Stay on the Browse tab.
- Search for CoinPayments, open the CoinPayments card and click Get for Free.
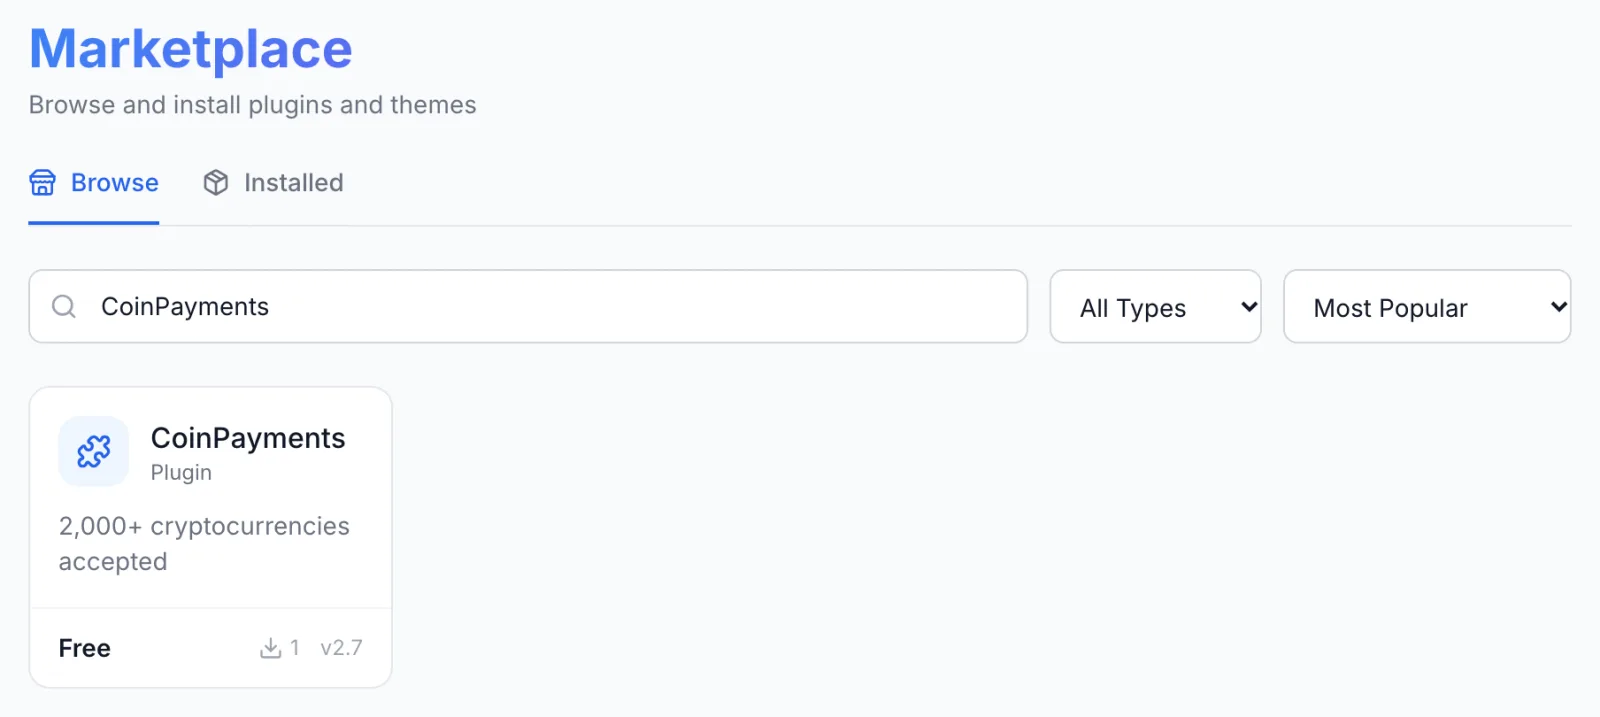
FluxBilling confirms with Plugin "CoinPayments" installed and ready to use. The plugin appears under Settings → Integrations → Plugins, marked Active, and under Settings → Financial → Payment Gateways. Your customers do not see it yet: a gateway is offered at checkout only once its required settings are filled in.
Step 3: Enter your CoinPayments details
- Open Settings → Integrations → Plugins.
- On the CoinPayments card, click Configure. The dialog opens on the Settings tab.
- Fill in the fields below. For IPN Secret, make up a long random string now; you enter the same string in CoinPayments in step 4.
- Click Save Configuration. FluxBilling shows Configuration saved successfully.
| Field | Required | What it does |
|---|---|---|
| Enabled | Yes, to take payments | Offers CoinPayments at checkout. Untick it to hide the gateway without removing its settings. |
| Merchant ID | Yes | Your CoinPayments Merchant ID. |
| Public Key | Yes | The public key of the API key from step 1. It identifies your account in every request. |
| Private Key | Yes | The private key of the same API key. FluxBilling uses it to sign each request; it is never sent as such. |
| IPN Secret | Yes | The secret CoinPayments uses to sign its IPNs. It must be exactly the same value as IPN Secret in your CoinPayments account. FluxBilling refuses every IPN whose signature does not match, so without the right secret no payment is ever confirmed. |
| Receive Currency | Yes | The coin the customer pays with, as a CoinPayments ticker, for example BTC, LTC or USDT.TRC20. It must be a coin enabled in your CoinPayments Coin Acceptance Settings. Fiat currencies such as EUR are not valid here. |
| Fallback Buyer Email | No | CoinPayments requires a buyer email with every payment. FluxBilling sends the customer's account email; this address is used only when that is not available. Use a mailbox on your own domain, for example billing@yourcompany.com. |
| IPN (Webhook) Setup | - | Not a field. A short reminder of the IPN settings in step 4. |
The keys and the IPN secret are stored encrypted and shown masked. To change one, type the new value; leaving a secret field empty keeps the stored value. If a required field is empty, FluxBilling saves the form but shows Saved, but the plugin is not configured until these are fixed: followed by the missing field, for example Receive Currency is required.
The plugin has no sandbox switch and the dialog has no connection test. To check the setup, make a small test payment as described in step 6.
Step 4: Set up IPNs in CoinPayments
IPNs are how FluxBilling learns that a customer has paid. CoinPayments does not send any IPN until an IPN secret is set in your account.
- In the FluxBilling Configure dialog, find the box Webhook configuration required. It shows your panel's IPN address. Click Copy URL.
- In CoinPayments, open Account Settings → Merchant Settings.
- Set IPN Secret to the same string you entered in FluxBilling.
- Set IPN URL to the address you copied, and make sure the IPN mode is HMAC.
- Save the CoinPayments settings.
FluxBilling also sends its IPN address with each payment it creates, so CoinPayments notifies the right address even if the account-wide IPN URL is used for another shop. The secret, however, is always the account-wide one. CoinPayments explains IPNs, the HMAC signature and its retries in Instant Payment Notifications (IPN).
The webhook box in the Configure dialog also shows what FluxBilling has seen on that address: No deliveries received yet, Receiving deliveries with a count, or Deliveries failing, and the time of the last delivery. Deliveries failing almost always means the IPN secrets in FluxBilling and CoinPayments differ.
Step 5: Check how CoinPayments appears at checkout
Open Settings → Financial → Payment Gateways. Every installed gateway has a card there with an Enabled or Disabled badge and a switch. The switch turns the CoinPayments plugin itself on or off.
To change what customers see, open the plugin's Configure dialog again and switch to the Checkout Display tab:
- Display Name: the name in the list of payment methods, for example Bitcoin if you receive BTC.
- Description: an optional line under the name, for example Pay with Bitcoin via CoinPayments.
- Icon: a preset icon or the address of your own image.
Because the customer can only pay in the coin set in Receive Currency, name that coin in the display name or description so customers know what to expect before they leave your site.
CoinPayments is not tied to products or categories. Once it is configured and enabled, it is offered for every invoice, order and credit top-up, next to your other gateways.
Step 6: Make a test payment
CoinPayments has no separate test account. Instead it offers a test coin, Litecoin Testnet (ticker LTCT), which has no value. CoinPayments describes it in its FAQ under Litecoin Testnet Mode.
- Enable
LTCTin your CoinPayments Coin Acceptance Settings. - In FluxBilling, set Receive Currency to
LTCTand save. - From a test client account, pay a small invoice with CoinPayments and send the LTCT from a testnet wallet.
- Check that the webhook box changes to Receiving deliveries and that the invoice turns paid.
- Set Receive Currency back to your real coin and disable
LTCTin CoinPayments.
While LTCT is the receive currency, every customer who chooses CoinPayments is asked to pay in test coins, so keep the test short or do it before you announce the gateway.
What your customers see
Paying an invoice
- The customer chooses CoinPayments (under the display name you set) as the payment method and clicks the checkout button.
- FluxBilling creates the payment at CoinPayments for the amount owed and sends the customer to CoinPayments' payment page. CoinPayments converts the invoice amount into the receive coin and shows how much to send, the address and the time left to pay.
- The customer sends the coins from their wallet. CoinPayments waits for the number of blockchain confirmations it requires for that coin.
- When CoinPayments reports the payment complete, FluxBilling marks the invoice paid, the usual paid-invoice emails go out and any service on the order is set up.
When the customer leaves the CoinPayments page, they come back to the FluxBilling client area. The invoice may still show as unpaid for a while: crypto payments are confirmed on the blockchain, which can take from minutes to an hour or more depending on the coin.
CoinPayments receives the customer's account email with each payment. CoinPayments uses it to contact the buyer itself, for example if they sent too little or need a refund.
Paying again
While a CoinPayments payment for an invoice is less than 30 minutes old, starting a second one for the same invoice is refused with A payment for this invoice is already in progress with this gateway. Please complete the existing payment window or wait a few minutes before trying again. This protects the customer from paying twice. After 30 minutes, a new attempt replaces the old one.
Currencies
FluxBilling asks CoinPayments for the amount in the invoice's own currency when that currency is USD or EUR, or is your base currency. An invoice in any other currency is converted to your base currency first. CoinPayments then converts that amount into the receive coin at its own rate.
Payment lifecycle
FluxBilling follows the status codes CoinPayments sends with each IPN. CoinPayments lists them in its IPN documentation under Payment Statuses.
| CoinPayments status | In FluxBilling |
|---|---|
100 Payment complete, or 2 Queued for nightly payout | The payment is completed and the invoice is marked paid. These are the two statuses CoinPayments says are safe to deliver on. |
0 Waiting for buyer funds | The payment stays pending. |
1 Coins received, and other statuses from 1 to 99 | The payment stays pending while CoinPayments waits for confirmations. |
-1 Cancelled / Timed out | The payment is marked failed as an abandoned payment. The invoice stays unpaid and the customer can pay again. |
-2 Refund or reversal (and any status below -2) | The payment is recorded as refunded. |
CoinPayments can repeat an IPN and does not guarantee the order in which they arrive. FluxBilling ignores a repeated IPN and never moves a completed payment back to pending or failed because a late, older IPN arrives.
Each CoinPayments payment in FluxBilling carries the CoinPayments transaction ID, so you can find it in your CoinPayments account. A payment that is still pending 24 hours after the customer started it is closed as failed. If CoinPayments reports it complete after that, the payment is still completed and the invoice settled.
Refunds
FluxBilling cannot send a refund through CoinPayments. Return crypto to the customer from your CoinPayments account, then record the refund on the invoice: open the paid invoice in the admin panel, click Refund and choose Manual or, to give account credit instead, To balance. Choosing Via Gateway for a CoinPayments payment fails with This gateway does not support refunds. More in Invoice details.
Updating the plugin
Open Settings → Integrations → Marketplace, switch to Installed and click Check for Updates. When a new version is available, click Update to v…. Your settings are kept.
Troubleshooting
| Message or symptom | What to check |
|---|---|
| CoinPayments is not offered at checkout | A required field is empty, Enabled is unticked in the Configure dialog, or the switch on Settings → Financial → Payment Gateways is off. |
| Saved, but the plugin is not configured until these are fixed: followed by, for example, IPN Secret is required | Fill in the field named and save again. |
| A message from CoinPayments when the customer clicks to pay, or Failed to create CoinPayments transaction | CoinPayments refused to create the payment and its own message is shown. Check that the public and private key belong to the same API key, that the key is allowed to use create_transaction (Edit Permissions in CoinPayments), that Receive Currency is a coin ticker enabled in your Coin Acceptance Settings, and that your account is on CoinPayments' Legacy platform. |
| Minimum payment amount is 0.5 followed by the currency | The amount left to pay is below 0.50. Let the customer pay it with account credit or another method. |
| A payment for this invoice is already in progress with this gateway… | The customer started a CoinPayments payment for this invoice less than 30 minutes ago. Ask them to finish that payment page, or wait and try again. |
| The customer paid, but the invoice is still unpaid | First look at the payment in CoinPayments. Until its status is complete (100) or queued for payout (2), wait for the confirmations. If it is complete, open the Configure dialog: No deliveries received yet means no IPN reached the panel (missing IPN secret in CoinPayments, wrong IPN URL, or a panel not reachable from the internet). Deliveries failing means the IPNs arrived but were refused. |
| Deliveries failing in the webhook box | IPNs reach the panel but are refused because their signature does not check out. Most often the IPN Secret in FluxBilling is not exactly the one in CoinPayments' Merchant Settings: paste the same value into both and save. Also check that the IPN mode in CoinPayments is HMAC. CoinPayments retries a failed IPN several times, so a payment can still settle once the secret is fixed. |
| The customer sent too little | CoinPayments keeps waiting for the rest until the payment times out; the invoice is settled only when CoinPayments reports the payment complete. Settle the difference with the customer in CoinPayments. If you accept the smaller amount, record it on the invoice yourself. |
| This gateway does not support refunds | You chose Via Gateway in the refund dialog. Refund in CoinPayments and record it with Manual or To balance. |
Limits
- Legacy platform accounts only. Accounts on CoinPayments' NEW platform cannot be connected.
- One coin at a time. Every payment is created in the coin set in Receive Currency. To offer a different coin, change the setting; there is no coin choice inside your client area.
- No refunds from FluxBilling. Refunds are made in your CoinPayments account and recorded on the invoice by hand.
- No saved payment methods or automatic renewals. A crypto wallet cannot be charged by the merchant, so every invoice is paid by the customer.
- No partial payments. An invoice is settled only when CoinPayments reports the whole payment complete.
- Hosted page only. Customers always pay on CoinPayments' page. There is no crypto payment form inside your client area.
- Minimum amount 0.50 in the currency charged.
- IPN setup is manual. The plugin does not set the IPN secret or URL in CoinPayments for you.
CoinPayments is a trademark of CoinPayments Inc. FluxBilling is not affiliated with CoinPayments Inc.