
CCAvenue payment gateway
Set up the free CCAvenue plugin: merchant credentials, sandbox testing, how payments are confirmed, refunds and what customers see at checkout.
The CCAvenue plugin lets your customers pay FluxBilling invoices on CCAvenue's hosted payment page, using your CCAvenue merchant account. The customer picks CCAvenue at checkout, FluxBilling sends them to CCAvenue for the amount due, and the invoice is marked paid once CCAvenue reports the payment as successful. The customer chooses how to pay on CCAvenue's page, from the payment options your CCAvenue account offers; card and bank details are never entered in FluxBilling. The plugin is free and is listed in the plugin marketplace of every FluxBilling panel.
This guide covers plugin version 2.8. It walks through the setup in the order you do it, then explains how payments are confirmed, how refunds work and what to check when something does not work.
Who supports this integration. The plugin is built and maintained by FluxBilling. If something does not work, contact FluxBilling support at contact@fluxbilling.app or through fluxbilling.app/contact. Questions about your CCAvenue account, its credentials, payment options, fees or settlements go to CCAvenue.
What you need before you start
- An approved CCAvenue merchant account. You choose a plan and sign up on CCAvenue's pricing page. CCAvenue lists what your website must show (business description, contact details, refund, privacy and terms pages) and the KYC documents it needs in its merchant onboarding requisites.
- Your Merchant ID, Access Code and Working Key from your CCAvenue merchant dashboard.
- Your FluxBilling panel's domain registered as your website with CCAvenue. CCAvenue issues the access code and working key for the website address registered on your account.
- A public HTTPS address for your FluxBilling panel, so CCAvenue can deliver the payment result to it.
Step 1: Get your CCAvenue credentials
- Log in to your CCAvenue merchant dashboard.
- Open the API Keys page. It shows your Merchant ID and, for each website registered on your account, an Access Code and a Working Key. Copy the pair that belongs to your FluxBilling panel's domain.
- If your panel's domain is not registered yet, or you are moving to a new domain, ask CCAvenue to add or change it. CCAvenue's FAQ says to write to its merchant underwriting team with a change-of-URL letter.
- For testing, ask CCAvenue for access to its test environment and the matching test credentials. Test and live credentials are separate.
The Working Key is the secret FluxBilling uses to encrypt each payment request and to decrypt the result CCAvenue sends back. Keep it private: anyone who has it can read and forge CCAvenue responses for your account.
Step 2: Install the plugin
- In the FluxBilling admin panel, open Settings.
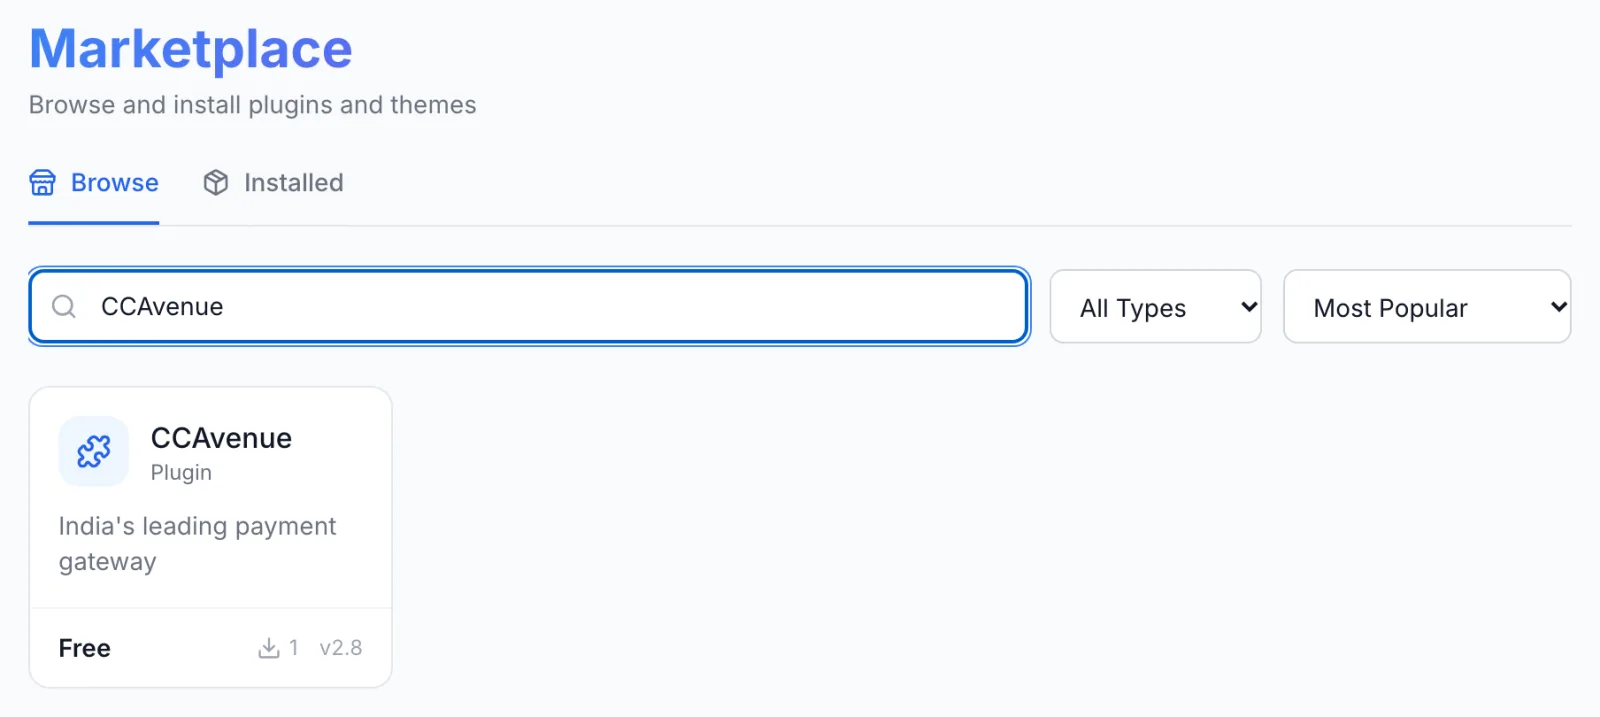
- Under Integrations, open Marketplace. Stay on the Browse tab and search for CCAvenue.
- Open the CCAvenue card and click Get for Free.
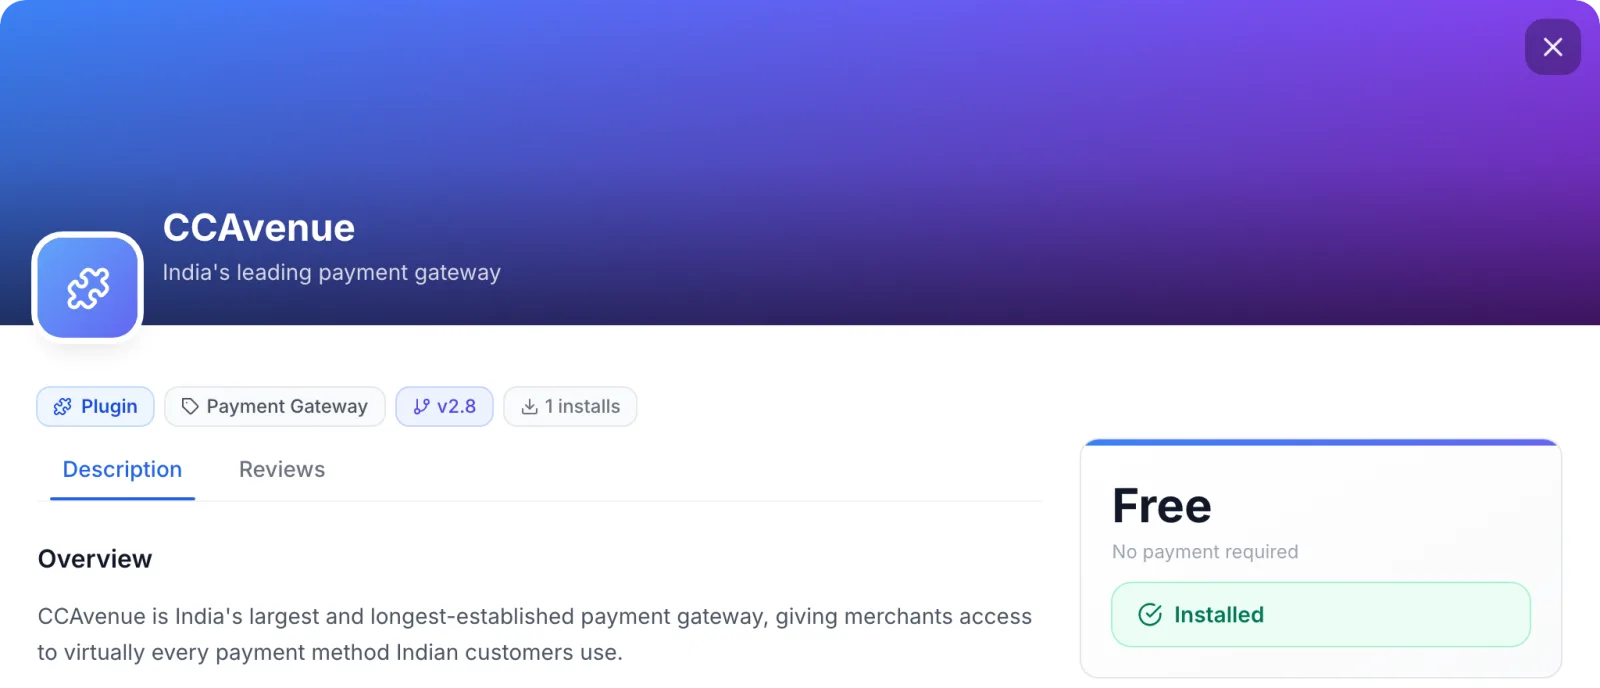
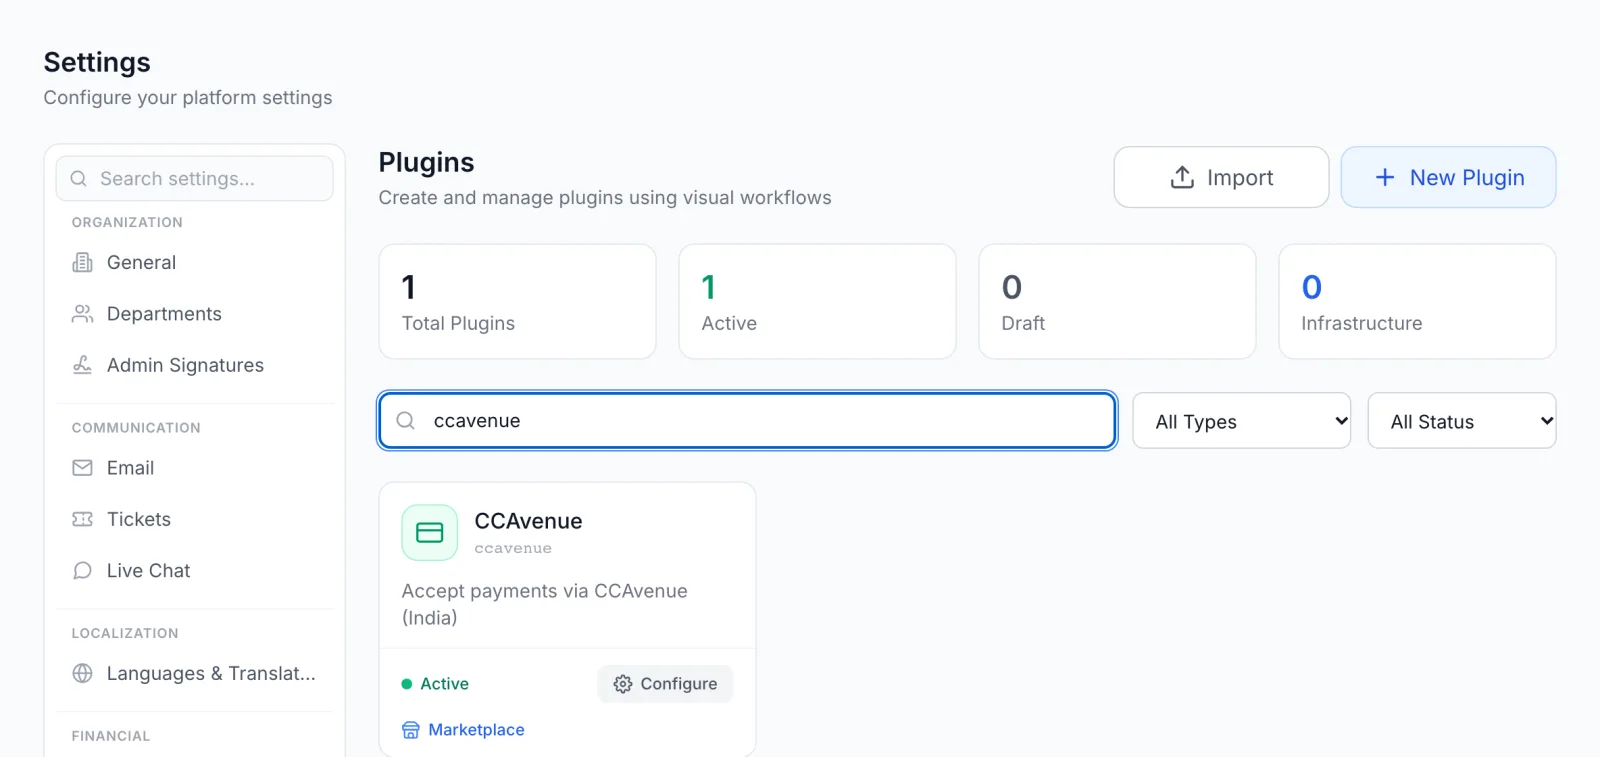
FluxBilling confirms with Plugin "CCAvenue" installed and ready to use. The plugin is switched on straight away and appears under Settings → Integrations → Plugins as CCAvenue, marked Active. Customers do not see it at checkout yet: a gateway appears there only once its required settings are filled in.
Step 3: Enter your credentials
- Open Settings → Integrations → Plugins.
- On the CCAvenue card, click Configure.
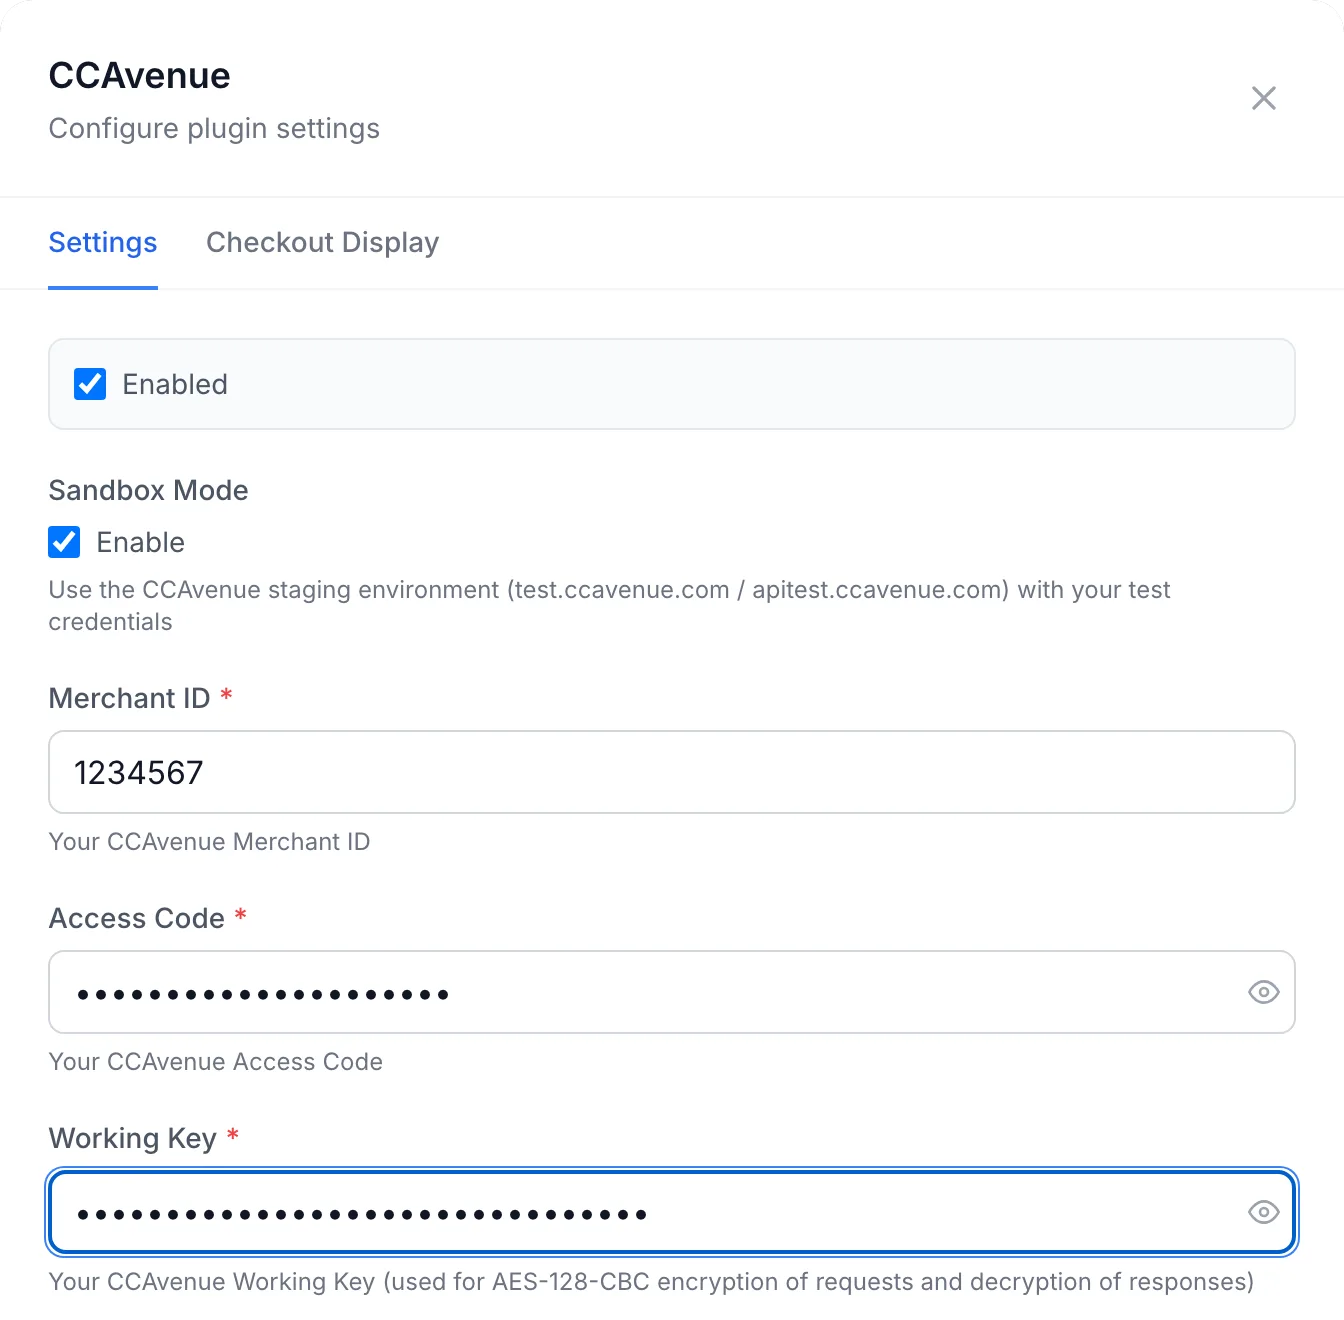
- On the Settings tab, fill in the fields below and click Save Configuration.
| Field | Required | What to enter |
|---|---|---|
| Enabled | No | Offers CCAvenue at checkout while it is ticked. Untick it to hide the gateway from customers without removing your settings. |
| Sandbox Mode | No | Tick Enable to send payments, status checks and refunds to CCAvenue's test environment (test.ccavenue.com and apitest.ccavenue.com) with your test credentials. Leave it unticked to take real payments on secure.ccavenue.com and api.ccavenue.com. |
| Merchant ID | Yes | Your CCAvenue Merchant ID. |
| Access Code | Yes | The access code for your panel's domain. Use the test access code while Sandbox Mode is ticked and the live one when it is not. |
| Working Key | Yes | The working key that belongs to the same access code. It encrypts every request to CCAvenue and decrypts every answer. |
The Access Code and Working Key are stored encrypted. FluxBilling shows Configuration saved successfully when the settings are saved. If a required field is empty, it saves the form but shows Saved, but the plugin is not configured until these are fixed: followed by the field, for example Working Key is required, and the gateway stays hidden from customers until you fix it.
The dialog has no connection test button. The first real check is the test payment in step 5.
The address in the blue box
Below the fields, the box Webhook configuration required shows the address CCAvenue reports payment results to, built from your panel's own domain, with a Copy URL button. You do not need to paste it into a webhook setting at CCAvenue: FluxBilling sends this address to CCAvenue with every payment, as both the return and the cancel address. What matters is that its domain is the website registered on your CCAvenue account (step 1). Once CCAvenue has reported a payment, the status under the address changes from No deliveries received yet to Receiving deliveries.
Step 4: Choose how CCAvenue looks at checkout
Switch to the Checkout Display tab of the same dialog:
- Display Name (required): the name customers see in the list of payment methods.
- Description: the line under the name.
- Icon: a Preset icon, or a Custom URL to your own PNG, SVG or JPG (64×64 px recommended).
The Preview shows the result. While Sandbox Mode is on, the preview carries a Test label. Click Save Configuration when you are done.
The gateway is also listed under Settings → Financial → Payment Gateways, with an Enabled badge and a toggle that switches the plugin on or off. See Payment gateways for that page.
Step 5: Make a test payment, then go live
- With Sandbox Mode ticked and your test credentials saved, log in to the client area as a test customer and pay an unpaid invoice with CCAvenue.
- Complete the payment on CCAvenue's test page with the test details CCAvenue gave you.
- Check in FluxBilling that the invoice turns Paid and that the payment carries CCAvenue's tracking ID or, if the automatic check credited it, its order ID (see How a payment is confirmed).
- To go live, open Configure again, enter your live Access Code and Working Key, untick Sandbox Mode and save.
What your customers see
On the checkout page of an invoice, CCAvenue appears in the list of payment methods with the name and description you set. If the customer has account credit, the Use Credit Balance option is shown above the list. The customer selects CCAvenue and clicks Checkout.
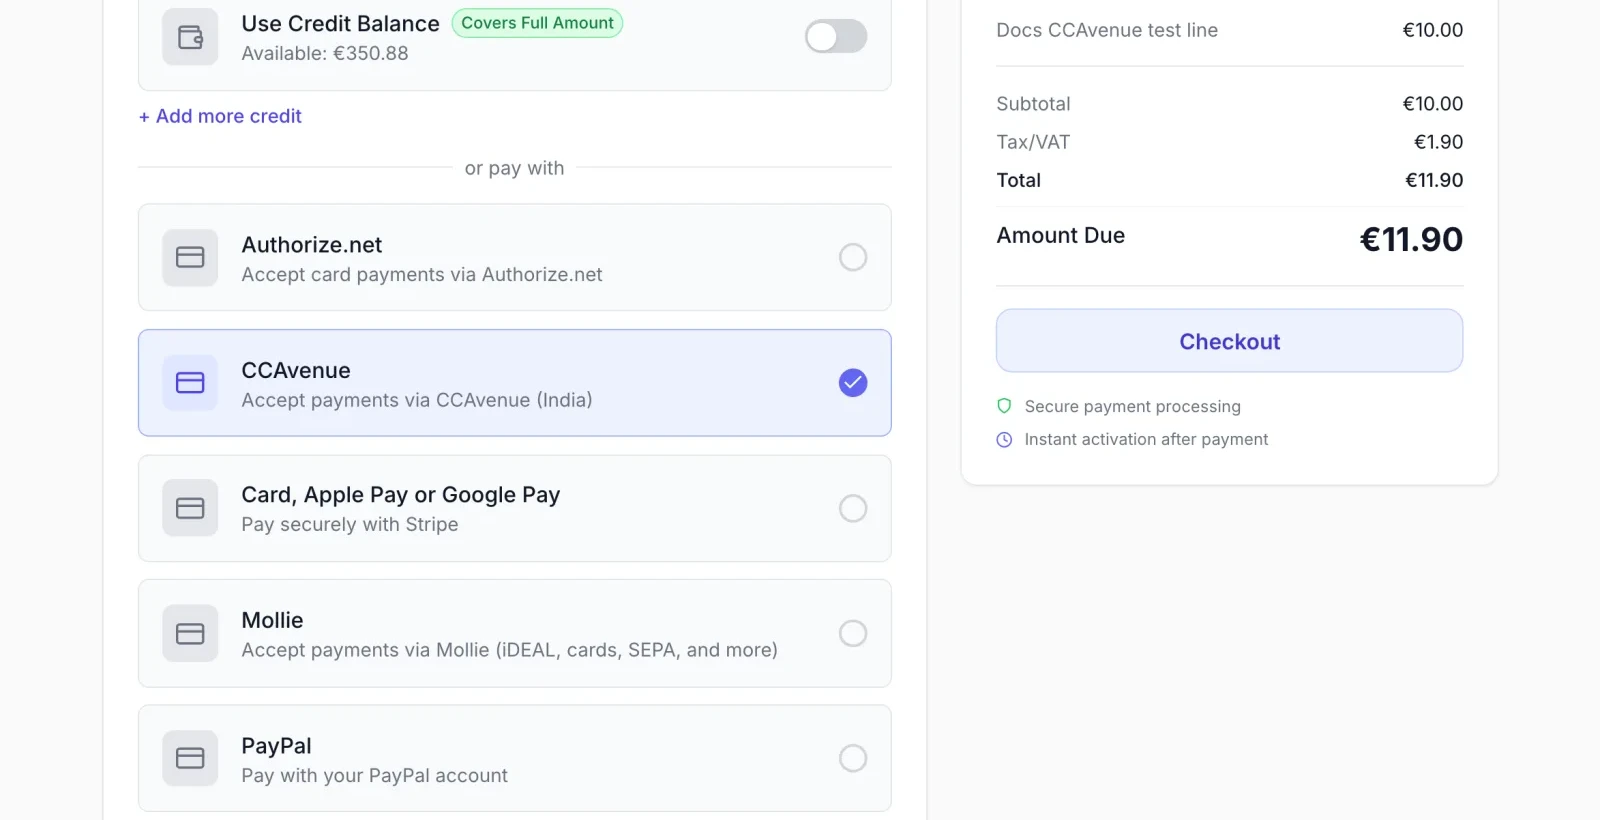
FluxBilling then sends the customer to CCAvenue's payment page for the amount due. There the customer picks one of the payment options enabled on your CCAvenue account, such as cards, net banking, UPI or wallets, and completes or cancels the payment. CCAvenue then reports the result to FluxBilling.
The checkout shows no Save this payment method for future purchases box for CCAvenue, because the plugin does not store payment methods (see Limits). The plugin sends no emails of its own; FluxBilling's usual payment and invoice emails apply.
Which currency is charged
FluxBilling charges an invoice in its own currency when that currency is your system base currency, US dollars or euros. An invoice in any other currency is converted to your base currency first. Most CCAvenue accounts settle in Indian rupees, so if you bill in another currency, check with CCAvenue that your account accepts it. CCAvenue's FAQ says it processes 27 foreign currencies. Each payment must be at least 1 in the charged currency.
How a payment is confirmed
A payment starts as pending when the customer is sent to CCAvenue. Each attempt gets its own unique order ID (shown as the payment's transaction ID while it is pending), so a retried payment never reuses an order ID CCAvenue has already seen. The confirmation then comes from two places:
- CCAvenue's encrypted response. When the customer finishes or cancels, CCAvenue sends the encrypted result to the address from step 3. FluxBilling decrypts it with your Working Key. Only a response that decrypts correctly is acted on, so a forged or garbled response changes nothing. A successful result settles the invoice straight away.
- The automatic check. Every 30 minutes, FluxBilling asks CCAvenue's order status service about CCAvenue payments that have been pending for more than half an hour, and asks again at most every six hours after that. Payments CCAvenue reports as successful are credited. This catches payments whose result never reached FluxBilling, for example because the customer closed the browser.
FluxBilling marks the invoice paid only when the amount and currency CCAvenue reports match what was due. When CCAvenue's encrypted response settles the payment, its transaction ID becomes CCAvenue's tracking ID; a payment credited by the automatic check keeps its order ID. Either one finds the order in your CCAvenue dashboard.
When CCAvenue reports a payment as failed, invalid, timed out or aborted, the payment is closed as failed and the invoice stays unpaid, so the customer can pay again with CCAvenue or another method. A payment that is still pending 72 hours after the customer left for CCAvenue is closed the same way.
Refunds
You refund a CCAvenue payment from the invoice in the admin panel:
- Open the paid invoice and click Refund.
- Under Refund Method, choose Via Gateway. The dialog shows Refunding via followed by the gateway name.
- Leave Amount empty to refund the whole payment or enter a smaller amount for a partial refund, add a Reason if you like, and click Confirm Refund.
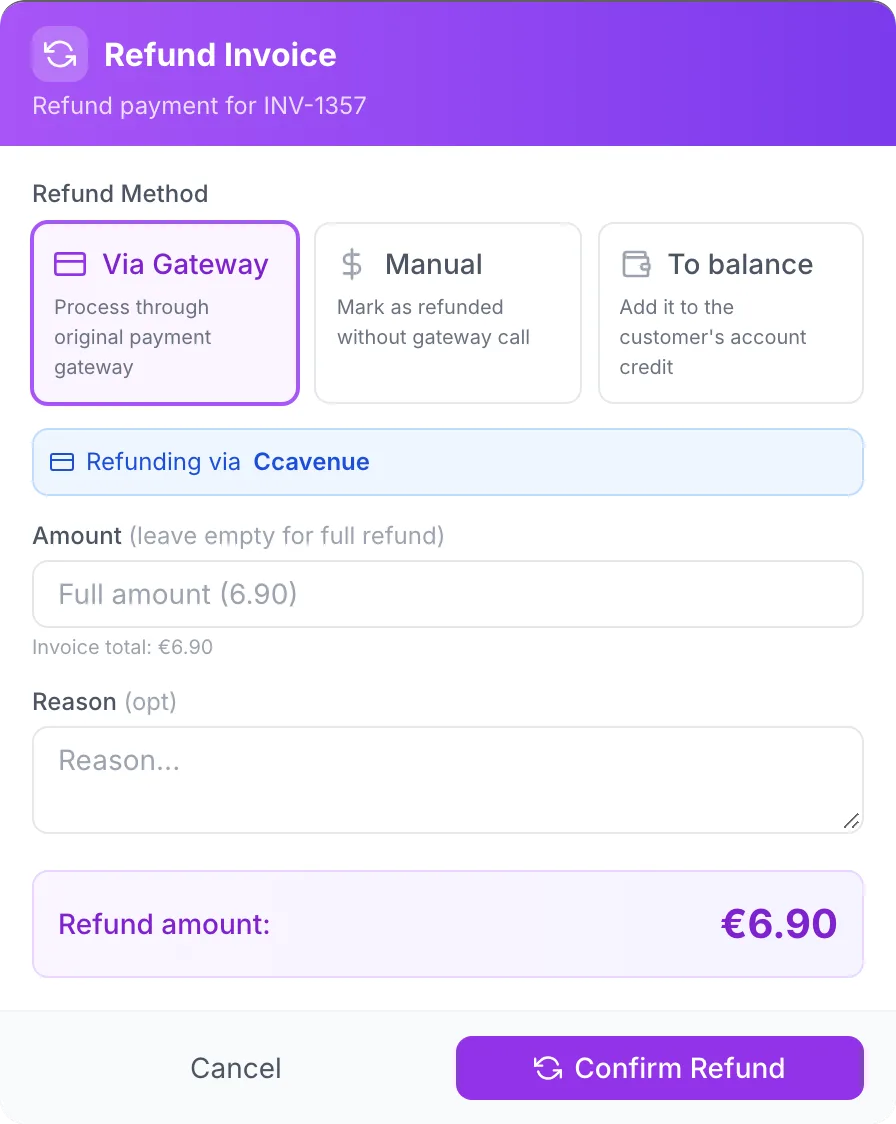
FluxBilling looks the order up at CCAvenue to find its reference number and the paid amount, asks CCAvenue to refund it, and shows Refund processed via gateway when CCAvenue accepts the refund. Partial refunds work the same way. Manual marks the invoice refunded without contacting CCAvenue, for money you returned some other way. To balance adds the amount to the customer's account credit instead of returning it. See Invoice details for these options in general.
CCAvenue's FAQ gives merchants 90 days from the transaction date to refund it. Refund older payments outside CCAvenue and record them with Manual.
Troubleshooting
| What you see | What to do |
|---|---|
| CCAvenue does not appear at checkout | Check that Merchant ID, Access Code and Working Key are all filled in and saved, that Enabled is ticked, and that the plugin is switched on under Settings → Financial → Payment Gateways. |
| Saved, but the plugin is not configured until these are fixed: followed by a field | Fill in the field named, for example Merchant ID is required, and save again. |
| Minimum payment amount is 1 followed by a currency | CCAvenue takes payments of at least 1 in the charged currency. Ask the customer to use another method or account credit for smaller amounts. |
| CCAvenue's page shows an error instead of the payment options, for example a merchant authentication error | CCAvenue could not match the request to your account. Check that the Merchant ID, Access Code and Working Key belong together, that they match the environment selected by Sandbox Mode (test credentials do not work live, or the other way round), and that your panel's domain is the website registered with CCAvenue. |
| The customer paid but the invoice is still unpaid | Wait for the automatic check, which asks CCAvenue about pending payments after half an hour. If it never settles, check the payment's order ID in your CCAvenue dashboard and confirm that CCAvenue accepts API requests from your panel (see the next rows). |
| CCAvenue API rejected the refund status lookup: or CCAvenue API rejected the refund request: followed by CCAvenue's message | CCAvenue refused the API call. The message after the colon is CCAvenue's own reason. Check the Access Code and Working Key, and ask CCAvenue to enable API access for your account and your server's public IP address if it is not enabled. |
| Could not resolve the CCAvenue reference number for transaction followed by the order ID | CCAvenue's order status service did not return the payment. Check that the payment exists in your CCAvenue dashboard in the same environment (test or live) as your current settings. |
| CCAvenue rejected the refund, or CCAvenue's own reason | CCAvenue declined the refund, for example because the amount is more than what is left to refund or the payment is too old. Check the payment in your CCAvenue dashboard. |
Limits
- Customers pay each invoice themselves on CCAvenue's payment page. The plugin does not store cards or set up standing instructions, so there is no automatic charging of renewals and no Save this payment method option for CCAvenue.
- Payment details stay on CCAvenue's hosted page. There is no payment form embedded in FluxBilling's checkout.
- The payment options (cards, net banking, UPI, wallets, EMI) are whatever CCAvenue has enabled on your account. You change them with CCAvenue, not in FluxBilling.
- Refunds started in your CCAvenue dashboard are not reported back to FluxBilling. Refund from the invoice in FluxBilling, or record a dashboard refund there with Manual.
- The dialog has no connection test. A test payment in CCAvenue's test environment is the way to check your credentials.
- Settlement reports, fees and payouts stay in your CCAvenue dashboard. FluxBilling records each payment and refund, not CCAvenue's settlements.
- Each FluxBilling panel connects to one CCAvenue merchant account at a time.
CCAvenue is a trademark of its respective owner. FluxBilling is not affiliated with CCAvenue.