
Plesk hosting subscriptions
Sell Plesk hosting subscriptions and reseller accounts: API key, plugin settings, products per service plan, IP options, lifecycle and troubleshooting.
The Plesk plugin connects FluxBilling to your Plesk server, so you can sell Plesk hosting subscriptions and Plesk reseller accounts as FluxBilling products. FluxBilling takes the order, sends the invoice and collects the payment. When the invoice is paid, the plugin creates the account in Plesk, and the customer manages it from the FluxBilling client area. The plugin is free and is listed in the plugin marketplace (Settings → Integrations → Marketplace). Your Plesk server and licence stay as they are; the plugin only talks to Plesk's API and installs nothing on the server.
This guide covers plugin version 1.0.0. It walks through the setup in the order you do it, then explains what happens to an account over its life and what to check when something does not work.
Who supports this integration. The plugin is built and maintained by FluxBilling. If something does not work, contact FluxBilling support at contact@fluxbilling.app or through fluxbilling.app/contact. Questions about Plesk itself, its licence or its servers go to Plesk support.
How the plugin maps Plesk to FluxBilling
- One Plesk customer per client. A client's first hosting order creates a Plesk customer for them. Their later hosting orders add subscriptions under the same Plesk customer, so they see all their sites in one Plesk login.
- One subscription per hosting service. Each FluxBilling hosting service is one Plesk subscription for the domain the customer ordered, on the Plesk service plan of the product.
- Reseller accounts. A product can sell a Plesk reseller account on a Plesk reseller plan instead. A reseller service is a reseller login, not a subscription.
- Limits live in Plesk. Disk space, traffic, mailboxes, databases and PHP settings come from the Plesk plan. Prices, billing cycles and taxes live in FluxBilling.
What you need before you start
- A Plesk server running Plesk Obsidian 18.0 or newer, on Linux or Windows, with its panel reachable on port 8443 (or the port you use).
- The service plans you want to sell, set up in Plesk under Service Plans. For reseller products, the reseller plans as well. The plugin uses the plans of the Plesk administrator.
- IP addresses on the Plesk server. At least one shared IPv4 address. If you sell dedicated addresses, free dedicated (exclusive) IPv4 addresses under Tools & Settings → IP Addresses. IPv6 is optional.
- An API key created on the Plesk server for your FluxBilling panel (step 1), or the Plesk administrator login.
- Network access from your FluxBilling panel to the Plesk panel port. A self-signed certificate on that port is accepted. If you restrict API access in Plesk's
panel.ini([api] allowedIPs), add your FluxBilling panel's address there. Plesk describes this setting in How to disable or restrict Plesk XML API.
Step 1: Create an API key in Plesk
The plugin uses two Plesk interfaces: the XML API for accounts, plans and IP addresses, and the REST API for the one-time login links customers use to open Plesk. An API key works for both. We recommend a key over the admin password: the key is bound to one IP address and can be revoked without changing the admin password.
- Log in to the Plesk server over SSH (or open a command prompt on a Windows server) as an administrator.
- Run the following command, with the public IP address your FluxBilling panel connects from:
plesk bin secret_key -c -ip-address 198.51.100.25 -description FluxBilling - Copy the key the command prints. Plesk shows a key only once, when it is created, and stores only a hash of it.
A key created this way is accepted only from that IP address. If you are not sure which address your FluxBilling panel connects from, ask FluxBilling support. Plesk documents the utility in secret_key: Authentication in Plesk XML API (that page is the Plesk for Windows reference; on Linux the plesk bin secret_key command takes the same options), and both ways to sign in to the REST API in About REST API. To remove a key later, use plesk bin secret_key --list and plesk bin secret_key --delete -key <id>.
If you prefer not to use a key, you can sign in with the Plesk administrator login instead (see the settings in step 3).
Step 2: Install the plugin
- In the FluxBilling admin panel, open Settings (the gear icon in the top bar).
- Under Integrations, open Marketplace. Stay on the Browse tab.
- Open the Plesk Provider card and click Get for Free.
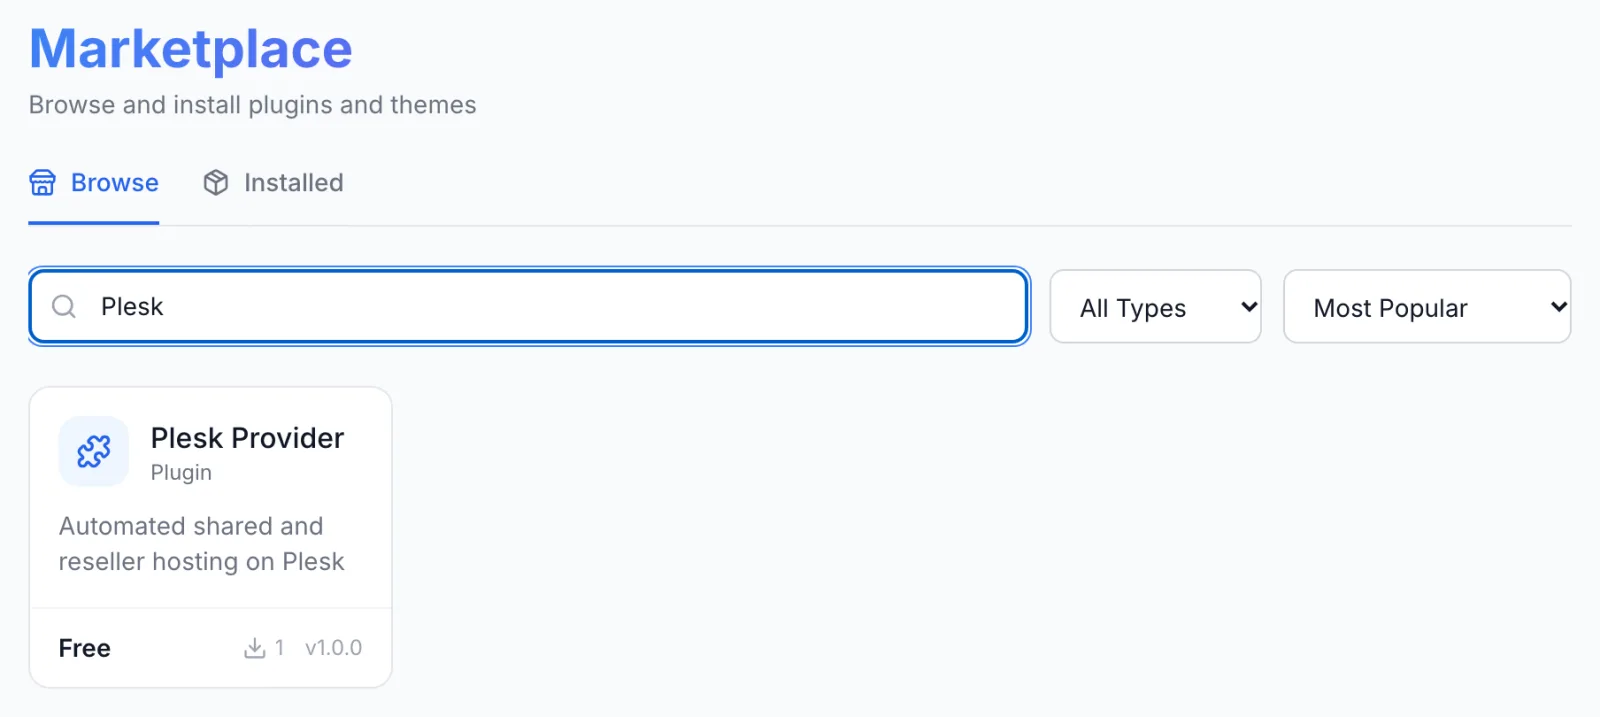
FluxBilling confirms with Plugin "Plesk Provider" installed and ready to use. The plugin is switched on straight away and appears under Settings → Integrations → Plugins as Plesk Provider, marked Active.
Step 3: Connect it to Plesk
- Open Settings → Integrations → Plugins.
- On the Plesk Provider card, click Configure.
- Fill in the fields below and click Save Configuration.
| Field | What to enter |
|---|---|
| Server Hostname (required) | The host name or IPv4 address of the Plesk server, for example plesk.example.com. Only the name: no https://, port or path. |
| Port | The Plesk panel port. 8443 unless you changed it. |
| API Key | The key from step 1. Leave it empty only if you sign in with the admin login. |
| Sign in with admin login | Switch on Use the admin login and password instead of an API key to sign in with the Plesk administrator account. Two more fields then appear. |
| Admin Login | Shown with the admin login only. admin (or root) on Linux, administrator on Windows. |
| Admin Password | Shown with the admin login only. The password of that account. |
| Public Panel URL | Optional. The address your customers reach Plesk at, for example https://plesk.example.com:8443. Login links and the welcome email use it. Leave it empty to use https:// + the server hostname + the port. |
| Default Service Plan | Optional. The name of a Plesk service plan used for hosting products that have no service plan selected. |
| Remove empty customers | On (Delete the Plesk customer with its last subscription): terminating a client's last hosting service also deletes their Plesk customer. Off: the empty Plesk customer is kept. |
The settings are grouped under Connection and Accounts in the dialog. The API key and the admin password are stored encrypted. FluxBilling shows Configuration saved successfully when the settings are saved.
Check the connection
The Configure dialog has no test button. Two quick checks:
- In the product editor (step 5), the Service Plan list fills with your Plesk service plans. Then FluxBilling can reach the XML API and the key works.
- Once a service exists, the staff service page has a Test Connection button. A good answer reads like Connected — Plesk 18.0.81 on Ubuntu (plesk.example.com). Login links: ready. If it ends with Login links unavailable: REST API …, the XML API works but the REST API does not, so Log in to Plesk will not work until that is fixed.
Step 4: Create a category for your Plesk products
In FluxBilling, the category decides how its products are delivered. Every product in the category is built by the plugin you choose here.
- Open Products, switch to the Categories tab and click Add Category.
- When FluxBilling asks What does this category sell?, choose Plugins. Do not choose Web hosting: that type is FluxBilling's own web hosting module, not Plesk.
- Enter a Name. The URL slug fills in by itself.
- Under How paid orders are fulfilled, click Plesk Provider.
- Under Availability, choose Live to show the category on the order page, or Unlisted while you test.
- Click Create Category.
Step 5: Create a product for each Plesk plan
- On the Products tab, click Add Product and choose the category from step 4.
- On General, enter the product name and description your customers will see.
- On Configuration, fill in the Plesk fields described below.
- On Pricing, set the price and billing cycles.
- Click Create Product.
| Field | What it does |
|---|---|
| Account Type (required) | Hosting subscription: one subscription per service, under the client's Plesk customer. Reseller account: a reseller login on a reseller plan, with no subscription. |
| Service Plan | Hosting products. The Plesk service plan the subscription is created on; it sets disk, traffic, mailboxes, databases and PHP options. The list is read from Plesk. Empty: the plugin's Default Service Plan is used. |
| Reseller Plan | Reseller products only. The Plesk reseller plan the reseller account is created on. Required for reseller products. |
| IPv4 Address | Shared, or Dedicated (a free exclusive IP per account): every order gets its own dedicated IPv4 address from the server's free exclusive addresses. |
| Shared IPv4 | Which of the server's IPv4 addresses shared subscriptions use. The list shows each address with (shared) or (dedicated). Empty: the server's first shared IPv4 address. |
| IPv6 | An IPv6 address for the subscription. First shared IPv6 address picks it automatically, or choose an address. Empty: no IPv6 address. |
The plan, IP and IPv6 settings apply to hosting products. A reseller account gets only the reseller plan.
Step 6 (optional): Sell a dedicated IP as an add-on
Instead of giving every account on a product a dedicated address, you can let customers order one at checkout.
- Open Products, switch to the Options tab and click Add Option.
- Enter an Option Name such as Dedicated IP.
- Under Slug, choose dedicated_ip — Plesk Provider. This is the name the plugin reads. A different slug is not seen by the plugin.
- Leave Spec Service on None (billing only) and set the price.
- If you use Configurable Options, give the choice that means "yes" the Value
yes(ortrueor1, in lower case). Any other value means no dedicated IP. A plain add-on without choices counts as yes. - Click Create, then open each Plesk hosting product, go to Pricing and use Attach under Plugin expects these options, or select the add-on in the list.
The dedicated IP is assigned when the subscription is created. The plugin does not move an existing subscription to another address, so customers cannot add or remove the add-on after the build. If you change it from the admin panel, FluxBilling bills the new choice and adds a pending task under Automations as a reminder; change the subscription's address in Plesk yourself.
Step 7: Place a test order
Place an order for each product before you sell it, for example from a test client account. For a hosting product, the order form asks for the Domain Name: The main domain of the hosting account, without www. A value with www., spaces or slashes is refused with Enter a domain such as example.com — no www., spaces or slashes. Reseller products ask for no domain.
The plugin hosts the domain the customer enters. It does not register the domain or change its DNS.
What happens when the invoice is paid
With Auto Provisioning switched on (see Billing lifecycle), FluxBilling starts the build as soon as the invoice is paid. For a hosting product:
- The domain and plan. The plugin takes the ordered domain, removes a leading
www.orhttps://, and checks that it is a valid domain name. It takes the product's service plan, or the default plan. - The addresses. It reads the server's IP addresses and picks the shared IPv4 address, or a free dedicated one, and the IPv6 address the product asks for.
- The Plesk customer. It looks for the client's Plesk customer, which it marks with the client's FluxBilling ID. If there is none, it creates one with the client's name and email address.
- The subscription. It creates the subscription for the domain on the plan, with the chosen addresses and a system user for FTP and SSH. The login name is built from the first part of the domain plus a short part of the FluxBilling service ID, for example
shop1a2b3c. FluxBilling generates the password. - Hand-over. FluxBilling saves the account on the service, sets the service's IP address and hostname (the domain), and marks it Active. With the default email templates, the customer gets the Your hosting account for … is ready email with the domain, IP address, control panel address, username and password.
For a reseller product, the plugin creates a Plesk reseller account on the reseller plan instead, with the client's name and email address and a login built from the first part of their email address.
The password is used for the system user (FTP and SSH) and, when the plugin creates the client's Plesk customer with this order, for that Plesk customer login as well. A client's second hosting service goes under the existing Plesk customer and does not change its password.
If a build is retried, the plugin first looks for what an earlier attempt created: the client's Plesk customer and a subscription for the same domain under that customer. It reuses them, so a retry never creates a second account. It refuses a domain already hosted under another Plesk customer, and a login whose Plesk account is marked as belonging to another client. A Plesk customer or reseller with the same login that carries no such mark, for example one created by hand in Plesk, is reused.
What your customers can do
In the client area, the customer opens the service and sees:
| Item | What it shows or does |
|---|---|
| Hosting Account | Domain, username, IP address, IPv6 address, plan and status, read live from Plesk. Values can be copied with one click. |
| Usage | Disk, traffic this month, mailboxes and databases against the plan's limits, refreshed every minute. |
| Log in to Plesk | Opens Plesk in a new tab through a one-time login link, signed in as the client's Plesk customer (or the reseller). No password is typed. |
| Webmail | Hosting subscriptions only. Opens https://webmail. + the domain in a new tab, which is where Plesk serves webmail. It works once the domain points to the server. |
| Change Password | Sets a new password for FTP and SSH, and, on the service whose order created the client's Plesk customer, for the Plesk panel login too. The password needs at least 8 characters with upper and lower case letters, a digit and a symbol. |
The Plesk panel login is shared by all of a client's subscriptions. Changing the password on the service whose order created that login changes the panel password for every subscription; changing it on any other service changes only that subscription's FTP and SSH password. Customers reach Plesk with Log in to Plesk, which needs no password. While a service is suspended, the customer sees a Service Suspended notice with the reason instead.
What your staff see
In the admin panel, the service page shows a Plesk Account card with the domain, username, the Plesk customer login, IP addresses, plan, status, creation date and panel address, the same usage figures, and these Account Actions:
- Log in to Plesk: the same one-time link the customer uses, so you see their account as they do.
- Change Plan: moves a hosting subscription to another Plesk service plan, chosen from a list read from Plesk. Moves the account to another plan in Plesk only — billing does not change. Use an upgrade to change what the client pays. Customers do not have this button.
- Change Password: the same as the customer's.
- Test Connection: checks the connection to Plesk (see step 3).
Billing lifecycle
The invoice drives the account. The rules are set under Settings → Billing → Automation:
- Auto Provisioning: creates the account when the first invoice is paid. When it is off, the paid service waits as Pending until staff provision it.
- Auto Suspension with Suspension Grace: an invoice still unpaid that many days after its due date suspends the service. Only that subscription is suspended in Plesk (as suspended by the administrator); the client's other subscriptions keep running. A reseller account is suspended as a whole.
- Paying the overdue invoice unsuspends the service: the subscription is activated again. Plesk refuses this while the client's Plesk customer itself is suspended, for example because someone suspended it in Plesk.
- Auto Termination with Termination Grace: a service still suspended for non-payment that many days later is terminated.
Terminating a service deletes the subscription in Plesk, with its websites, mail and databases. A reseller account is deleted with everything it owns. With Remove empty customers on, the client's Plesk customer is deleted too once it has no subscription left, but only a Plesk customer the plugin created. Termination happens when auto termination runs, when a customer's cancellation takes effect, or when staff terminate the service. It cannot be undone. A subscription already deleted in Plesk counts as terminated.
Once an hour, FluxBilling also reads the IP address and domain of each active Plesk service, so a change made in Plesk shows up on the service. If a subscription was deleted in Plesk, the service page shows its status as Terminated, and actions such as suspend or unsuspend fail with The Plesk account no longer exists.
Plan changes
Customers can only move between products you link on the product's Upgrade Paths tab. When an upgrade or downgrade between two Plesk products is paid, the plugin switches the subscription to the new product's service plan, or the reseller account to the new product's reseller plan. The site, mail and databases stay in place.
- Link hosting products only to hosting products, and reseller products only to reseller products. A hosting subscription cannot be turned into a reseller account or back.
- The new product needs a plan selected, and Plesk must have a plan with that name.
If Plesk refuses the change, the upgrade is marked as failed and the service keeps its current product. Try an upgrade on a test account before you offer upgrades to customers.
Updating the plugin
Open Settings → Integrations → Marketplace, switch to Installed and click Check for Updates. When a new version is available, click Update to v…. Your settings and products are kept.
Troubleshooting
When a build fails, the service stays Pending. The error appears in the Automations menu in the top bar of the admin panel, with the reason and a retry button. FluxBilling tries a failed build again by itself, up to two more times over the next minutes. After that, open the service and click Retry Provisioning. A build started this way does not email the customer, so use Resend Welcome on the service page once it has worked.
Errors from Plesk are shown as Plesk error followed by Plesk's error code and text. These are the messages you are most likely to see:
| Message or symptom | What to check |
|---|---|
| The Service Plan list in the product editor stays empty | FluxBilling cannot read from Plesk. Check the hostname, port, key or admin login, and any firewall between FluxBilling and Plesk. |
| Plesk error 11003: … — the API key is wrong or bound to another IP; create it with -ip-address set to this billing server | The key is mistyped, or was created for another IP address. Create a new key with your FluxBilling panel's address (step 1). |
| Plesk error 1001: … — check the admin login and password in the plugin settings | The admin login or password is wrong. |
| Plesk error 1006: … — the API user lacks the permission for this operation | The login used cannot do this in Plesk. Use a key of the administrator, or the admin login. |
| Plesk error 1014: … — Plesk rejected the request (Plesk Obsidian 18.0 or newer is needed) | Update Plesk to Obsidian 18.0 or newer. |
| Plesk XML API not reachable: …, with API access from this server is restricted in panel.ini ([api] allowedIPs) on HTTP 403 | FluxBilling cannot reach Plesk, or Plesk refuses its address. Check the hostname, port and firewall, and add your FluxBilling panel's address to allowedIPs if you restrict the API. |
| Plesk did not answer with XML (…) — check the hostname and port or Plesk did not answer with an XML API packet — check the hostname and port | The address reaches a web server, but not the Plesk panel. Correct Server Hostname and Port. |
| "…" is not a valid domain name for the hosting account | The order has no usable domain. Check the domain on the order, then retry. |
| The product has no service plan selected and the plugin has no default plan | Choose a Service Plan on the product, or set Default Service Plan in the plugin, then retry. |
| The product has no reseller plan selected (product › Provisioning) | Choose a Reseller Plan on the reseller product, then retry. |
| No free dedicated IPv4 address on the Plesk server — add one under Tools & Settings › IP Addresses | Every dedicated address is in use. Add one in Plesk, then retry. Nothing was created in Plesk. |
| The Plesk server has no shared IPv4 address, or IPv4 … chosen on the product is not an address of the Plesk server | Add a shared address in Plesk, or pick another one in Shared IPv4 on the product. The same applies to IPv6. |
| The domain … is already hosted on this Plesk server by another customer | The domain exists in Plesk under someone else. Sort it out in Plesk, then retry. |
| Plesk customer login … already belongs to another account or Plesk reseller login … already belongs to another account | A Plesk account marked as belonging to another client already uses that login. Rename or remove it in Plesk, then retry. |
| Could not create a Plesk login link: … | The REST API is not usable. Run Test Connection on the service page. The REST API accepts the admin login or an administrator's API key. |
| Plesk has no plan named … or No target plan: the new product has no service plan selected | A plan change found no plan. Select a plan on the new product and check that Plesk has a plan with that exact name. |
| A hosting subscription and a reseller account cannot be switched into each other — order a new service instead | The upgrade path links a hosting product to a reseller product. Remove that path. |
| The Plesk account no longer exists | Shown when an action such as suspend or unsuspend runs on a subscription or reseller that was deleted in Plesk. |
Limits
- Backups, SSL certificates, DNS zones and WordPress are not managed through the plugin. Customers manage them in Plesk.
- There is no direct phpMyAdmin login from the client area.
- The plugin hosts the domain the customer enters. It does not register domains.
- The dedicated IP add-on is applied only when the subscription is created.
- A hosting subscription and a reseller account cannot be converted into each other.
- Each FluxBilling panel connects to one Plesk server.
- FluxBilling does not rely on callbacks from Plesk: each action is judged on Plesk's direct answer. You do not need to set up anything for callbacks.
Plesk is a trademark of WebPros International GmbH. FluxBilling is not affiliated with WebPros International GmbH.