
CoinGate: crypto payments for your invoices
Set up the free CoinGate plugin: API token, sandbox, settlement currency, what customers see at checkout, payment statuses, refunds and troubleshooting.
The CoinGate plugin lets your customers pay FluxBilling invoices in cryptocurrency through CoinGate's hosted payment page. The customer chooses CoinGate at checkout, picks a coin and network on CoinGate's own page and sends the payment from their wallet. CoinGate then notifies FluxBilling, FluxBilling checks the order with CoinGate, and the invoice is marked paid. Wallet details and coin selection never pass through your FluxBilling panel. The plugin is free in the plugin marketplace.
This guide covers plugin version 2.7. It walks through the setup in the order you do it, then explains what your customers see, how payments, expiries and refunds work, and what to check when something does not work.
Who supports this integration. The plugin is built and maintained by FluxBilling. If something does not work, contact FluxBilling support at contact@fluxbilling.app or through fluxbilling.app/contact. Questions about your CoinGate account, its verification, fees, supported coins or payouts go to CoinGate support.
What you need before you start
- A CoinGate merchant account. CoinGate requires merchant verification before you can take live payments. See CoinGate's Environments page.
- A public HTTPS address for your FluxBilling panel. CoinGate must be able to reach the panel to report payments. CoinGate does not send notifications to private network addresses, so a panel that is only reachable inside your network cannot confirm crypto payments automatically.
- Optional: a CoinGate sandbox account to test with before you go live. Sandbox is a separate system with its own account at sandbox.coingate.com. It needs no verification and runs on test networks. Sandbox and live accounts have different API tokens, and a token from one does not work in the other.
Step 1: Create a CoinGate API token
The plugin authenticates every request to CoinGate with one API token.
- Sign in to your CoinGate dashboard (the sandbox one at sandbox.coingate.com if you are testing).
- Open the API management section and create a new API app or credential. CoinGate's support article How can I create CoinGate API credentials? shows the current menu path. The plugin's own hint refers to the older name of this screen, Merchant > API > Apps.
- Copy the token straight away and keep it safe. CoinGate shows each token only once.
CoinGate recommends a separate token for each website or service, so create one just for FluxBilling. If you use CoinGate's IP allowlist for the token, add the public IP address your FluxBilling panel sends requests from, or CoinGate refuses the requests.
Step 2: Install the plugin
- In the FluxBilling admin panel, open Settings (the gear icon in the top bar).
- Under Integrations, open Marketplace. Stay on the Browse tab.
- Search for CoinGate, open the CoinGate card and click Get for Free.
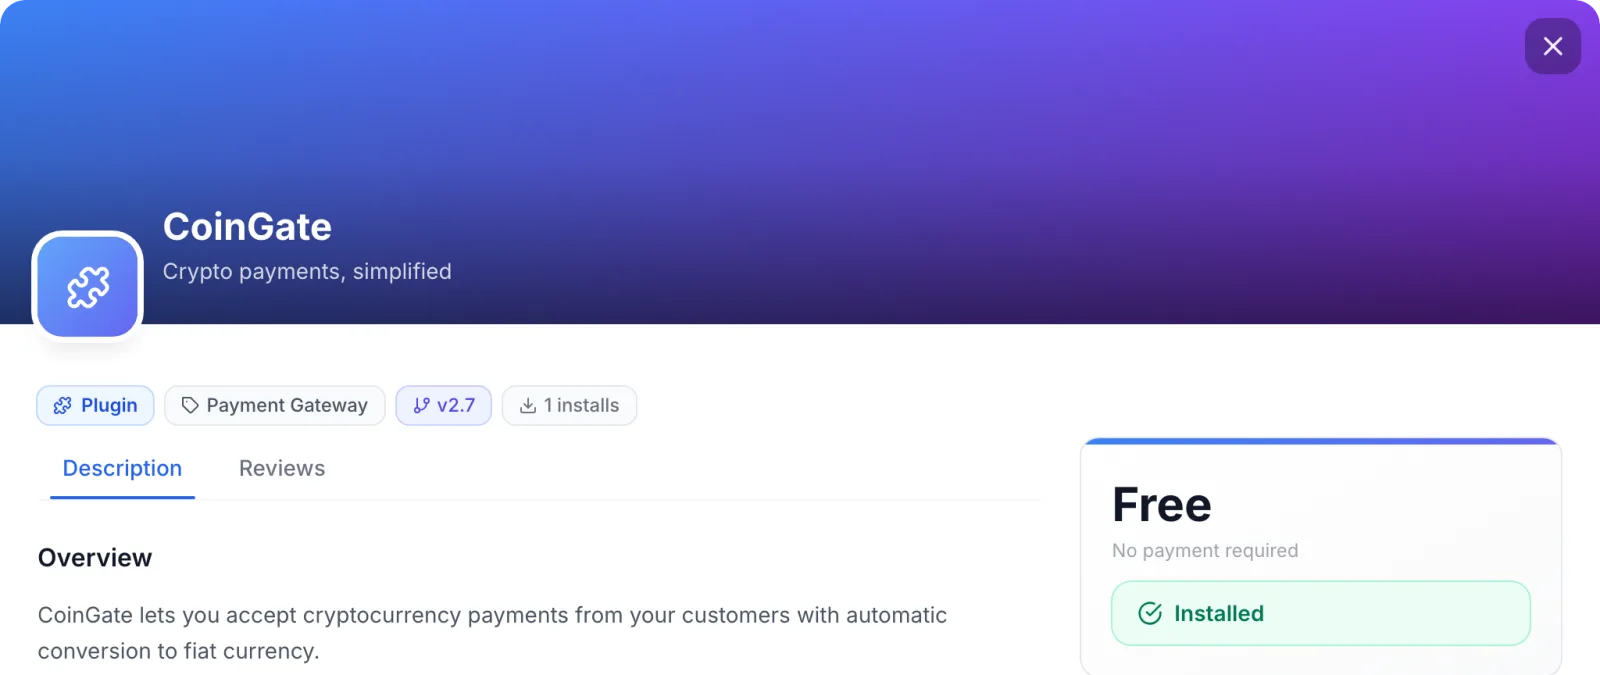
FluxBilling confirms with Plugin "CoinGate" installed and ready to use. The plugin appears under Settings → Integrations → Plugins as CoinGate, marked Active, and under Settings → Financial → Payment Gateways. Your customers do not see it yet: a gateway appears at checkout only once its required settings are filled in.
Step 3: Enter your token in FluxBilling
- Open Settings → Integrations → Plugins.
- On the CoinGate card, click Configure.
- On the Settings tab, fill in the fields below.
- Click Save Configuration. FluxBilling shows Configuration saved successfully.
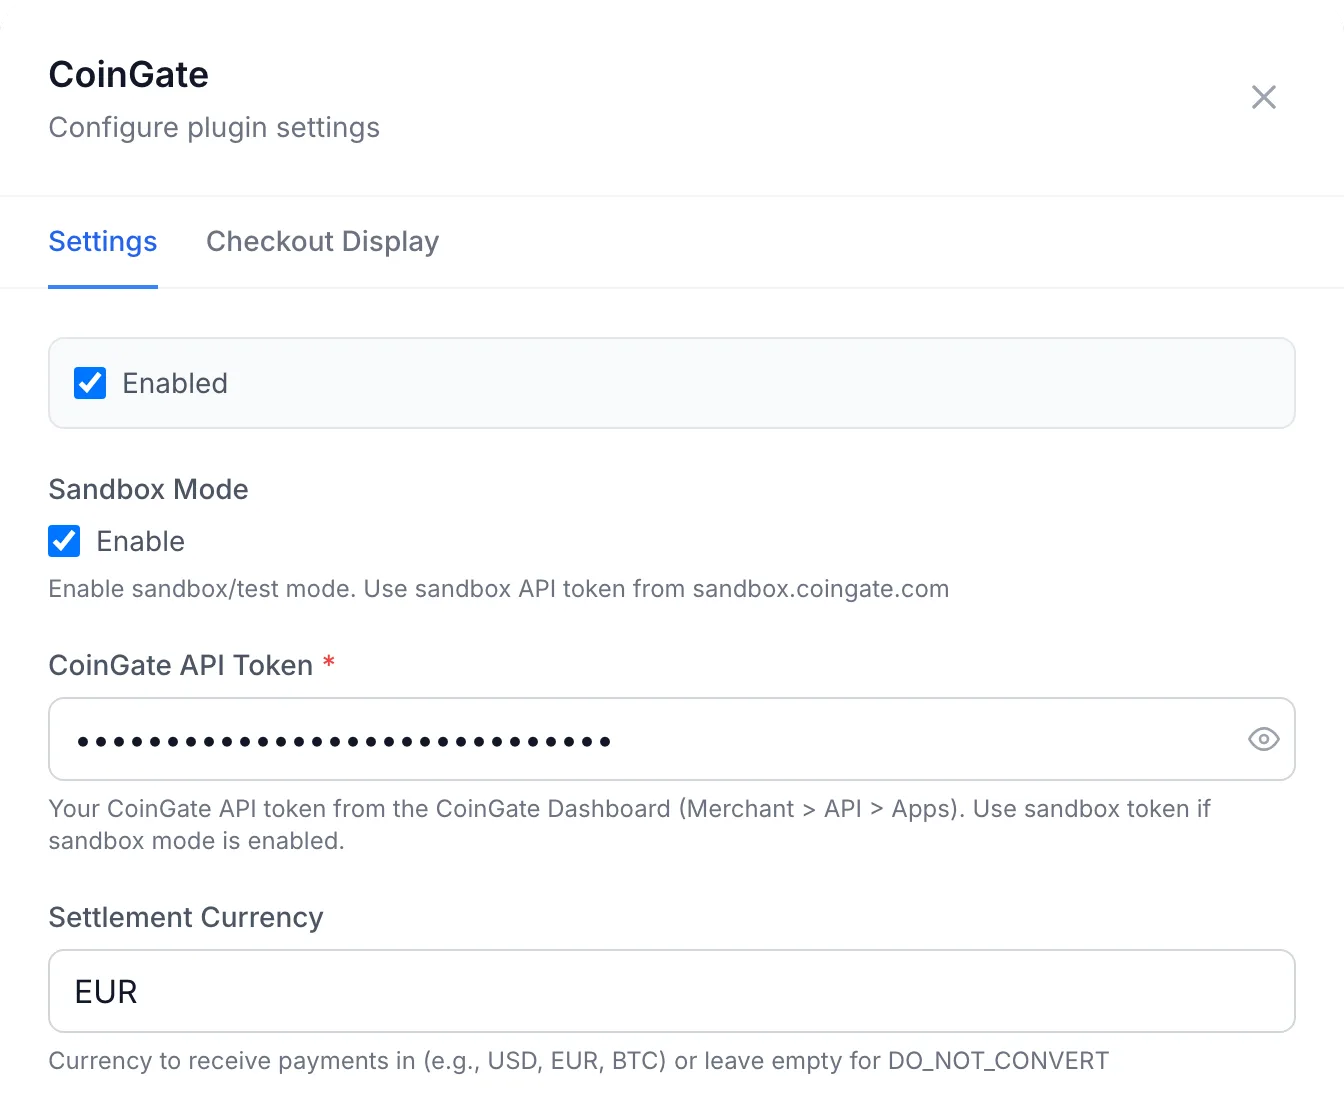
| Field | Required | What it does |
|---|---|---|
| Enabled | No | Offers the gateway at checkout. Untick it to hide CoinGate from customers without removing your settings. |
| Sandbox Mode | No | Tick Enable to send every request to CoinGate's sandbox instead of the live system. Use a sandbox token while it is ticked and your live token once you untick it. While it is ticked, the gateway preview on the Checkout Display tab carries a Test label. |
| CoinGate API Token | Yes | The token from step 1. It is stored encrypted and shown masked. |
| Settlement Currency | No | The currency CoinGate credits to your CoinGate account for each payment, for example EUR, USD or BTC. Leave it empty to keep each payment in the coin the customer paid with (CoinGate calls this DO_NOT_CONVERT). Which currencies you can settle in depends on your CoinGate account; see the receive_currency option in CoinGate's Create Order reference. |
The settlement currency only affects what CoinGate credits to you. The amount to pay is sent to CoinGate in the invoice's own currency when that currency is your base currency or one the gateway accepts; otherwise FluxBilling converts it to your base currency first. The customer pays the equivalent in the coin they choose.
If the token is missing, FluxBilling still saves the form but shows Saved, but the plugin is not configured until these are fixed: followed by CoinGate API Token is required. Until it is filled in, customers do not see CoinGate at checkout.
Checkout Display
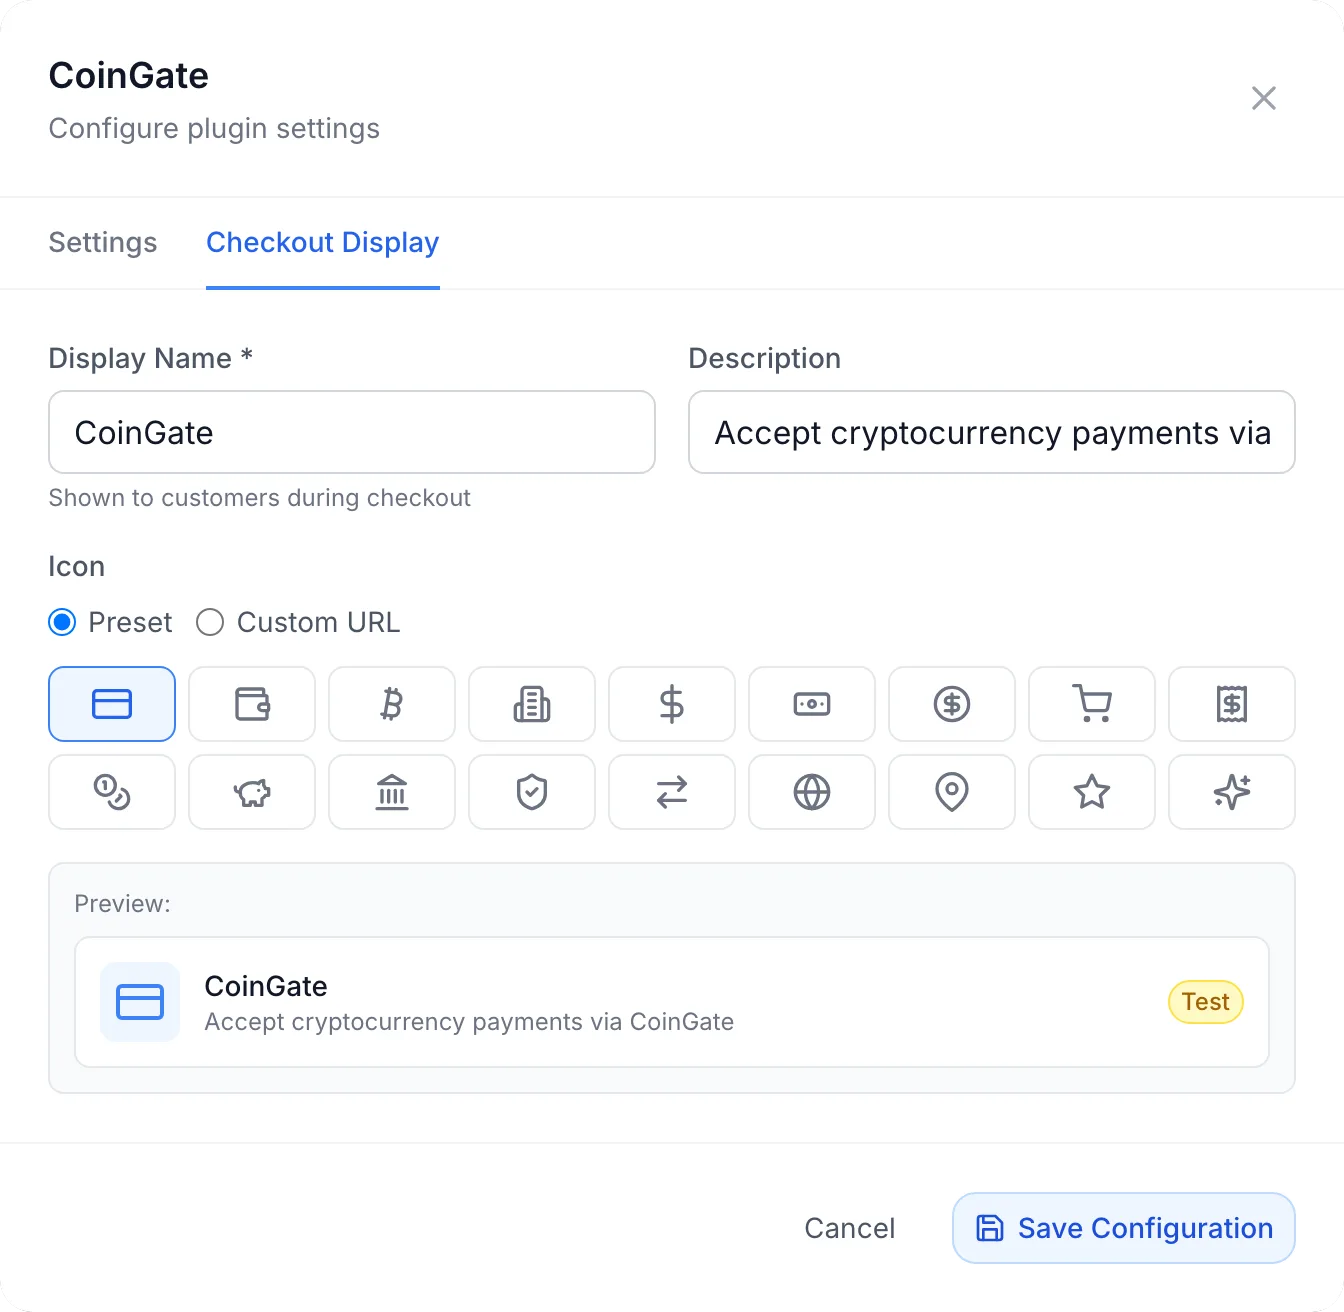
The Checkout Display tab sets how the gateway looks to customers: the Display Name (required, "Shown to customers during checkout"), a Description and an Icon, either a preset or a Custom URL. The preview shows a Test label while Sandbox Mode is on. Click Save Configuration to keep your changes.
Step 4: Payment notifications from CoinGate
CoinGate reports every change of an order's status (for example confirming, paid, expired or invalid) to a callback address. You do not need to register this address in your CoinGate dashboard. FluxBilling sends its own callback address with every order it creates, so CoinGate always knows where to report.
The box Webhook configuration required at the bottom of the Settings tab shows that address with a Copy URL button, and its status: No deliveries received yet until the first notification arrives, then Receiving deliveries. You can use it to check that notifications get through. If you look at CoinGate's callback log for an order, this is the address you should see.
FluxBilling does not trust the content of a notification. For every notification it asks CoinGate for the order with your API token and acts only on the status CoinGate returns. A notification for an order your token cannot read changes nothing.
CoinGate retries a notification that is not accepted, first every minute, then at growing intervals for several days. CoinGate describes this in API Callbacks, together with the callback log and callback testing tools in its dashboard.
Step 5: Check it in Payment Gateways and test
Open Settings → Financial → Payment Gateways. Each installed gateway has a card with an Enabled or Disabled badge and a switch. The switch turns the whole CoinGate plugin on or off.

If the Configure dialog shows a Connect CoinGate button under the fields, click it after saving. It checks your token against CoinGate, live or sandbox depending on Sandbox Mode, and shows Connected with the mode, or Last connection attempt failed with CoinGate's reason.
The reliable check of the whole setup is a sandbox payment:
- Tick Sandbox Mode, enter your sandbox token and save.
- In the client panel, pay a small test invoice with CoinGate. The amount charged must be at least 0.50 in the currency sent to CoinGate.
- Complete the payment on CoinGate's sandbox page with a test network coin.
- Check that the invoice shows as paid in FluxBilling and that the notification status in the Configure dialog reads Receiving deliveries.
- When it works, untick Sandbox Mode, replace the token with your live one and save.
What your customers see
CoinGate appears in the payment method list when a customer pays an invoice or a proforma, and when they add credit to their account, under the name and icon you set on the Checkout Display tab.
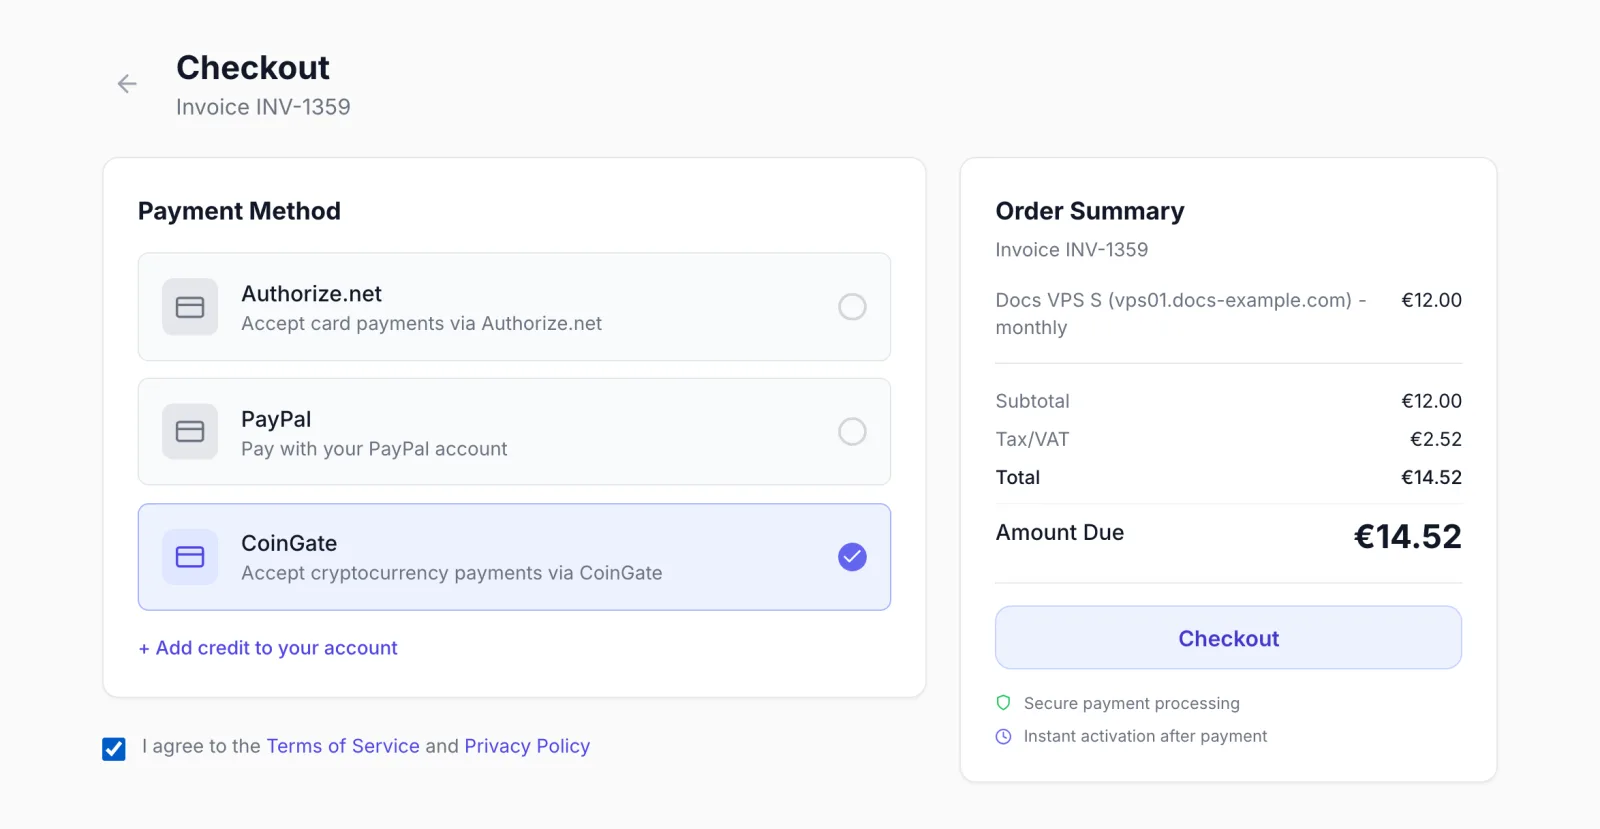
- The customer selects CoinGate, accepts your terms if the checkout asks for it, and clicks Checkout.
- The browser goes to CoinGate's payment page for the invoice amount. The customer's email address from your panel is filled in there, so CoinGate does not fall back to an address remembered from another account.
- The customer chooses a coin and network and sends the payment from their wallet. CoinGate waits for the blockchain confirmations it needs.
- After paying, the customer returns to the invoice list in your client area. If they cancel on CoinGate's page, they return to your client area and the invoice stays unpaid.
- When CoinGate reports the order as paid, the invoice is marked paid, and FluxBilling continues as for any paid invoice, for example by delivering the ordered service.
Crypto payments are not instant: depending on the coin, confirmation can take from seconds to an hour or more. The invoice stays unpaid until CoinGate marks the order paid.
CoinGate cannot store a payment method, so the checkout never offers to save one when CoinGate is selected, and CoinGate payments cannot be used for automatic renewals. Customers pay each invoice themselves.
Payment lifecycle at a glance
| CoinGate order status | In FluxBilling |
|---|---|
Customer opens CoinGate's page (new, pending) | A pending payment is recorded for the invoice. |
Payment sent, waiting for confirmations (confirming) | The payment stays pending. |
Confirmed (paid) | Invoice marked paid. |
Not paid in time (expired) | Payment recorded as failed; the invoice stays unpaid and the customer can pay again. |
Customer cancelled (canceled) | Payment recorded as failed; the invoice stays unpaid. |
Rejected by CoinGate (invalid) | Payment recorded as failed, with the reason and, if coins were sent, the on-chain transaction. |
Refunded at CoinGate (refunded) | Refund recorded against the invoice. |
CoinGate explains each status in Order Statuses. An order expires if the customer does not pick a currency within 2 hours, or does not pay within 20 minutes of picking one.
Failed payments and the reason shown
On the invoice (or proforma) in the admin panel, the Activity card lists each payment attempt. A failed CoinGate attempt shows a Reason, and an On-chain tx line when coins were actually sent:
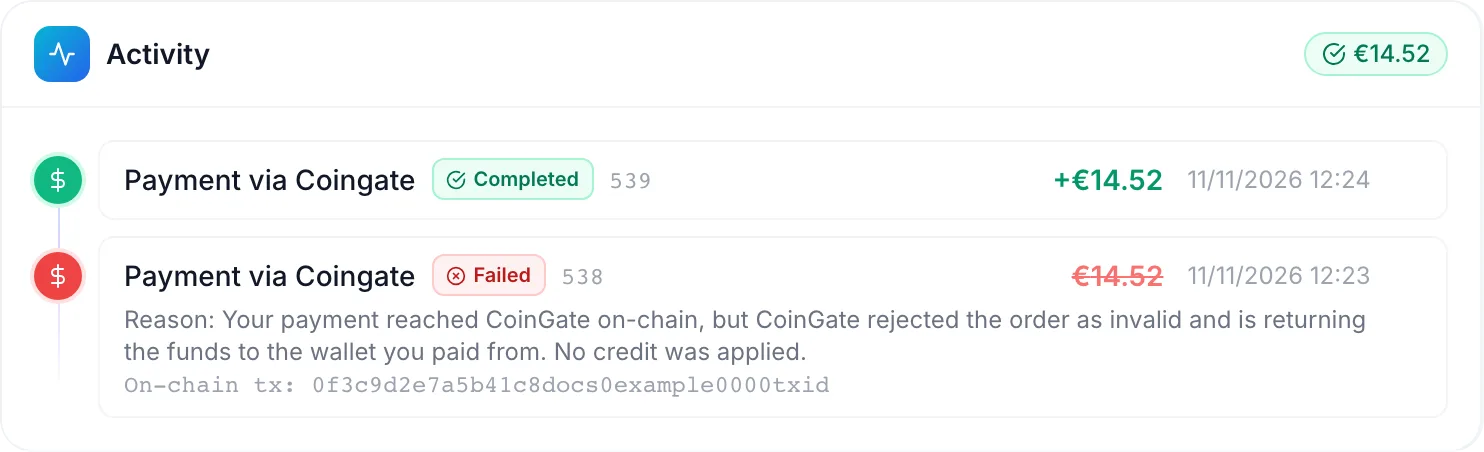
| Reason | What it means |
|---|---|
| CoinGate order expired before payment | The customer did not pay in time. Nothing was received. |
| Payment arrived after the CoinGate order had expired. CoinGate did not settle it and is returning the funds to the wallet you paid from. | The coins arrived too late. CoinGate handles the return; ask the customer to pay the invoice again. |
| CoinGate marked this order invalid - no payment was received. | CoinGate rejected the order and nothing was received. |
| Your payment reached CoinGate on-chain, but CoinGate rejected the order as invalid and is returning the funds to the wallet you paid from. No credit was applied. | CoinGate received the coins but rejected the order, for example for compliance reasons. Check the order in your CoinGate dashboard; the invoice was not credited. |
An order that CoinGate marks invalid also raises a payment failed event, which your notification plugins can send to your team (see Notification plugins). Expired and cancelled orders do not, because they are normal when a customer walks away.
If a notification is lost
FluxBilling does not rely on notifications alone. About half an hour after a CoinGate payment was started and still shows as pending, FluxBilling asks CoinGate for the order status and settles the invoice if the order is paid. It asks again every few hours. A payment still pending after 12 hours is closed as failed, after a final check with CoinGate.
Paying again
While a CoinGate payment for an invoice is less than 30 minutes old, starting a second one for the same invoice is refused with A payment for this invoice is already in progress with this gateway. Please complete the existing payment window or wait a few minutes before trying again. This protects the customer from paying twice. After 30 minutes, a new attempt replaces the old one. If the amount owed has changed since the first payment page was opened, for example because account credit was applied, the new attempt replaces the old one straight away.
Refunds
FluxBilling cannot send a refund through CoinGate. Refund a crypto payment in your CoinGate dashboard: CoinGate returns the funds to an address the customer gives. CoinGate explains its refunds in Create Order Refund.
If CoinGate reports the order as refunded, FluxBilling records the refund against the invoice. Check the invoice before you record anything by hand, so the refund is not recorded twice. To record it yourself, open the paid invoice in the admin panel, click Refund and choose Manual ("Mark as refunded without gateway call") or To balance (to give the customer account credit instead). Choosing Via Gateway for a CoinGate payment fails with This gateway does not support refunds. More in Invoice details.
Troubleshooting
| Message or symptom | What to check |
|---|---|
| CoinGate is not offered at checkout | The CoinGate API Token is empty. Also check that Enabled is ticked in the Configure dialog and that the switch on Settings → Financial → Payment Gateways is on. |
| Saved, but the plugin is not configured until these are fixed: CoinGate API Token is required | Enter the token and save again. |
| After clicking Checkout the customer sees CoinGate's error message, or Failed to create CoinGate order | CoinGate refused to create the order. Check the token, and that Sandbox Mode matches the account it belongs to: sandbox tokens work only with Sandbox Mode on, live tokens only with it off. A live account must be verified by CoinGate. If you use an IP allowlist on the token, add your panel's IP. CoinGate's troubleshooting page lists common causes. |
| CoinGate API authentication failed. Verify your API token (and that sandbox mode matches the token) in the CoinGate dashboard. | Shown by Connect CoinGate when CoinGate rejects the token. Same checks as above. |
| The customer paid, but the invoice is still unpaid | First check the order in your CoinGate dashboard. While it is confirming, the blockchain has not confirmed it yet; wait. If it is paid, check CoinGate's callback log for the order: the panel must be reachable over the internet at the address shown in the Configure dialog. FluxBilling also checks pending orders with CoinGate on its own, so a paid order is settled within a few hours even if every notification is lost. |
| The customer paid too little | FluxBilling settles an invoice only when CoinGate marks the order paid. Check the order in your CoinGate dashboard, which shows any underpaid amount, and settle the difference with the customer there. If you accept the payment, record it on the invoice yourself. |
| A payment for this invoice is already in progress with this gateway… | The customer started a CoinGate payment for this invoice less than 30 minutes ago. Ask them to finish that payment page, or wait and try again. |
| Minimum payment amount is 0.5 followed by the currency | The amount left to pay is below 0.50 in the currency charged. Let the customer pay it with account credit or another method. |
| This gateway does not support refunds | You chose Via Gateway in the refund dialog. Refund at CoinGate and record it with Manual or To balance. |
Limits
- No refunds from FluxBilling. Refunds are made in your CoinGate dashboard.
- No saved payment methods or automatic renewals. A crypto wallet cannot be charged by the merchant, so every invoice is paid by the customer.
- No partial payments. An invoice is settled only when CoinGate marks the whole order paid.
- Hosted page only. Customers always choose the coin and pay on CoinGate's page. There is no crypto payment form inside your client area.
- Minimum amount 0.50 in the currency charged (the invoice currency, or your base currency when the amount is converted).
- Coins and networks are set at CoinGate. Which coins, networks and settlement currencies your customers and you can use is decided by your CoinGate account, not by the plugin.
Updating the plugin
Open Settings → Integrations → Marketplace, switch to Installed and click Check for Updates. When a new version is available, click Update to v…. Your settings are kept.
CoinGate is a trademark of its respective owner. FluxBilling is not affiliated with CoinGate.