
Mollie: iDEAL, cards, SEPA and more
Set up the free Mollie plugin: API key, checkout display, test payments, saved mandates for automatic renewals, refunds and troubleshooting.
The Mollie plugin adds Mollie as a payment method at checkout, so your customers can pay invoices through Mollie's hosted payment page with iDEAL, cards, Bancontact, SEPA bank transfer, PayPal and the other methods you activate in your Mollie account. FluxBilling creates the payment, sends the customer to Mollie, and marks the invoice paid when Mollie reports the payment as paid. Customers can also save a card or bank account with Mollie, so renewal invoices are paid automatically. The plugin is free and is listed in the plugin marketplace of every FluxBilling panel.
This guide covers plugin version 2.7. It walks through the setup in the order you do it, then explains what your customers see, how payments, refunds and saved payment methods work, and what to check when something does not work.
Who supports this integration. The plugin is built and maintained by FluxBilling. If something does not work, contact FluxBilling support at contact@fluxbilling.app or through fluxbilling.app/contact. Questions about your Mollie account, its payment methods, fees or payouts go to Mollie support.
What you need before you start
- A Mollie account with a website profile for the site your customers pay on. Mollie creates API keys per profile. Sign up or log in at my.mollie.com. To take real payments, Mollie has to approve your account first; test payments work straight away.
- The payment methods you want to offer, activated for that profile in the Mollie Dashboard. The plugin does not choose methods: Mollie's payment page shows the methods you activated that fit the amount and currency of the payment. See Mollie's payment methods and hosted checkout documentation.
- The profile's API key. Each profile has a Test API key (starts with
test_) and a Live API key (starts withlive_). You find them in the Mollie Dashboard under Developers → API keys. Mollie shows a new key only once, when it is created, so copy it right away. Use the profile API key, not an advanced access token or an OAuth app token. Mollie explains the keys on its Authentication page. - A FluxBilling panel that Mollie can reach over the internet. Mollie reports every payment status change to your panel. A panel that only runs on a private network or on your own computer can create payments, but never hears that they were paid.
You do not need to set up a webhook in the Mollie Dashboard. FluxBilling sends its own notification address to Mollie with every payment it creates, which is how Mollie's standard webhooks work.
Step 1: Install the plugin
- In the FluxBilling admin panel, open Settings (the gear icon in the top bar).
- Under Integrations, open Marketplace. Stay on the Browse tab.
- Open the Mollie card and click Get for Free.
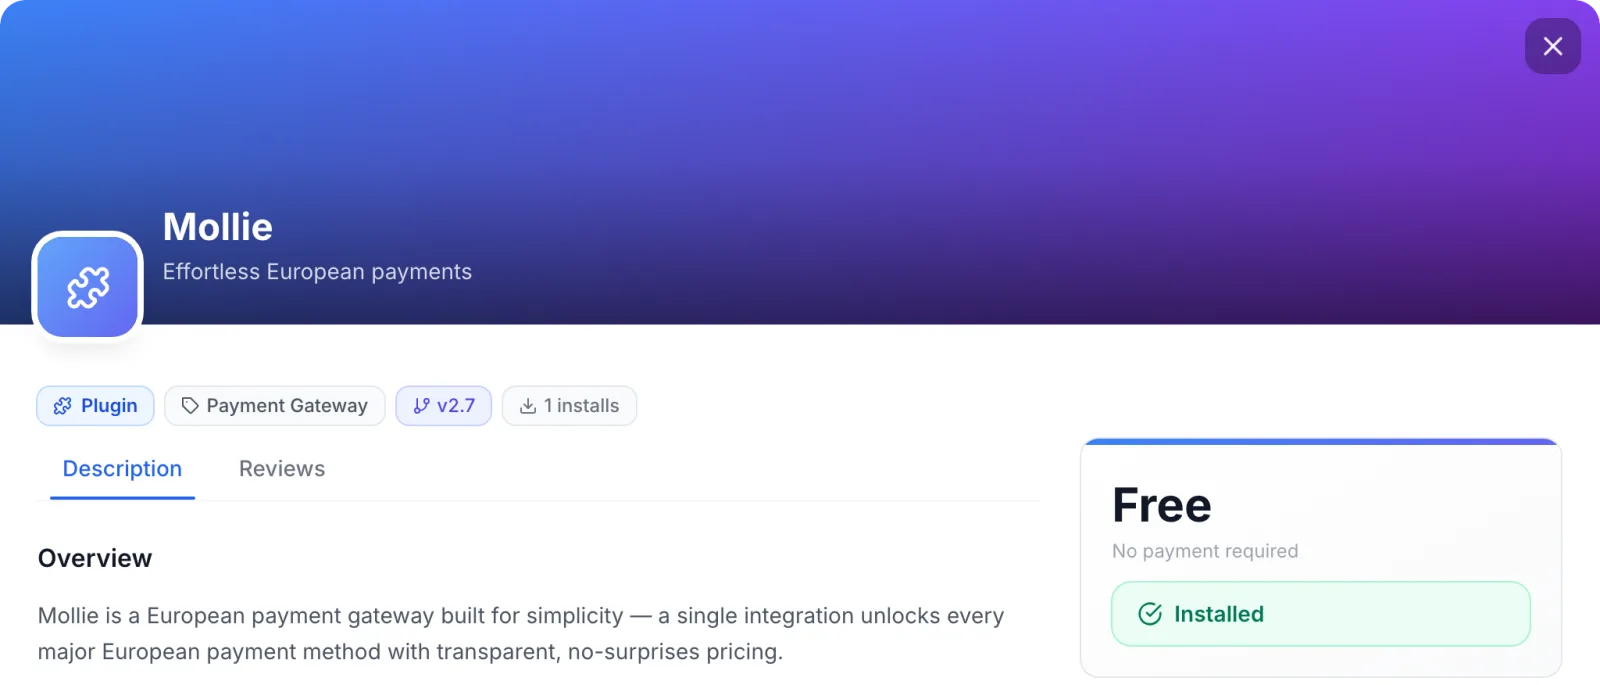
FluxBilling confirms with Plugin "Mollie" installed and ready to use. The plugin is switched on straight away and appears under Settings → Integrations → Plugins, marked Active. Customers do not see Mollie at checkout until you enter an API key in the next step.
Step 2: Enter your API key
- Open Settings → Integrations → Plugins.
- On the Mollie card, click Configure.
- On the Settings tab, make sure Enabled is ticked and paste your key into Mollie API Key.
- Click Save Configuration. FluxBilling shows Configuration saved successfully.
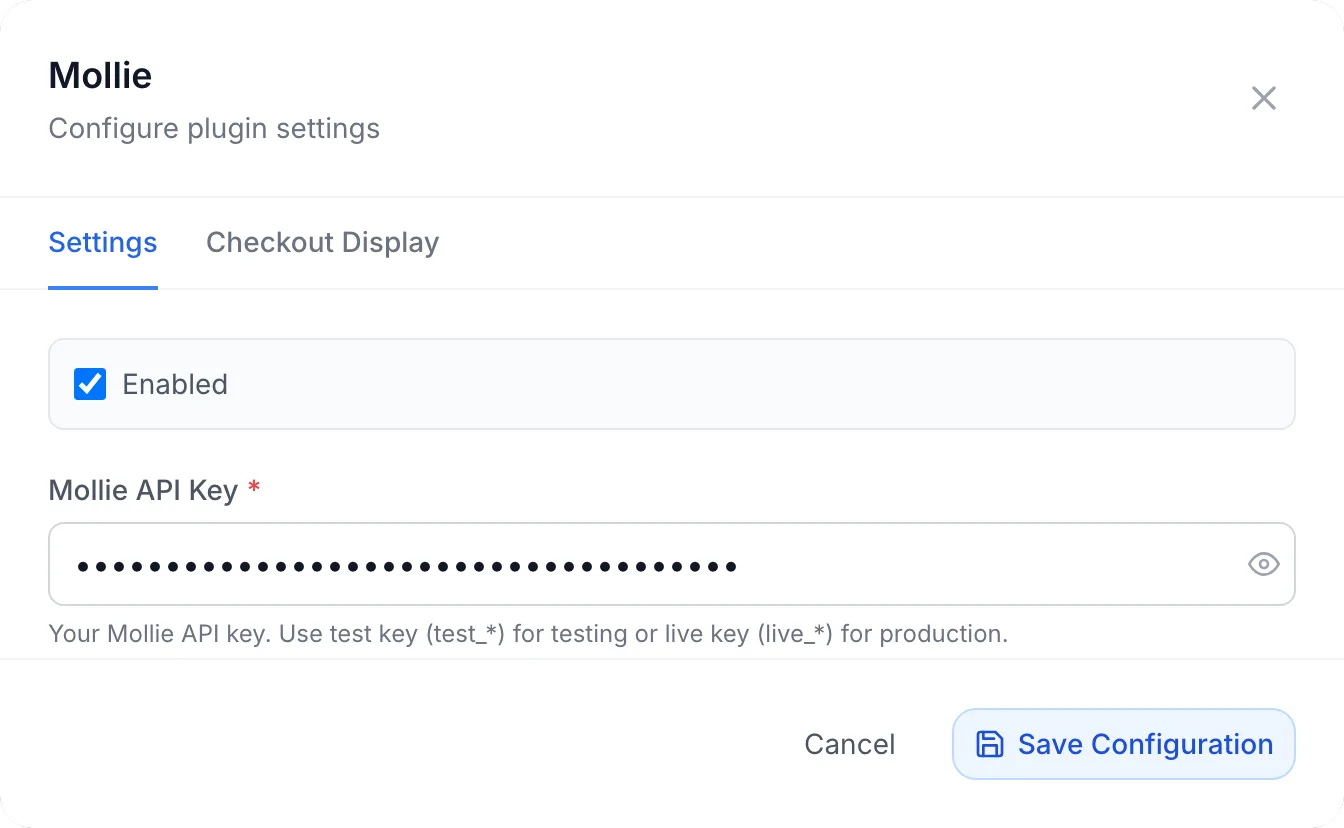
| Field | What it does |
|---|---|
| Enabled | Offers Mollie at checkout. Untick it to hide Mollie from customers without removing your key. |
| Mollie API Key (required) | The API key of your Mollie website profile. A test_ key creates test payments; a live_ key creates real ones. The key is stored encrypted and is shown as dots. |
The dialog also shows a Webhook configuration required box with your panel's notification address. For Mollie you do not need to copy it anywhere: FluxBilling hands it to Mollie with each payment. Once Mollie has reported a payment, the box shows that deliveries are being received instead of No deliveries received yet.
The dialog has no connection test. To check the key, pay a test invoice with your test key (see step 4).
Step 3: Choose how Mollie appears at checkout
Switch to the Checkout Display tab of the same dialog to set what customers see in the list of payment methods:
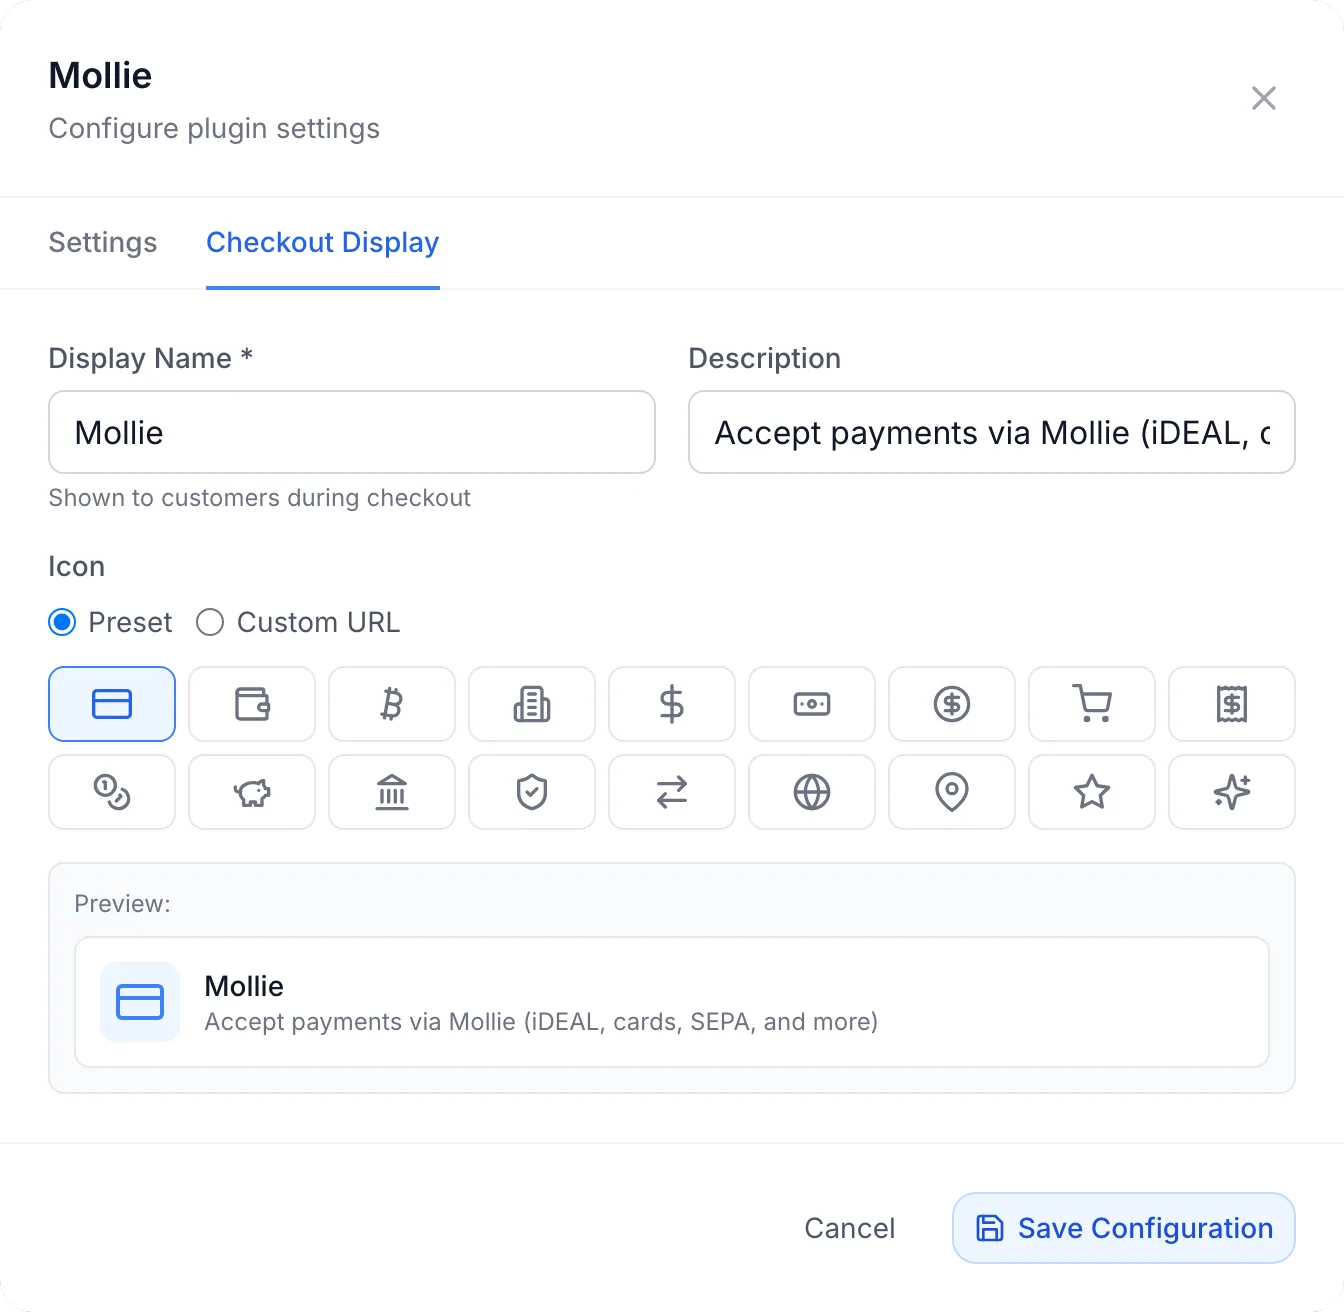
| Field | What it does |
|---|---|
| Display Name (required) | The name of the payment option at checkout, for example iDEAL, Bancontact or card. Naming the methods your customers know usually works better than the provider's name. |
| Description | The line under the name. |
| Icon | Choose a Preset icon, or Custom URL to use your own image. |
Click Save Configuration to keep the changes.
The same gateway is listed under Settings → Financial → Payment Gateways, with a switch that turns the Mollie plugin on or off. See Payment Gateways.

Step 4: Test with your test key
With a test_ key, Mollie shows a test payment screen instead of the real payment page. There you choose the outcome of the payment, such as paid, failed, cancelled or expired, without spending money. Mollie calls your panel exactly as it does in live mode. Mollie's Testing page lists test card numbers and the amounts that trigger specific card failures, and notes that test mode only supports EUR.
- Log in to the client area with a test client account that has an unpaid invoice in EUR.
- Open the invoice, choose Mollie (or the display name you set) and click Checkout.
- On Mollie's test screen, choose Paid.
- Back in FluxBilling, check that the invoice is marked paid. Then try a failed or expired payment and check that the invoice stays unpaid.
When everything works, replace the key with your live_ key in Mollie API Key and save. Nothing else changes between test and live mode.
What your customers see
Paying an invoice
Mollie appears in the list of payment methods on the checkout page of every invoice, under the name and icon you set:
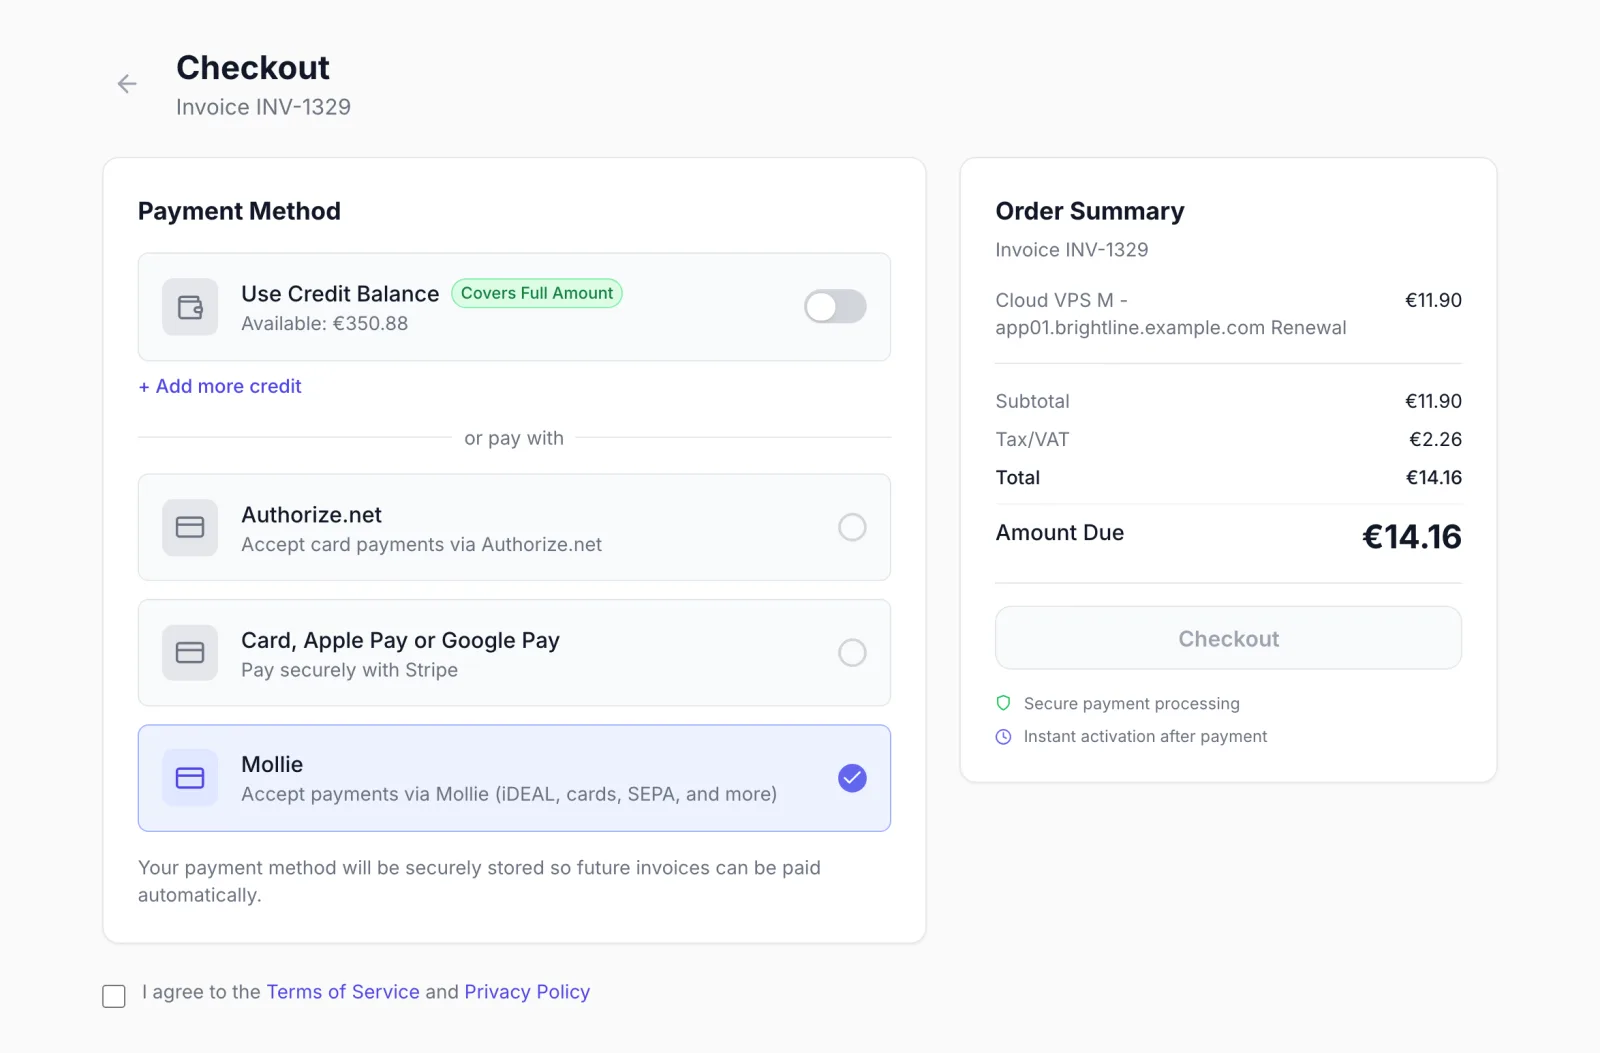
- The customer chooses Mollie, accepts your terms if you require it, and clicks Checkout.
- FluxBilling creates the payment at Mollie for the amount still due and sends the customer to Mollie's payment page. There the customer chooses a method, for example iDEAL or a card, and pays.
- Mollie sends the customer back to the invoices page in the client area.
- As soon as Mollie reports the payment as paid, FluxBilling marks the invoice paid and runs what follows from it, such as activating the ordered service. With the default email templates, the customer receives a Payment Received email.
Some methods, such as bank transfer, are not paid on the spot. The invoice stays unpaid while the payment is still open at Mollie, and is marked paid when the money arrives. If a customer cancels on Mollie's page or the payment fails or expires, the invoice stays unpaid and the customer can pay again.
If the customer starts a second Mollie payment for the same invoice while the first is still open, FluxBilling answers A payment for this invoice is already in progress with this gateway. Please complete the existing payment window or wait a few minutes before trying again.
Currencies
FluxBilling asks Mollie for the invoice's own currency when the invoice is in EUR, in USD or in your base currency. An invoice in any other currency is converted to your base currency for the payment. Mollie's page then only offers the methods that accept that currency; see Mollie's Multicurrency page.
Saving a payment method
Mollie can store a customer's card or bank account as a mandate, which FluxBilling then uses to pay later invoices automatically. Customers save one in two ways:
- While paying an invoice. The checkout shows the tick-box Save this payment method for future purchases. If you switched on Require saving the payment method under Settings → Billing → Automation, the tick-box is replaced by the notice Your payment method will be securely stored so future invoices can be paid automatically. Mollie then asks the customer to agree to future charges on its payment page.
- From their profile. Under Profile Settings → Payment Methods, the customer clicks Add payment method and chooses Mollie. Mollie asks the customer to authorise a payment of €0.01 to set up the mandate, then sends them back. FluxBilling confirms with Payment method saved — future invoices can now be paid automatically.
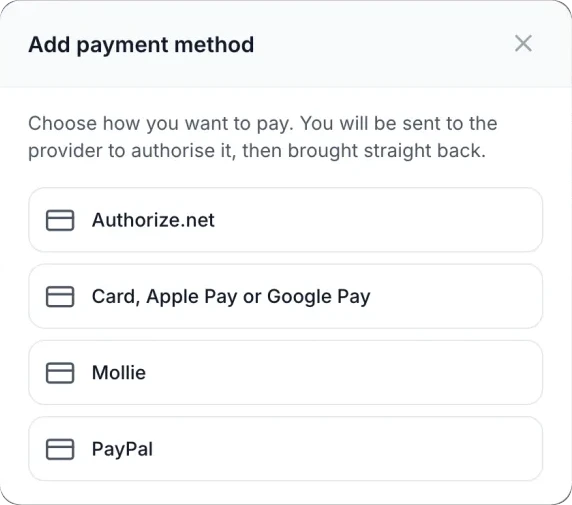
Saved methods appear under Saved Payment Methods on the checkout page, so the customer can pay with one click. When a customer removes a saved Mollie method, FluxBilling also revokes the mandate at Mollie.
Automatic payment of renewals
To charge saved Mollie methods for renewal invoices, switch on Enable Auto-Payment in the Auto-Payment for Renewals card under Settings → Billing → Automation. The same card sets Days Before Due, Max Retries, Retry Interval, Require saving the payment method and Auto-enroll customers when they save a card. See Billing Settings.
- FluxBilling asks Mollie to charge the customer's mandate for the invoice amount, without the customer taking part.
- A card charge usually succeeds or fails straight away. A SEPA Direct Debit charge starts as pending and can take several business days; the invoice is marked paid when Mollie reports the debit as paid.
- A failed charge is retried according to your settings. When the mandate is no longer valid, for example because the customer revoked it or no suitable mandate exists, FluxBilling stops using that saved method straight away.
- With the default email templates, customers receive Auto-Payment Success, Auto-Payment Failed, Auto-Payment Action Required (the bank asks the customer to confirm the payment) and Payment Method Disabled emails.
If you move from WHMCS with WHMCS Migration, saved Mollie customer and mandate references are carried over, so migrated customers can be charged without saving their method again.
Refunds and chargebacks
Refunding from FluxBilling
- Open the paid invoice in the admin panel and click Refund.
- Under Refund Method, choose Via Gateway (Process through original payment gateway).
- Leave Amount empty to refund the whole payment, enter a Reason if you like, and confirm.
FluxBilling sends the refund to Mollie, in the currency the customer paid in. Mollie does not pay a refund out at once, so the invoice is marked Refunded once Mollie reports the refund. Mollie takes refunded amounts from your Mollie balance; see Mollie's Refunds page. The other refund methods in the dialog, Manual and To balance, do not involve Mollie.
Refunds and chargebacks made at Mollie
- When you refund a whole payment in the Mollie Dashboard, Mollie tells FluxBilling, and the invoice is marked Refunded.
- When a customer's bank reverses a payment (a chargeback), FluxBilling puts the invoice On Hold so you can follow it up. If the payment had added account credit, that credit is taken back. Nothing else is done automatically against the customer.
Updating the plugin
Open Settings → Integrations → Marketplace, switch to Installed and click Check for Updates. When a new version is available, click Update to v…. Your API key is kept. The update puts the display name, description and icon back to the plugin's own, so open the plugin's Checkout Display tab afterwards and set them again if you had changed them.
Troubleshooting
When Mollie refuses a request, FluxBilling shows Mollie's own error message. When Mollie gives no message, the plugin's own message below is shown instead.
| Message or symptom | What to check |
|---|---|
| Mollie does not appear at checkout | The Mollie API Key is empty, Enabled is not ticked in the dialog, or the plugin is switched off under Settings → Financial → Payment Gateways. |
| Failed to create Mollie payment, or Mollie's message that authentication failed | The API key is wrong, was removed in Mollie, or is not a profile API key. Copy a fresh test_ or live_ key from Developers → API keys. |
| The customer paid, but the invoice stays unpaid | Mollie cannot reach your panel to report the payment, for example because the panel is not reachable from the internet. FluxBilling also asks Mollie about open payments by itself after a while, so the invoice can still be marked paid later. A method such as bank transfer stays open at Mollie until the money arrives; a payment still unpaid after 14 days is closed as expired. |
| Minimum payment amount is 0.01 followed by the currency | The amount left to pay is below what Mollie accepts. |
| Failed to create Mollie customer or Failed to create setup payment when adding a payment method | Mollie refused the request. Check the API key, and that the profile has a payment method activated that supports recurring payments. |
| No mandate created — the setup payment was not completed | The customer left or cancelled Mollie's page before finishing, or the payment failed. The customer can try again. |
Failed to charge saved method, or a failure reason such as insufficient_funds or card_expired on an automatic payment | Mollie could not charge the saved method. FluxBilling retries according to Max Retries and Retry Interval and emails the customer. |
| Refund failed or Failed to load payment for refund | Mollie refused the refund, for example because your Mollie balance is too low or the payment was already refunded. Check the payment in the Mollie Dashboard. |
Limits
- Customers always pay on Mollie's hosted payment page. The plugin has no payment form embedded in your checkout and does not let you preselect a method.
- FluxBilling does not create Mollie subscriptions. Renewals are FluxBilling invoices, paid automatically from a saved mandate when auto-payment is on.
- Payments are captured straight away. Holding an authorisation and capturing it later is not offered.
- Each FluxBilling panel connects to one Mollie website profile.
- Mollie sends no notice when a customer revokes a mandate at their bank. FluxBilling finds out at the next charge attempt and then stops using that saved method.
Mollie is a trademark of Mollie B.V. FluxBilling is not affiliated with Mollie B.V.