
cPanel/WHM: sell shared hosting accounts
Connect FluxBilling to WHM with an API token, sell WHM packages as products, and give customers one-click cPanel logins plus email, database, domain, FTP and SSL management.
The cPanel/WHM plugin connects FluxBilling to the WHM API of your cPanel server, so you can sell shared hosting accounts as FluxBilling products. FluxBilling takes the order, sends the invoice and collects the payment. When the invoice is paid, the plugin creates the cPanel account in WHM on the product's package. In the FluxBilling client area the customer opens cPanel, Webmail, File Manager and phpMyAdmin without a password and manages mailboxes, forwarders, databases, domains, PHP versions, FTP accounts and SSL. The plugin is free and is listed in the plugin marketplace of every FluxBilling panel. Your cPanel licence and server stay as they are.
This guide covers plugin version 1.2.1, which needs FluxBilling 0.0.1572 or newer. It walks through the setup in the order you do it, then explains what happens to a hosting account over its life and what to check when something does not work.
Who supports this integration. The plugin is built and maintained by FluxBilling. If something does not work, contact FluxBilling support at contact@fluxbilling.app or through fluxbilling.app/contact. Questions about cPanel & WHM itself, its licence or its servers go to cPanel support.
What you need before you start
- FluxBilling 0.0.1572 or newer.
- A working cPanel & WHM server and a WHM login as
rootor as a WHM reseller. Accounts are created under the user you connect with. - At least one hosting package in WHM (Packages » Add a Package). The package sets the account's disk quota, bandwidth, email accounts, databases and other limits.
- A WHM API token for that user (step 1). The plugin does not accept a password.
- Network access from your FluxBilling panel to WHM on port 2087 (WHM over SSL). A self-signed certificate on that port is accepted.
- Free dedicated IPv4 addresses in WHM, only if you want to sell a dedicated IP (steps 5 and 6).
Step 1: Create a WHM API token
The plugin signs every request with a WHM API token, sent in the Authorization: whm username:token header that cPanel documents. We recommend a separate token for FluxBilling, so you can restrict it and revoke it without touching anything else.
- Log in to WHM as the user FluxBilling will connect as, and open Development » Manage API Tokens.
- Click Generate Token and give it a name, for example
fluxbilling. - Choose an expiry. A token that expires stops FluxBilling from reaching WHM on that date, so note it or choose no expiry.
- Optionally restrict the token to the public IP address your FluxBilling panel connects from. Ask FluxBilling support if you are not sure which address that is.
- Leave the privileges the plugin needs selected. The token must be allowed to run every WHM API function in the table below. The plugin's own hint asks for all privileges (
acl=all); if you remove some, keep the ones that cover these functions. - Click Generate. WHM shows the token only once: copy it now, then confirm that you saved it.
cPanel documents this screen in Manage API Tokens in WHM, and the header format in the guide to API tokens in WHM. If you connect as a reseller, WHM only shows the token screen when the reseller holds all the initial privileges (see Resellers » Edit Reseller Nameservers and Privileges).
| Function | Used for |
|---|---|
listpkgs | The package lists in the product editor and the staff Change Package dialog |
createacct | Creating the cPanel account when the invoice is paid |
suspendacct, unsuspendacct, removeacct | Suspending, unsuspending and terminating the account |
accountsummary, showbw | Account details, disk and bandwidth use |
uapi_cpanel | Everything on the service page that runs as the customer's own account: usage counters, mail, databases, domains, PHP, FTP, SSL and backups |
cpanel (cPanel API 2) | Removing a subdomain |
create_user_session | The one-click logins |
passwd | Setting a new account password |
changepackage | Upgrades, downgrades and the staff Change Package |
editquota, modifyacct | The staff actions Change Quota and Modify Account |
version | The connection test |
Step 2: Install the plugin
- In the FluxBilling admin panel, open Settings (the gear icon in the top bar).
- Under Integrations, open Marketplace. Stay on the Browse tab.
- Open the cPanel/WHM card and click Get for Free.
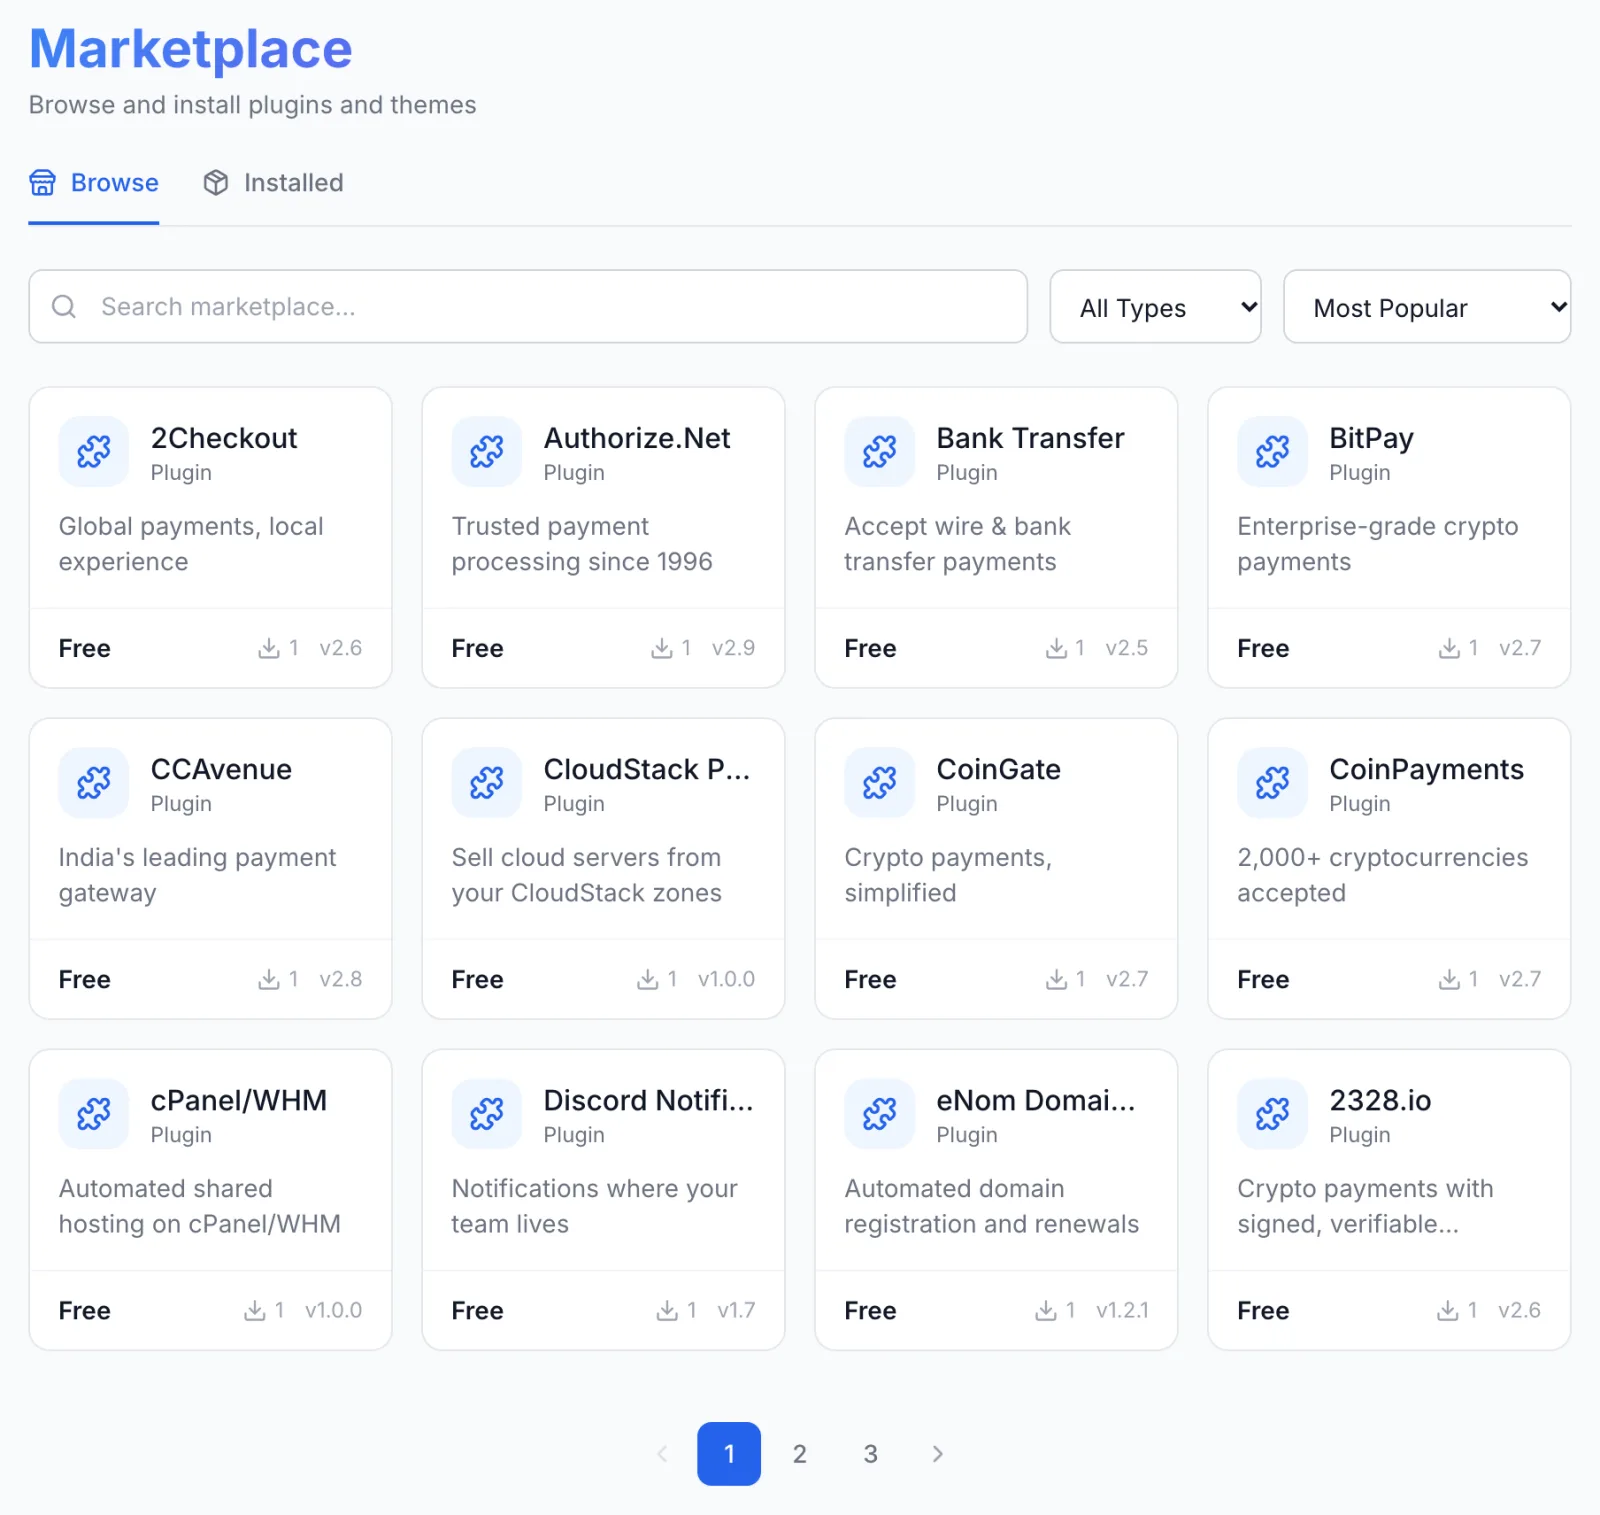
FluxBilling confirms with Plugin "cPanel/WHM" installed and ready to use. The plugin is switched on straight away and appears under Settings → Integrations → Plugins as cPanel/WHM Provider, marked Active.
Step 3: Connect it to WHM
- Open Settings → Integrations → Plugins.
- On the cPanel/WHM Provider card, click Configure.
- Fill in the fields below and click Save Configuration.
| Field | What to enter |
|---|---|
| Hostname (required) | The WHM server's hostname or IP address, without https:// and without a port, for example server.example.com. |
| Port | The WHM port. Enter 2087, the port WHM serves its API on over SSL. FluxBilling always connects over HTTPS. |
| Username (required) | root, or the WHM reseller that should own the new accounts. It must be the user the token belongs to. |
| WHM API Token (required) | The token from step 1. A WHM password does not work here. |
| Default Package | Used only for a product that has no WHM Package saved (step 5). Enter the package name exactly as WHM shows it. When it is empty too, the plugin asks WHM for a package named default. |
| Nameserver 1 to Nameserver 4 | Optional. The first two are shown on the service page when WHM does not report the account's nameservers. New accounts always get the nameservers set in WHM. |
The token is stored encrypted. FluxBilling shows Configuration saved successfully when the settings are saved.
Test the connection. On Settings → Integrations → Plugins, click the cPanel/WHM Provider card itself, switch to the Connections tab and click the test button (Test connection) next to WHM API. The plugin asks WHM for its version with your settings, so a wrong or expired token fails. A good result reads Connection successful — WHM and your WHM version; otherwise Test failed: Failed to connect to WHM. Check hostname, port and API token.
Step 4: Create a category for your hosting products
In FluxBilling, the category decides how its products are delivered. Every product in the category is built by the plugin you choose here.
- Open Products, switch to the Categories tab and click Add Category.
- When FluxBilling asks What does this category sell?, choose Plugins. Do not choose Web hosting: that type is FluxBilling's own web hosting module, not cPanel.
- Enter a Name. The URL slug fills in by itself.
- Under How paid orders are fulfilled, click cPanel/WHM Provider.
- Under Availability, choose Live to show the category on the order page, or Unlisted while you test.
- Click Create Category.
Step 5: Create a product for each WHM package
- On the Products tab, click Add Product and choose the category from step 4.
- On General, enter the product name and description your customers will see.
- On Configuration, fill in the fields below.
- On Pricing, set the price. Prices, billing cycles, taxes and add-ons all live in FluxBilling. Disk, bandwidth and the other limits come from the WHM package.
- Click Create Product.
| Field | What it does |
|---|---|
| WHM Package (required) | The package new accounts are created on, read live from WHM. It is also the package an account moves to when a customer upgrades or downgrades to this product (see Plan changes). |
| Dedicated IP | Gives every account of this product a dedicated IPv4 address from WHM's free IP addresses. |
| Allow Custom Username | Shows the cPanel Username field on the order form (step 7). |
| Allow Custom Password | Shows the cPanel Password field on the order form. |
| Auto Username Prefix | The start of generated usernames. cp gives usernames like cp1a2b3c4d; left blank, the prefix is fb. |
Step 6 (optional): Add-ons the plugin reads
The plugin reads a few add-ons by their slug when it creates the account. To offer one, create it once and attach it to your cPanel products:
- Open Products, switch to the Options tab and click Add.
- Enter an Option Name, for example Dedicated IP.
- Under Slug, choose the slug from the table below, marked cPanel/WHM Provider. A different slug is not seen by the plugin.
- Leave Spec Service on None (billing only), choose a Pricing Type and set the price.
- Click Create.
- Open each cPanel product, go to Pricing and use Attach under Plugin expects these options, or select the add-on in the list.
| Slug | Effect when the customer orders it |
|---|---|
dedicated_ip | The account gets a dedicated IPv4 address from WHM's free IP addresses, as with the product's Dedicated IP switch. Make it a simple add-on (no configurable choices). |
hasshell | The account is created with shell (SSH) access. |
reseller | The account is created with WHM reseller privileges. |
cpanel_package | Not needed: the product's WHM Package wins. Used only for a product without one. |
Add-ons take effect when the account is created. Customers cannot change them later: the service page shows the current choice and asks them to open a ticket. If you change one from the admin panel, FluxBilling bills the new choice and adds a pending task under Automations as a reminder; make the change in WHM yourself.
Step 7: Place a test order
Place an order for each product before you sell it, for example from a test client account. This is what the customer sees on the order page:
| Field | What it does |
|---|---|
| Domain Name (required) | The account's main domain, entered without www.. |
| cPanel Username | Only with Allow Custom Username on. Optional: up to 16 lowercase letters and digits, starting with a letter, unique on the server and not starting with test. Left empty, FluxBilling uses the Auto Username Prefix and eight characters of the service's internal identifier, for example fb3f2a9c1d. |
| cPanel Password | Only with Allow Custom Password on. Optional; left empty, FluxBilling generates a 16-character password. A typed password must meet WHM's password strength. |
Add-ons you attached in step 6 appear below these fields. The password is not shown in the cart.
What happens when the invoice is paid
With Auto Provisioning switched on (see Billing lifecycle), FluxBilling creates the account as soon as the invoice is paid:
- The account details. The plugin takes the domain, username and password from the order (or the generated ones), the customer's email address as the account's contact email, and the product's WHM Package.
- The account. It asks WHM to create the account with those details, with a dedicated IP when the product or the order asks for one, and with shell access or reseller privileges when the order includes those add-ons.
- Hand-over. When WHM confirms, FluxBilling saves the cPanel username, password and IP address on the service and marks it Active. With the default email templates, the customer gets the Hosting Account Ready email with the domain, IP address, username and password, and a link to the service.
What your customers can do
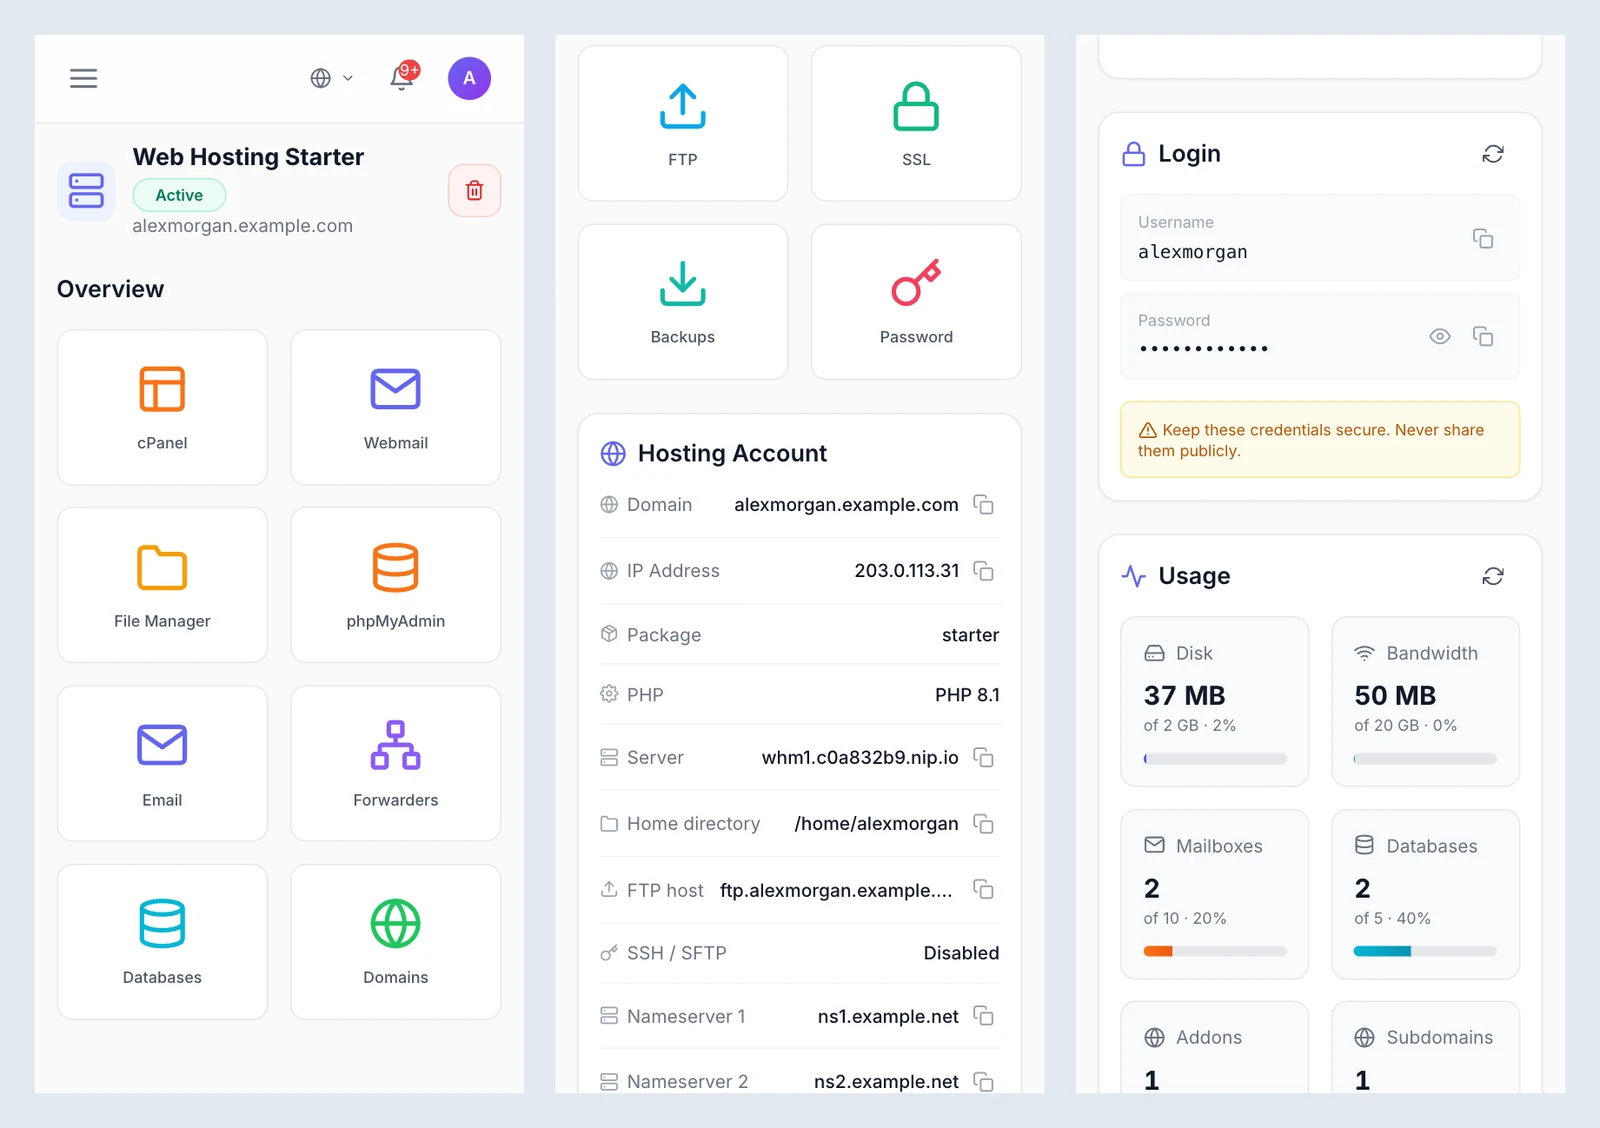
In the client area, the customer opens the service. The Overview starts with a grid of tiles:
- cPanel, Webmail, File Manager and phpMyAdmin open that part of cPanel in a new browser tab, already signed in. Each click asks WHM for a new login session.
- Email, Forwarders, Databases, Domains, FTP, SSL and Backups open the management pages below. A breadcrumb leads back to Overview.
- Password opens Change Account Password: "Sets a new password for cPanel, FTP and Webmail." The customer enters the New Password (at least 8 characters) and clicks Change Password.
Below the tiles:
- Hosting Account: Domain, IP Address, Package, PHP (the main domain's version), Server, Home directory, FTP host, SSH / SFTP (Disabled, or SFTP/SSH on port 22 with shell access), Nameserver 1 and Nameserver 2, most with a copy button.
- Login: the cPanel Username and the masked Password. The eye button (Show) reveals the stored password for one minute. Customers can reveal it only while the service is active and their account is not suspended; team members need the Manage Services permission. Every reveal is recorded in the activity log, without the password. A password change made here updates the card.
- Usage: eight meters against the package limits, refreshed every minute: Disk, Bandwidth, Mailboxes, Databases, Addons, Subdomains, FTP and Files.
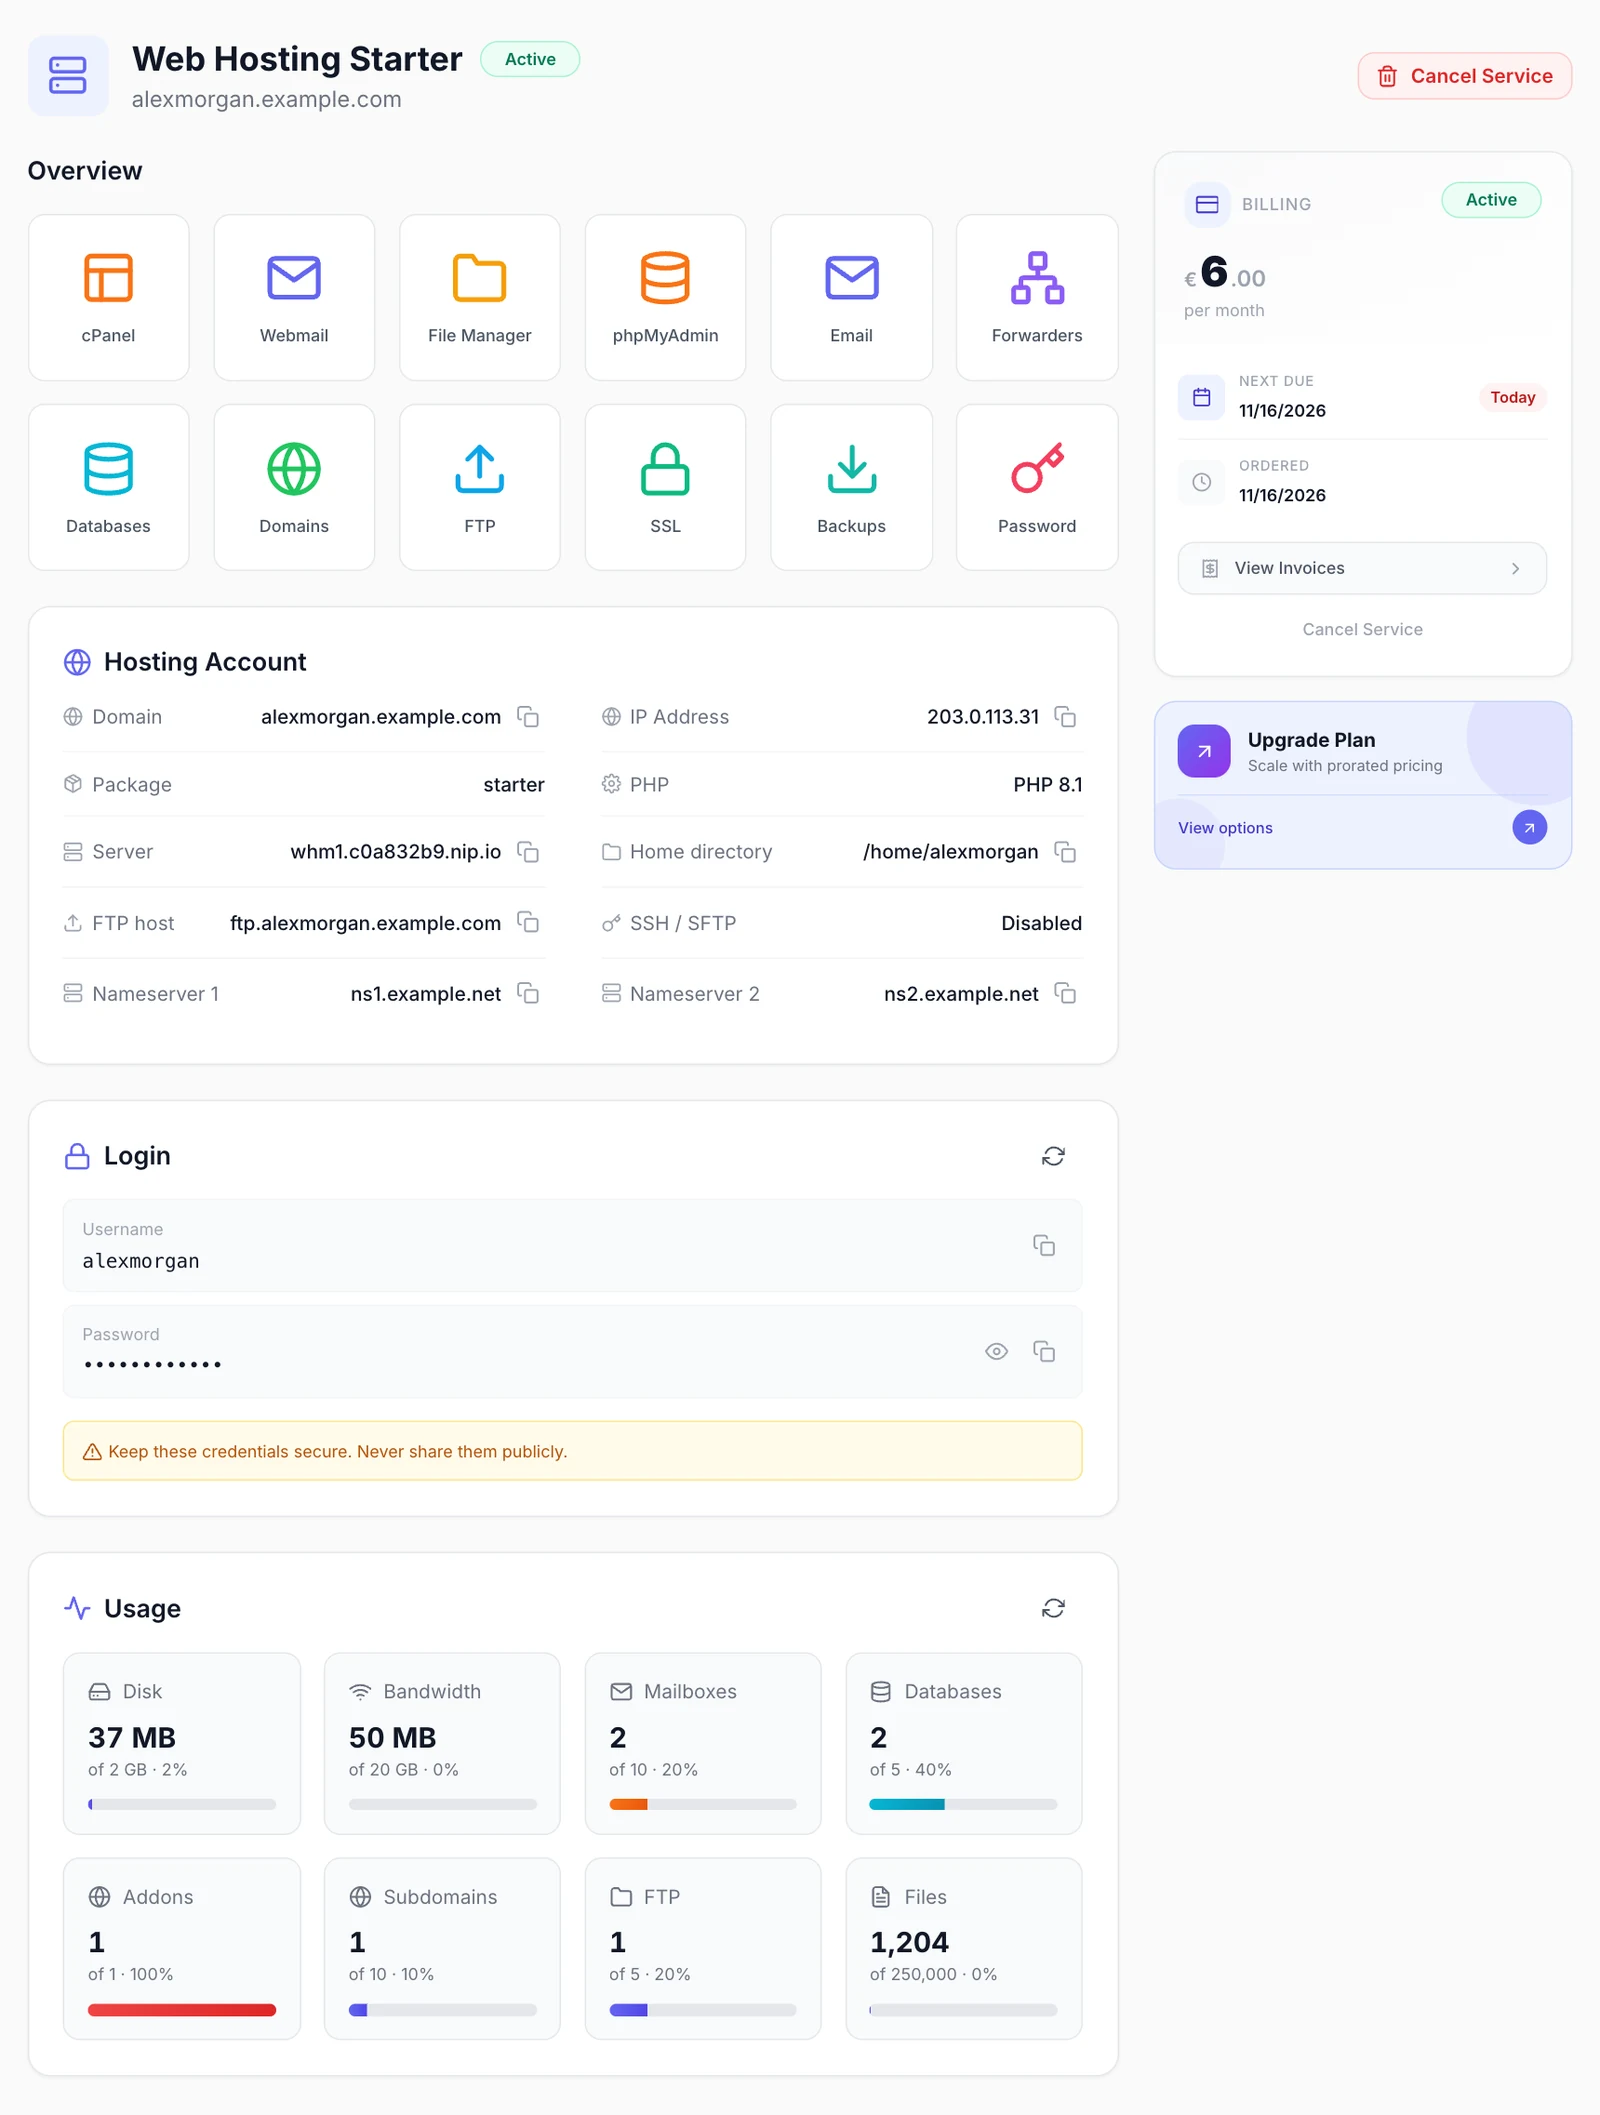
Each management page is one list with its buttons in the header. The row menu holds Delete (Remove for domains), which asks for confirmation. Everything works on the service's own cPanel account. Passwords set here need at least 8 characters with letters and digits.
| Page | What the customer can do |
|---|---|
| Email Accounts | See each mailbox with used space and quota. New Mailbox (name, domain, password, Quota (MB, 0 = unlimited)), Password, Quota. Deleting a mailbox deletes its mail. |
| Forwarders | See the forwarders of every domain. New Forwarder forwards an Address on a Domain to one Forward to address. |
| Databases | See databases with size and users. New Database creates a database and a user with all privileges on it; both names get the account prefix (the cPanel username and _). User Password, Delete User. |
| Domains | See the main domain, addon domains, subdomains and aliases with their PHP version. Add Domain (Addon domain (own website), Subdomain or Alias (same website)); a subdomain must end in one of the account's domains. PHP Version sets one website's version. Removing a domain keeps its files; the main domain stays. |
| FTP Accounts | See logins with directory, used space and quota. New FTP Account (login, domain, directory, password, quota) creates login@domain; Password. Deleting keeps the files. |
| SSL Certificates | See each website's certificate with issuer, expiry and status (valid, expired or self-signed). Run AutoSSL requests free certificates for every domain that points at the server; they appear within a few minutes. |
| Backups | See the backup dates the server keeps. Generate Backup writes a full backup (files, databases, email) to the home directory. |
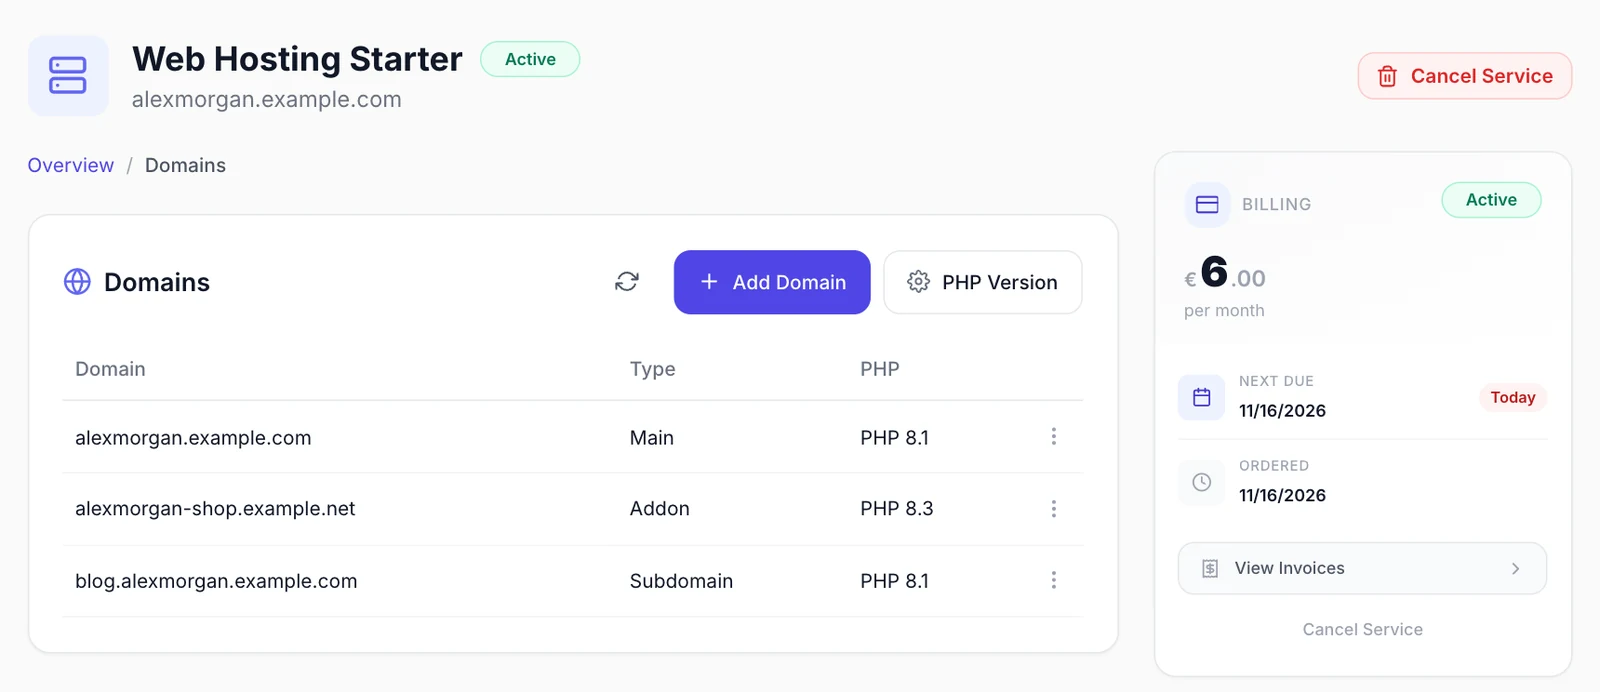
While a service is suspended, these controls and the account details are hidden, and the customer sees a Service Suspended notice with the reason. WHM ends a login session after 15 minutes of inactivity (see create_user_session); the customer clicks the tile again for a new one.
What your staff see
In the admin panel, the service page shows Account credentials: Show account password reads the stored cPanel password for staff who may edit services, and Every reveal is recorded against your account. Below it, Provider Controls holds these Account Actions:
| Action | What it does |
|---|---|
| Login to cPanel, File Manager | Open the customer's cPanel, or its File Manager, in a new tab, signed in as the account. |
| Change Password | Sets a new account password in WHM. |
| Change Package | Moves the account to another WHM package from the live list. The FluxBilling product and price stay; use an upgrade to change those. |
| Change Quota | Sets the disk quota in MB, or unlimited. |
| Modify Account | Changes the contact email, bandwidth (MB) and the maximum SQL databases, email accounts, FTP accounts, subdomains, parked and addon domains. Empty fields stay unchanged. |
| Run AutoSSL, Backup | The same AutoSSL run and full backup the customer can start. |
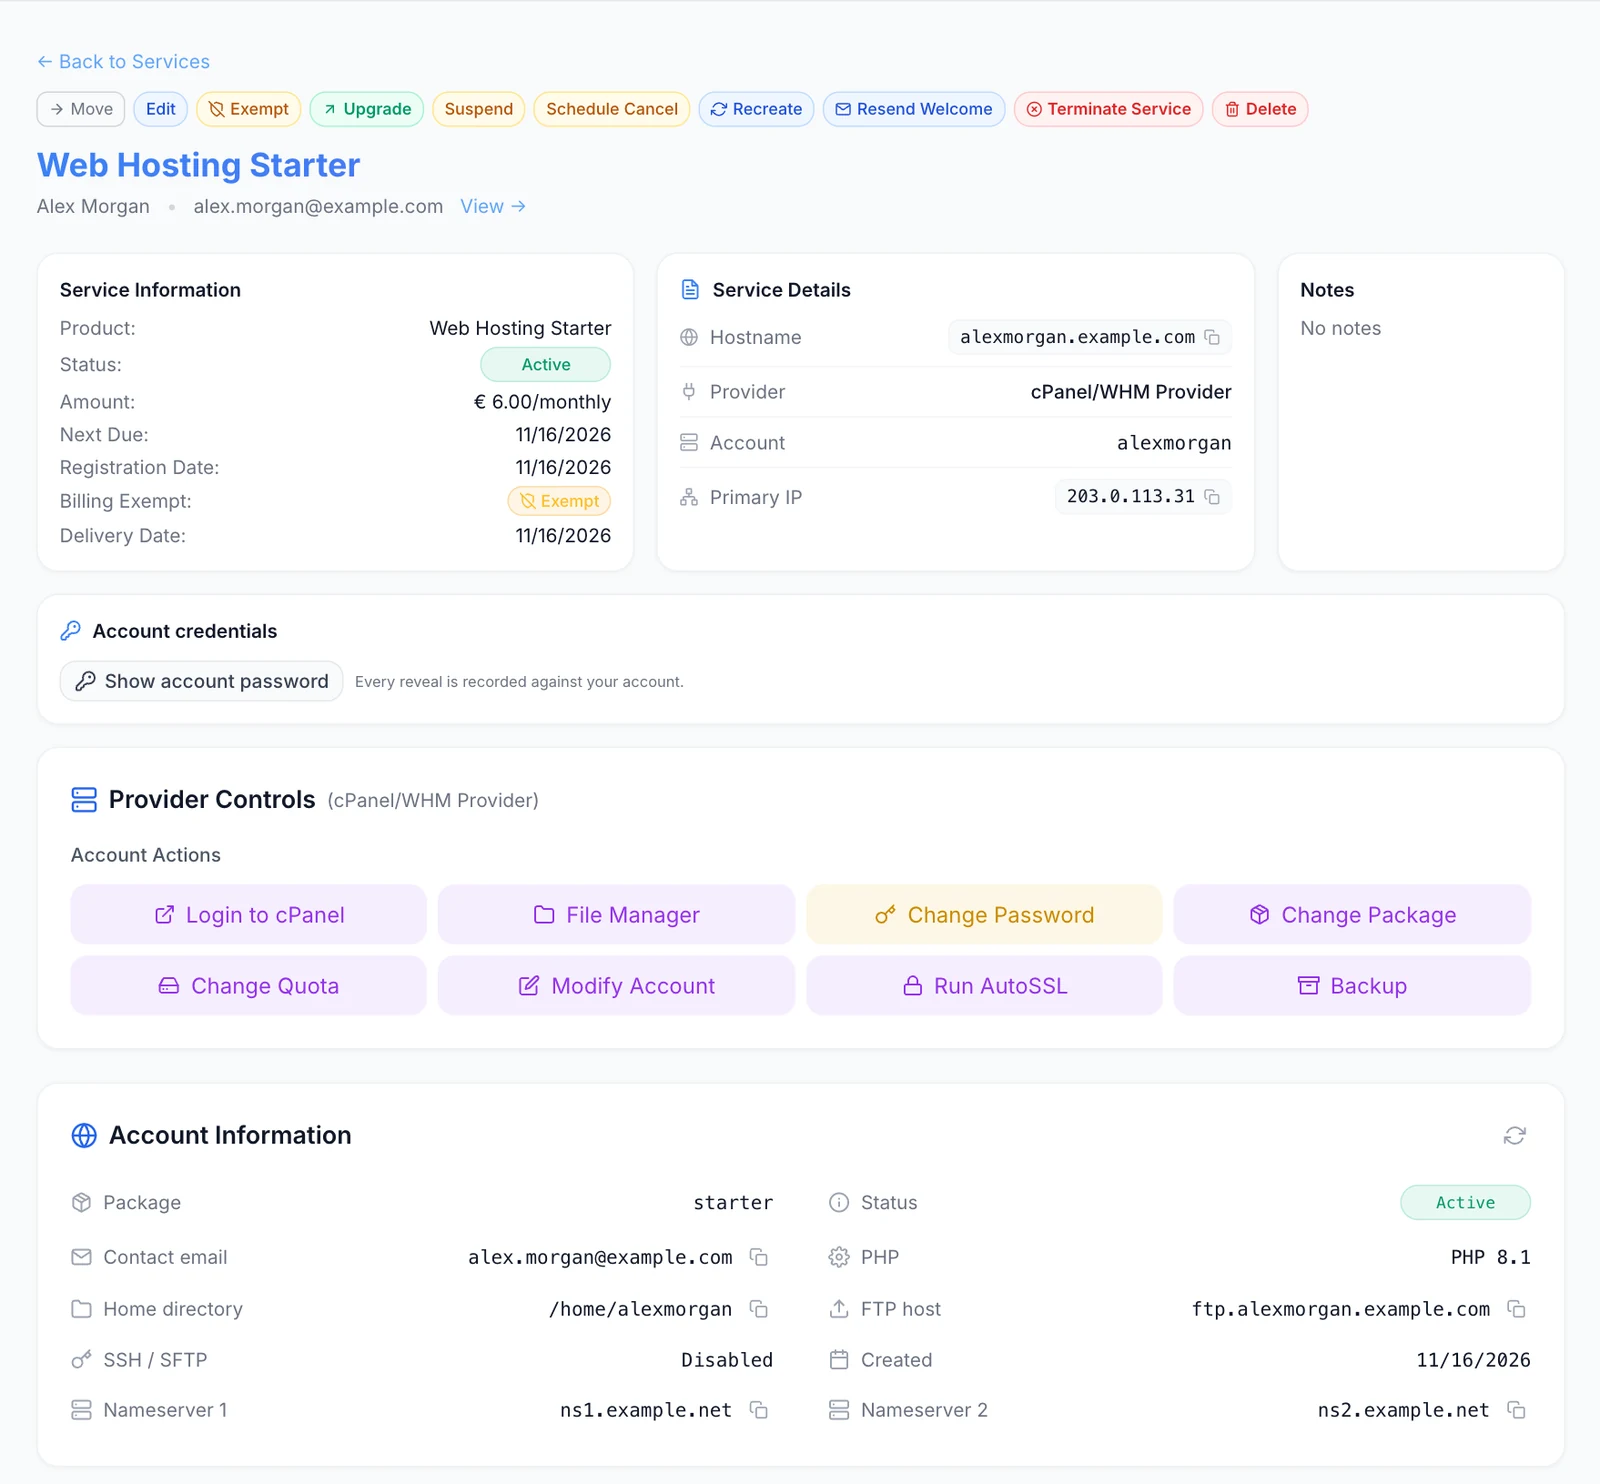
Further down, Account Information shows the package, status, contact email, PHP, home directory, FTP host, SSH / SFTP, creation date and nameservers (the domain, username and IP are in Service Details), and Resource Usage shows the eight meters, refreshed every 30 seconds. Email Accounts and Databases have a Delete button on each row; Domains and SSL Certificates are read-only. Change Quota and Modify Account change this account only, not the WHM package.
Billing lifecycle
The invoice drives the account. The rules are set under Settings → Billing → Automation:
- Auto Provisioning: creates the account when the first invoice is paid. When it is off, the paid service waits as Pending until staff provision it.
- Auto Suspension with Suspension Grace: an invoice still unpaid that many days after its due date suspends the account in WHM. WHM records the reason Suspended via platform.
- Paying the overdue invoice unsuspends the account automatically, once no earlier renewal invoice for that service is still unpaid. A suspension for abuse is not lifted by a payment.
- Auto Termination with Termination Grace: an account still suspended for non-payment that many days later is terminated.
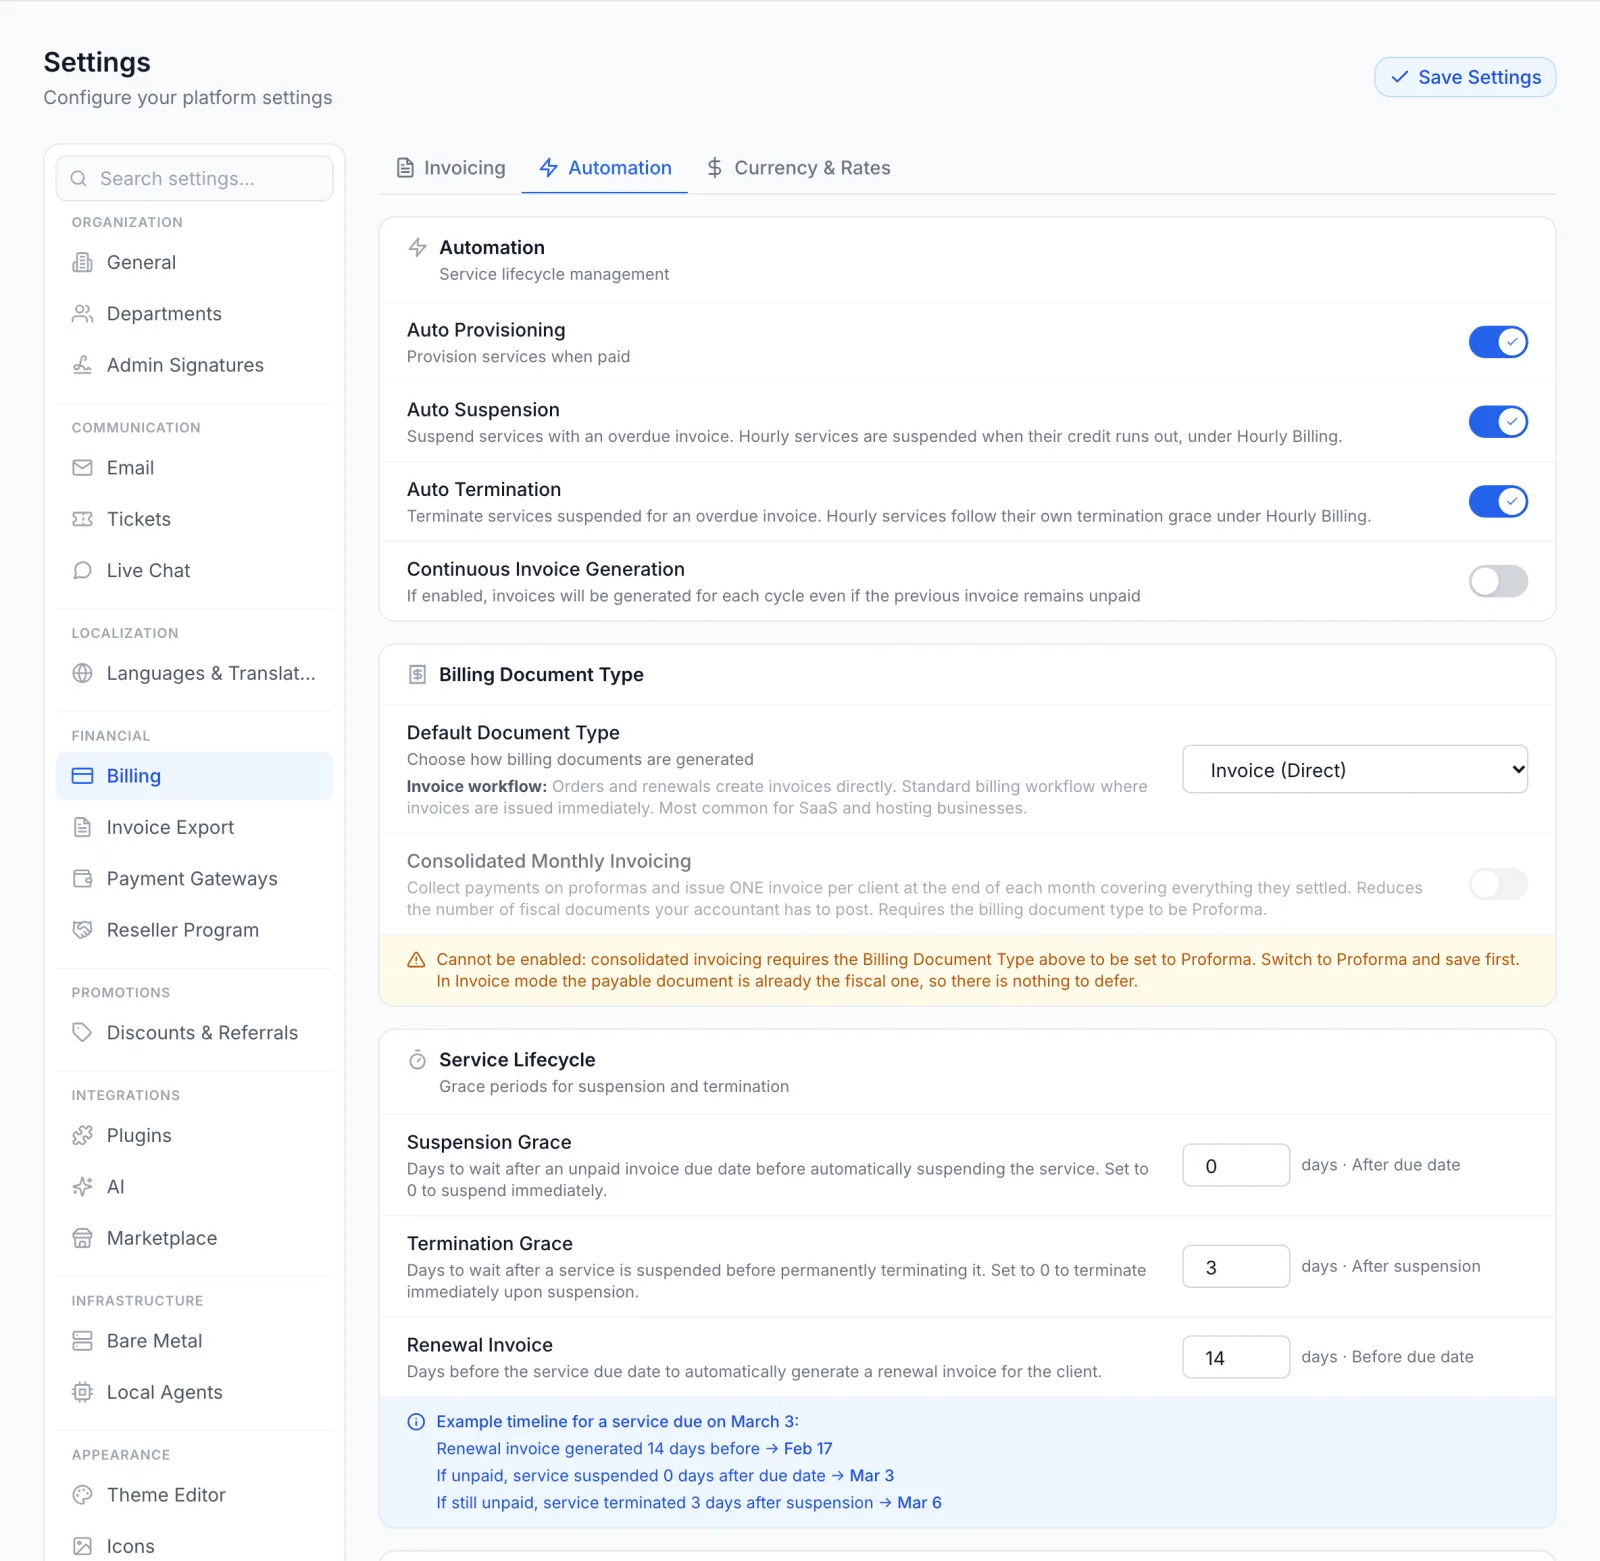
Terminating a service deletes the cPanel account in WHM, with its files, databases, mailboxes and DNS zone. This happens when auto termination runs, when a customer's cancellation takes effect, or when staff terminate the service. It cannot be undone. Check the Termination Grace before you go live. A service whose account was never created is closed without a call to WHM.
Plan changes
Customers can only move between products you link on the product's Upgrade Paths tab. When an upgrade or downgrade between two cPanel products is paid, the plugin moves the account to the new product's WHM Package; it keeps its username, domain and files. If WHM refuses, the upgrade is marked as failed and the service keeps its current product. Try an upgrade on a test account before you offer upgrades to customers.
Updating the plugin
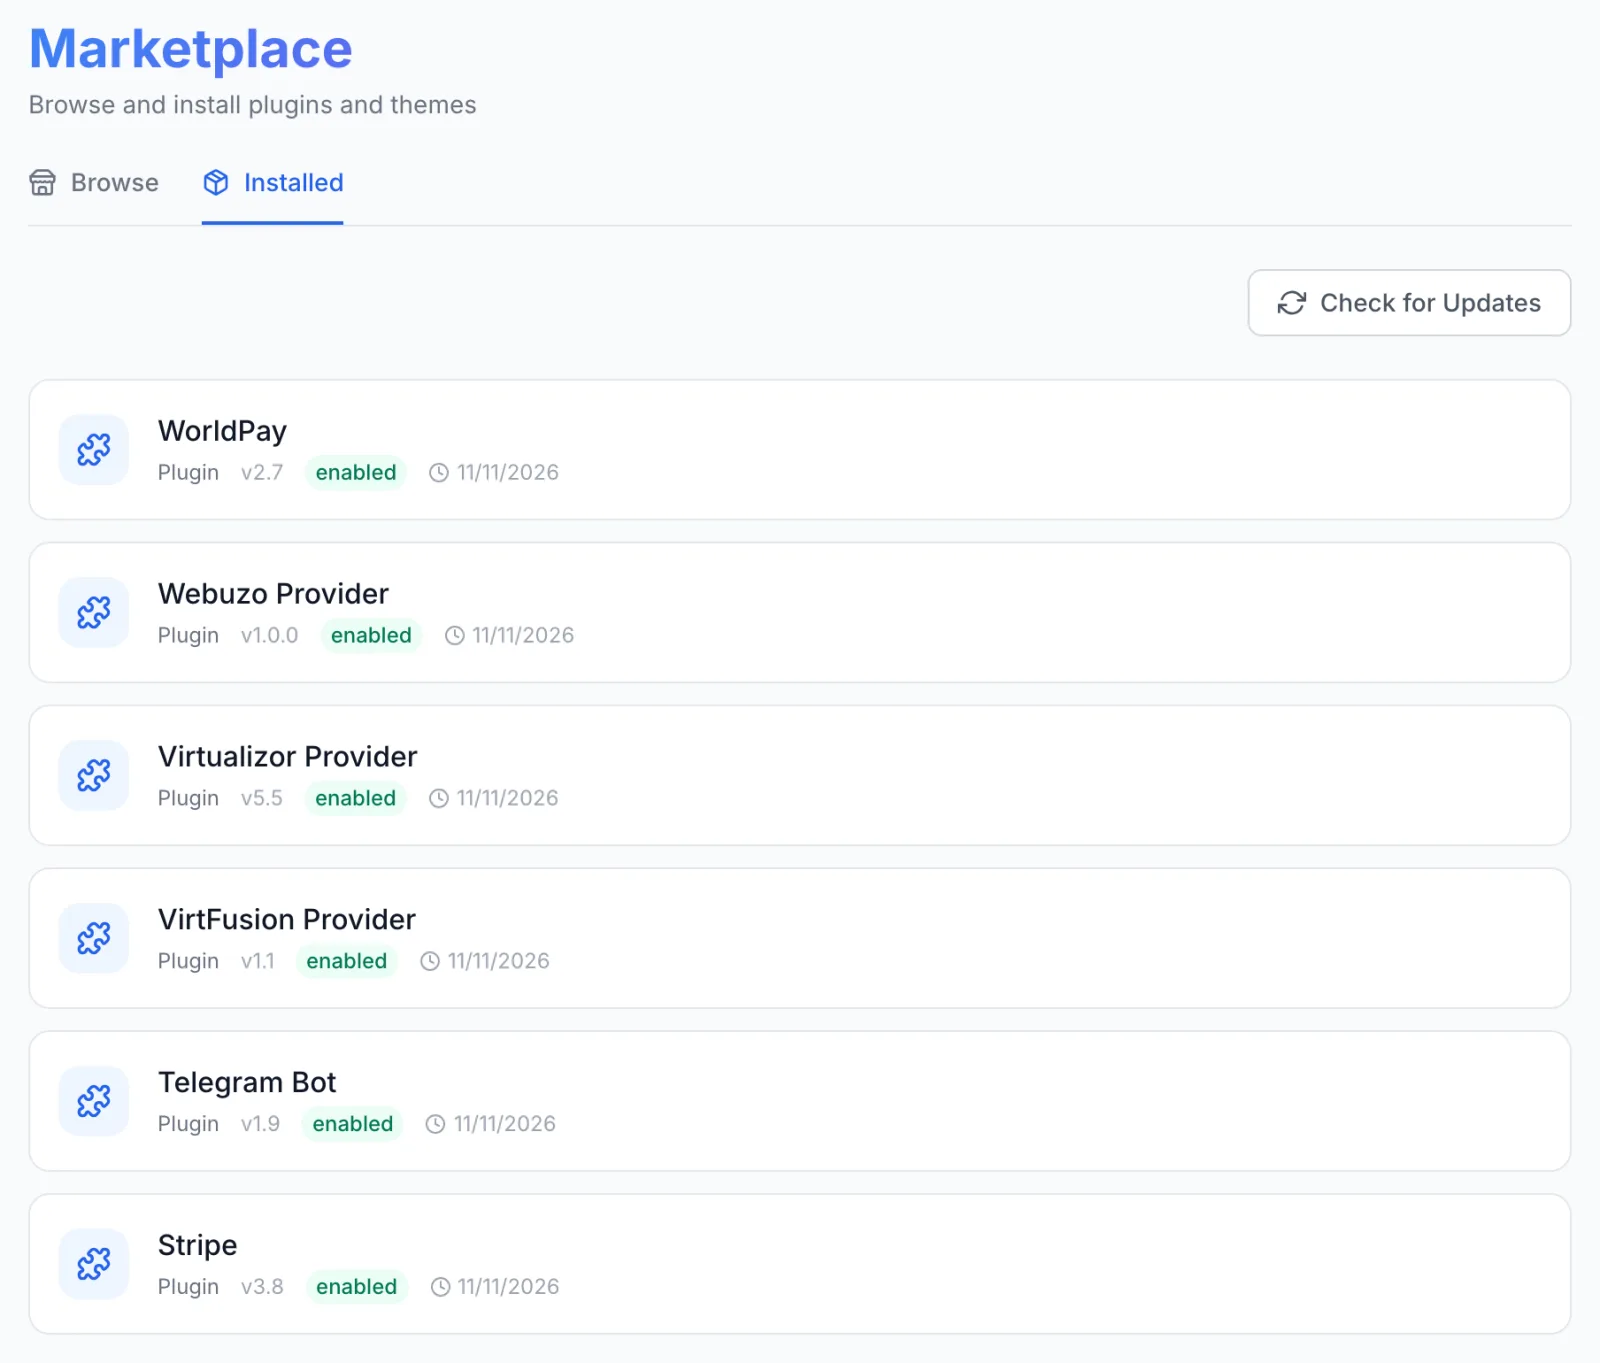
Open Settings → Integrations → Marketplace, switch to Installed and click Check for Updates. When a new version is available, click Update to v…. Your connection settings and products are kept.
Troubleshooting
When a build fails, the service stays Pending. The error appears in the Automations menu in the top bar of the admin panel, as a Provision entry for the service with the reason in red and a retry button. FluxBilling tries a failed build again by itself, up to two more times over the next minutes. After that, fix the cause and click Retry Provisioning on the service. A build started this way does not email the customer, so use Resend Welcome on the service page once it has worked.
| Message or symptom | What to check |
|---|---|
| The WHM Package list in the product editor stays empty | FluxBilling cannot read from WHM. Check the hostname, port 2087, the username and token, the token's expiry and allowed IP addresses, and any firewall between FluxBilling and WHM. |
| Failed to connect to WHM. Check hostname, port and API token. | Shown by the connection test. Check the same points. |
| WHM's own message when the account is created, for example about a username or domain that already exists | The plugin shows WHM's answer. Fix the cause in WHM, then retry. If WHM gives no answer, the message is Failed to create cPanel account: check the connection as above. |
| The account is created on the wrong package | New accounts use the product's WHM Package. Check the product, then move the account with Change Package. |
| Failed to create login session, Failed to create webmail session, Failed to create phpMyAdmin session | WHM did not return a login link. Check that the account exists and is not suspended in WHM, and that the token may create user sessions. |
| This service has no cPanel account recorded — provision it first | The service has no cPanel account yet. Provision it first. |
| WHM refused the API token (HTTP 403) — check the WHM API token | The token was revoked, expired or lacks a privilege. Check it under Manage API Tokens in WHM. |
| Other messages on a management page | Usually cPanel's own answer, for example a mailbox that already exists. Fix the cause and try again. |
| Failed to get account status or the service page shows no account details | WHM does not know the account, or FluxBilling cannot reach WHM. Check that the account still exists under the username shown on the service. |
| Failed to suspend account, Failed to unsuspend account, Failed to terminate account | WHM gave no usable answer. When WHM answers with an error, its own message is shown instead. Check the connection, and that the account still exists in WHM. |
| Failed to change password, Failed to change package, Failed to set quota, Failed to modify account | The same, for the staff actions. Most often WHM refused the value, for example a weak password. |
Limits
- Each FluxBilling panel connects to one WHM server.
- Backups from the service page go to the account's home directory. Restores and backup schedules stay in cPanel and WHM.
- Add-ons are applied only when the account is created. Changes afterwards are made in WHM, or with Change Package for the package.
- DNS records, email filters, cron jobs and application installs are managed inside cPanel. A forwarder made on the service page sends mail to one address.
- Accounts with the
reselleradd-on get WHM reseller privileges, but the service page has no WHM login: the reseller signs in to WHM directly. - The plugin does not move accounts between servers.
- FluxBilling does not rely on callbacks from WHM: each action is judged on WHM's direct answer. You do not need to set up anything for callbacks.
cPanel and WHM are registered trademarks of WebPros International L.L.C. FluxBilling is not affiliated with WebPros International L.L.C.